
Are you getting error “Restart To Repair Drive Errors” on your Windows 10? Don’t worry this tutorial will give you all possible solutions to fix the error without losing your data. And the method to back up your data before rebooting.
When running into some problems on the computer, users tend to try to fix it by restarting the PC. Similarly, when any problems are found by the error checking tool (whose main function is scanning and repairing drive), the system will suggest you to restart to repair drive errors.

As you can see from the above picture, the Restart to repair drive errors (Click to restart your PC) message will appear in the action centre on a Windows 10 computer. What does this error mean exactly? To be precise, this error indicates the following things:
Windows found errors on this drive that need to be repaired.
You need to restart your PC to repair drive errors found by the built-in Windows checking tool.
You are not able to access your data until you restart PC after repairing the drive.
The Restart Repair Error Is Annoying
If you do click to reboot your computer, you may get the following result:
The problem has been fixed automatically by the system after reboot.
The problem persists; you are still asked to do a restart for fixing the drive errors.
The second result may drive you crazy (see above picture), right? Undeniably, the Windows disk errors are quite a common thing; that’s why there’s a disk diagnostic tool built in all the Windows systems to scan and fix disk errors (check the integrity of your hard disk and fix various errors like file system error). Yet, it becomes annoying and equally devastating when the problems can’t be fixed after you have done what Windows suggests you do – restart your computer.
Taking a look at the error again, you’ll find that your data on the target drive may get lost since Windows says To prevent data loss, repair this drive now. On this occasion, I advise you to recover data from the drive that needs to be repaired after you have tried a reboot and failed. Then, you may try the feasible methods that’ll be mentioned later in this article to fix the reboot to repair drive error.
How to Recover Data When Windows Asks You to Repair This Drive
Since Windows won’t allow you to access the drive until the repair this drive error has been fixed, you can’t copy files from it to keep data safe. In this case, you should recover data from the inaccessible drive with reliable data recovery software. Another way to ensure data security is to make a data backup with powerful backup software.
In the following content, I’ll mainly focus on telling you how to recover data with the amazing recovery tool of MiniTool power data recovery.
Our readers get a special 20% discount coupon code for MiniTool power data recovery. Just visit our MiniTool discount coupon page for the coupon code.
Data Recovery Steps
Step one: Get the setup program of a reliable tool – download it properly. Then, click on the setup application to run the installation process and follow the instructions to complete installing the tool.
Step two: run the recovery tool and you’ll be brought to its main window after a quick disk loading process.
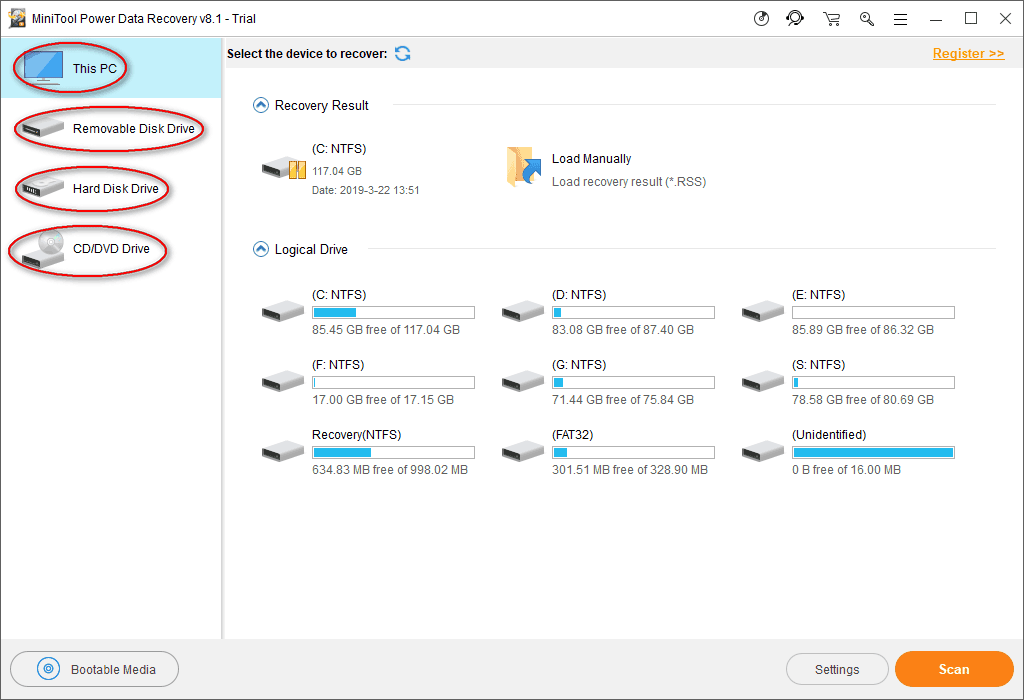
Step three: you’ll see four options located on the left side of the software main window: This PC, Removable Disk Drive, Hard Disk Drive, and CD/DVD Drive. Please select the drive that is most suitable for your case.
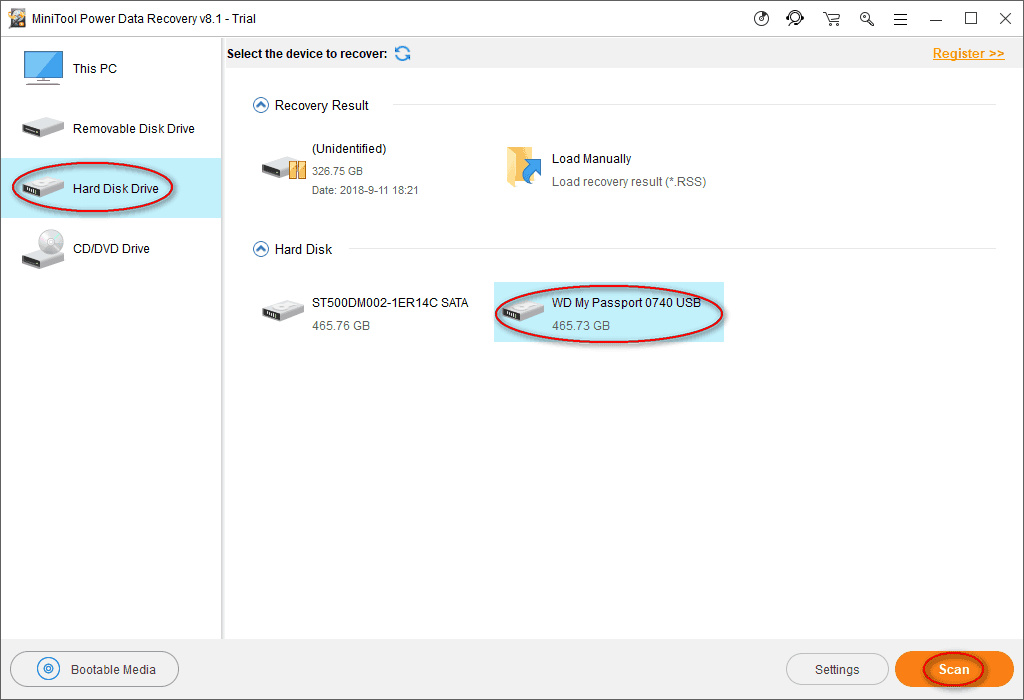
Step four: find the drive on which the restart to repair drive error appears. Then, double click on it or single click on the Scan button to start the drive scanning process (it will be initialized immediately after clicking).
Step five: you’ll see a progress bar now which indicates the progress of the scan.
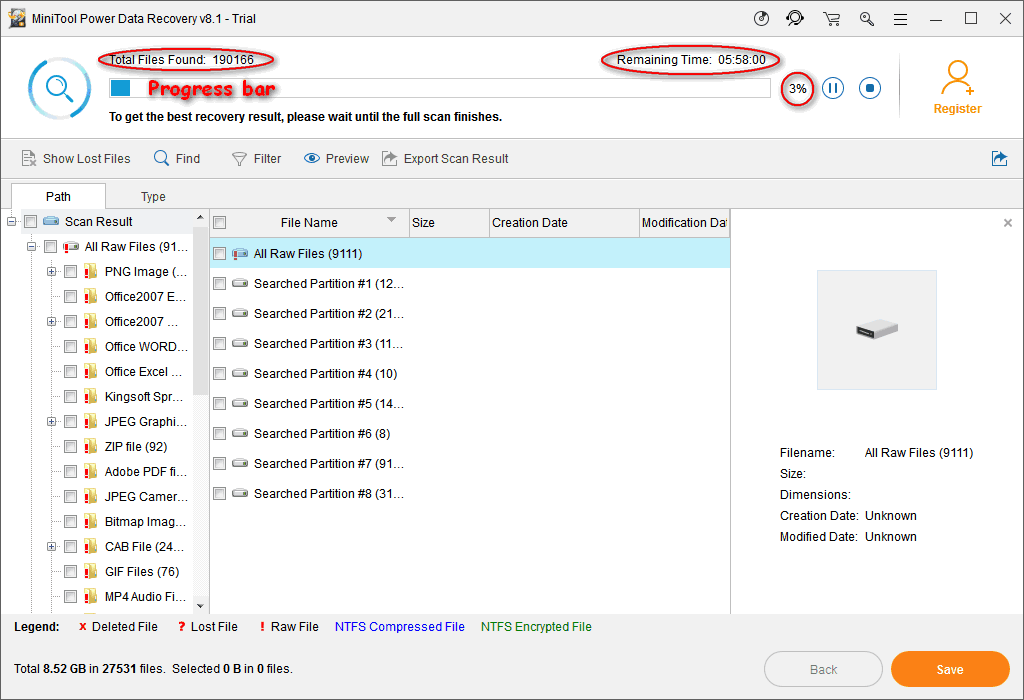
Step six: now, you can expand the found partitions and folders to see whether your needed files are contained.
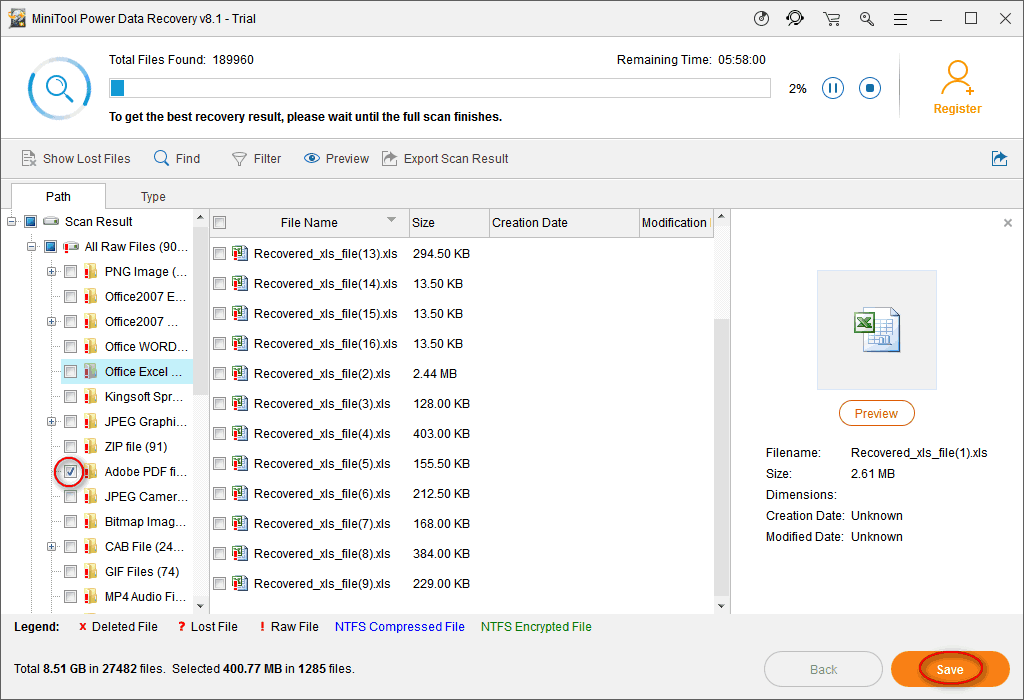
- If all the important data you need on the problematic drive have been found, you should end the scan and check them to recover by clicking on the Save button.
- If there are still some files not found yet, you should wait for the scan and check all the items you need to recover when they have been finally found.
- Related: How to Create a Windows 10 Image Backup with Ease?
- 5 Best Windows file recovery Softwares (Free & Professional)
How to Fix Repair Drive Errors on Windows 10
The restart to repair drive errors on Windows 10 are talked frequently in 2018. Many methods have been put forward by different people to try to fix the error. Here, I summarize 5 methods to help you settle down the repair this drive problem easily.
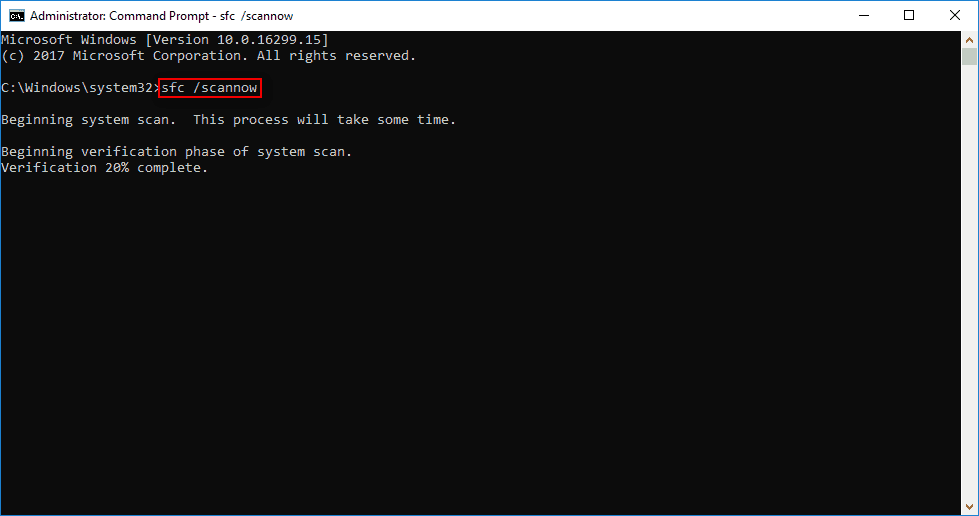
Method One: Run SFC – System File Checker Tool
- Click on the Cortana icon on the left side of the taskbar and type cmd to find command prompt.
- Right click on Command Prompt under the Best match and choose Run as administrator.
- Select Yes in the prompt window to allow the app to make changes to your device.
- Type sfc /scannow into the command prompt panel and then press Enter key to run the System File Checker.
- Then, the system scan will be started immediately and the prompt command tool will tell you that the process will take some time, so you need to wait patiently.
- Once the scan process has been completed, this tool will fix all problems it has found; you just need to wait for the completion.
Method 2: Run Check Disk to fix Restart To Repair Drive Errors on Windows 10
- Repeat step 1 to step 3 mentioned in method one.
- Type chkdsk *: /f into the command prompt tool and hit Enter in the keyboard.
- Wait for the disk checking process, which consists of mainly three stages (examining basic file system structure, examining file name linkage, and examining security descriptions).
- Any problems found by this command will be fixed automatically at the end of the scan.

Method 3: Run DISM to Fix Restart To Repair Drive Errors
The Deployment Image Servicing and Management (DISM) is actually a command-line tool embedded in Windows systems to do a lot of things, such as manage .wim files, update Windows features, and fix corrupt system files.
- Open the Start Menu.
- Scroll down to find Window Systems folder.
- Expand it and right click on Command Prompt inside.
- Choose More from the pop-up menu and choose Run as administrator from the submenu.
- Select Yes in the prompt window.
- Type exe /Online /Cleanup-image /Restorehealth and press Enter.
- Wait please when the tool is obtaining the system files online in order to restore back with the corrupt files.

Please note: sometimes, the DISM may fail to get the files. At this time, you may turn to the USB or DVD for help.
- Connect the USB or DVD to computer.
- Type DISM.exe /Online /Cleanup-Image /RestoreHealth /Source:* /LimitAccess (* stands for the path of your USB/DVD).
- Then, press Enter and wait.
Method Four: Automatic Repair or Startup Repair
In this method, the Windows bootable installation CD/DVD is necessary, you need to find it and make it ready for use.
- Connect the Windows bootable installation CD/DVD to the computer properly.
- Restart your Windows PC.
- When prompted to continue, you need to press any key in order to boot from this CD/DVD.
- Choose the language you like from language preferences and click on the Next button.
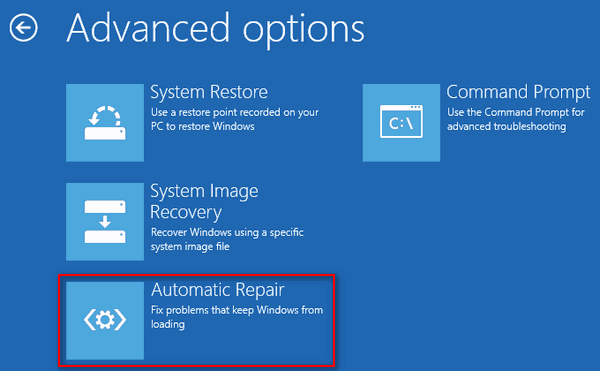
- Click on the Repair your computer option, located in the bottom-left corner.
- Select Troubleshoot in the Choose an option screen.
- Select Advanced options then to see the following window.
- Click on the Automatic Repair (Fix problems that keep Windows from loading) option (you can also select Startup Repair).
- Wait for the completion of Automatic Repair or Startup Repair.
- Restart your computer when it finishes and then boot into the Windows PC.
Method Five: Execute System Restore in Safe Mode
With the help of System Restore, you can bring your computer back to a point before the restart your PC to repair drive errors appear (you can recover files after System Restore if any important data are lost).
How to run system restore in safe mode:
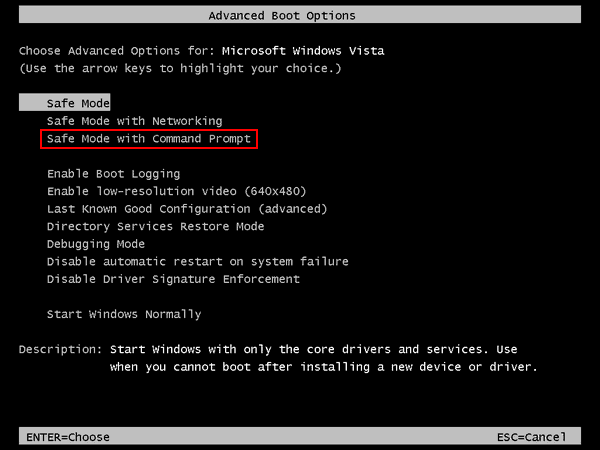
- Shut down your computer properly and then power it on.
- Press F8 or another key (varies from computer to computer) before the Windows logo appears.
- Select Safe Mode with Command Prompt and press Enter under Advanced Boot Options.
- Type exe and press Enter.
- Type system restore into the textbox and press Enter.
- Follow the System Restore instructions to choose an available restore point from the list so as to restore your computer.
- Wait for the end of the restore, and then reboot your PC.
That’s all I want to talk about how to repair drive errors on Windows 10. If you have other good suggestions, please leave a message below to help more people.
- You Might Like: 3 Ways To Repair/ Fix Hard Drive Become Unallocated Issue
- What is Dynamic Disk Invalid Issue? and 2 Ways to Fix it
In the end, I provide you with five practical ways to fix the error you have met. These methods are said to have helped many people get out of the Restart To Repair Drive Errors On Windows 10. Hope they also work well in your case! If you like this tutorial please share it and follow whatvwant on Facebook, Twitter, and YouTube.