
Want to record your screen on Windows, Mac, or iPhone? This article will give you all the possible free and premium methods to record your device screen.
In the age of media, everyone becomes the producer and disseminator of knowledge, idea, and tutorial. You might publish articles or release videos on YouTube, blog, and Twitter. You can even sell your videos on Udemy. In this way, you all are in fact replica watches establishing our personal brands and platforms. Writing is a comparatively traditional and dull way to do self-media while presenting a video or supplementing an explanatory video may catch more attention. Making a video sometimes requires recording your system or mobile screen.
Why and when should I record the screen?
Screenshots and screen recordings are really helpful to convey things and are the only way sometimes. Recording a screen is far better if you care about replica watches UK explaining a process that is probably miles away from you. Keep smartphone things aside, as it was easier these with inbuilt options.
There might be several situations where you need this,
Maybe you want to grab a particular clip from a video that is playing on your screen or might be explaining an issue with video guidance and some issues might need a screen recording. Although there are several apps to do the work, the free inbuilt way is far better for quality output. One might regret not using this to date. It is,
- Quick and takes no time
- Very easy and free to use.
- Of Good quality and is worth a try
How to Record Your Screen on Windows
For Win10 users, it is easy to use Game Bar, the built-in recording tool which comes with the pre-installed app Xbox. The original purpose of this tool is to record the process of your playing a game on Xbox but it is also feasible to record other activities on your screen. However, since Game Bar screen recording is not available on Windows 7/8 and it won’t record system sound, you may prefer a third-party screen recorder like FonePaw Screen Recorder which is more powerful and supports all Windows versions.
1. How to use Win10 built-in screen recorder to record your screen
- Click the Start menu; Find and click “Xbox” in All Apps.
- Tap [Win] + [G] and click “Yes, this is a game!” to launch the recording toolbar.
![C:\Users\Administrator.WINDOWS-BCBV1B5\AppData\Roaming\Tencent\Users\529496331\QQ\WinTemp\RichOle\WF5I52$(78Q]0@QEYPDJ}MF.png](https://whatvwant.com/wp-content/uploads/2018/07/c-users-administrator-windows-bcbv1b5-appdata-roa.png)
- Click the Red Dot to begin your screen recording or click the camera icon to snapshot your screen.
- Press G by holding the Windows key and click replica Omega the red square to finish the recording as well as save it.
- Find the footage: Open the Xbox app, click the setting icon on the left toolbar and choose the Game DVR. There you can see the path of the saved recording and you can click the “Open The File” directly.
- Other hotkeys for your reference:
- [Win] + [G] : Launch the toolbar
- [Win] + [Alt] + [R] : Start/stop recording
- [Win] + [Alt] + [T] : Show/hide timer
This tool just needs a simple operation but it is neither rich in functions nor flexible in use. No sound recording is the fatal defect of it. It can only record the interface area of the app you are using and you cannot select a certain area of the computer screen for recording. In addition, the recording is automatically finished if you minimalize the app you are recording. And it does not support webcam recording synchronously.
So the Windows’ built-in recording tool makes it impossible to reproduce the screen activities completely and flexibly. For people having a taste for well-designed and powerful software, it is excruciating to use such a simple app with limited function and flexibility.
2. Movavi Screen Recorder
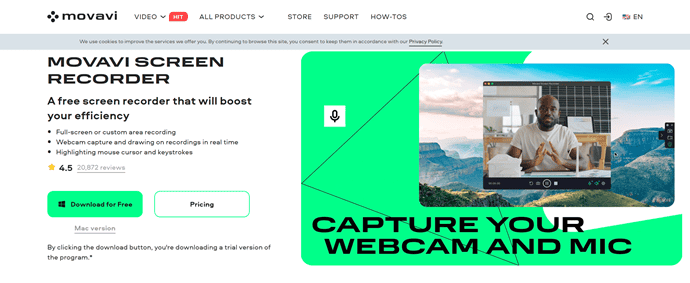
Movavi Screen Recorder is powerful desktop recording software that can be used to record screen activity, program use, and video conference calls. With its easy-to-use interface, you can quickly record your screen or specific windows with just a few clicks. You can also overlay webcam video and schedule tasks to automatically start and stop recording. Plus, you can grab snapshots, as well as add text, highlights, and arrows. This screen recorder also has a free trial version that overlays a watermark to output videos.
Features
- A screen recorder for both Windows and Mac
- Allows drawing on the screen while recording
- Webcam & audio recording without screen capture
- Enables you to grab and edit screenshots
- Lets you schedule recordings for months in advance
- Export to YouTube and Google Drive
Pricing
Movavi provides its screen recording software for both Windows and macOS. It provides its services in a 1-year plan and a lifetime plan. Else, you can also get the screen recorder with the Movavi Video Suite. Price varies for windows and macOS. The plans and prices of all the plans are listed below.
- Windows
- 1-Year Plan – $42.95
- Lifetime Plan – $57.95
- Video Suite (Lifetime) – $94.95
- macOS
- 1-Year Plan – $42.95
- Lifetime Plan – $57.95
- 1-Year Plan (Screen Recorder + Video Suite) – $62.95
- Lifetime Plan (Screen Recorder + Video Suite) – $72.95
- Video Suite (Lifetime) – $94.95
How To Record Your Screen using Movavi Screen Recorder
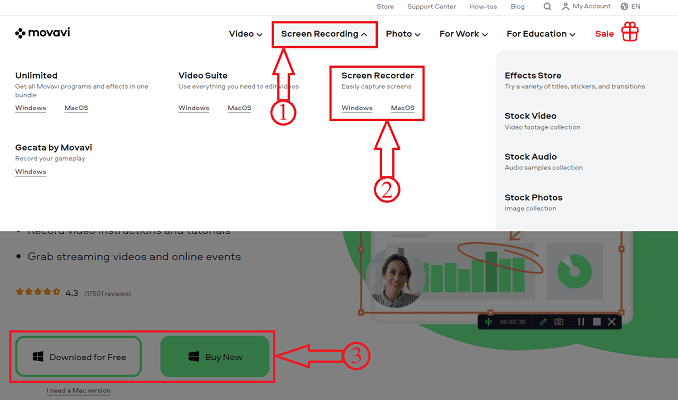
- STEP-1: Visit Movavi’s Official site and head towards the screen recorder section. It is available for both platforms like Windows and macOS. Choose your platform and it will redirect you to the download page. From that page, you can download the application. You can purchase the full version by clicking on the “Buy Now” option or else, you can also download and use the trial version for free from here itself.
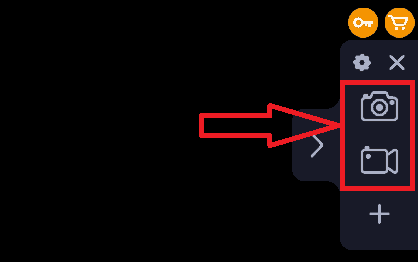
- STEP-2: Install and launch the screen Recorder application. You will find a widget to the right/left edge of the screen as shown in the below screenshot. On that widget, you will find a Camera option through which you can take screenshots. And another one is the video camera option, through which you can record your screen.
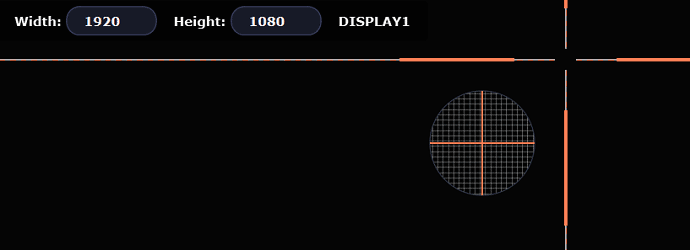
- STEP-3: Click on the “screen recorder” option and it will ask you to choose the area to record by using the marker option. The recording screen dimension will be seen on the top left corner of the screen.
- STEP-4: After choosing the area, it provides the pre-recording options like keyboard stroke, and mouse click highlighter on the right side. At the bottom, you will find the options to choose the audio, video, and webcam options. Click on the “Red colour” button to start recording.
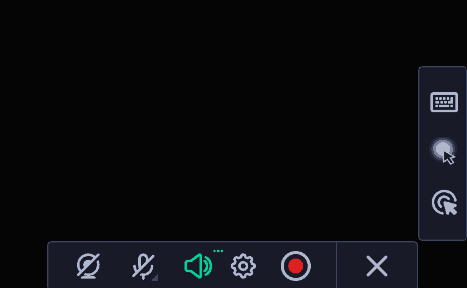
- STEP-5: Then you will find a status bar at the right bottom of the window. On that bar, you can use the tools like marker, screenshot, pause, and stop options. Click on the stop option after the completion of the recording. You can also use the Keyboard shortcut Fn+F10.

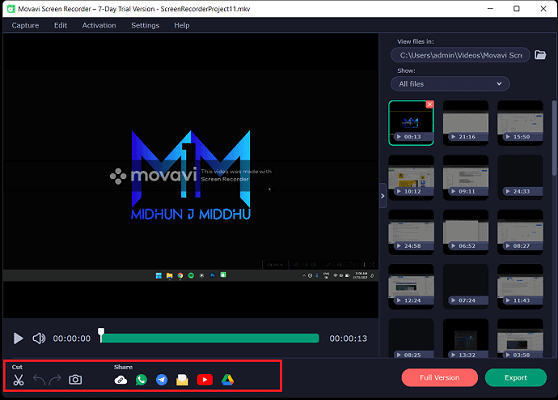
- STEP-6: If any, a window will pop up with the recorded video and previous recording. As we are using a free trial version, a watermark will be added to the recorded videos. From here, you are allowed to trim the video and share the final video using the available sharing options.
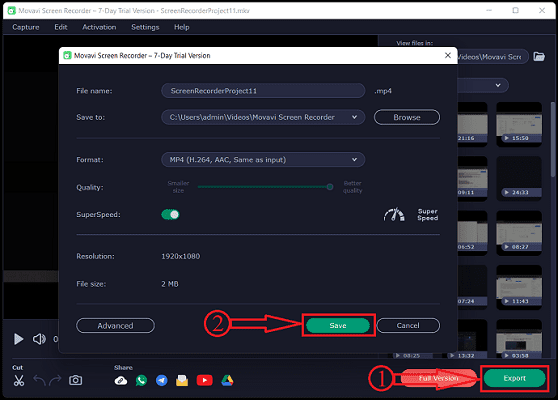
- STEP-7: Click on the Export option and a window will pop up. From this window, choose the File name, file location to save, File format, and later click on “Save” to save the recorded video.
Offer: Our readers get a 15% special discount on all Movavi Products. Visit our Movavi discount coupon page for the promo code.
3. How to Record Your Screen using iTop Screen Recorder (Earlier: iFun Screen Recorder)
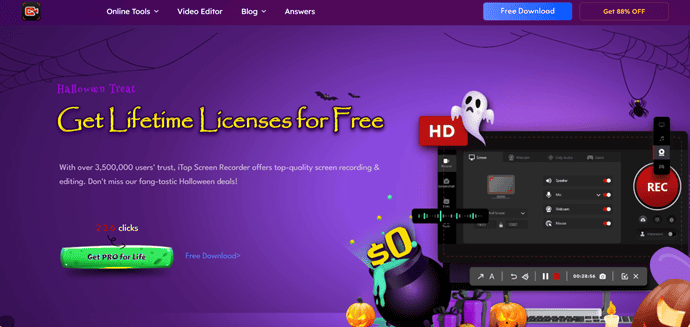
An iTop screen recorder is a powerful tool that is 100% fast, safe, and easy to use. The free version is also available. It can work perfectly and professionally for conference calls, online courses, video tutorials, music videos, HD films, etc.., it can record any area of your screen with no limits on the recording time, while it records HD videos with no watermark.
Why Choose iTop Screen Recorder?
- Free to answer how to record your screen video
- By providing a free trial, you can enjoy sorts of powerful functions without a penny.
- Easy to answer how to record your screen video
- Powerful to answer how to record your screen video
- It supports taking screenshots while recording. And more than 12 output formats are supported to be stored and converted to other formats you want. Besides, no lagging while HD recording is also guaranteed by iTop Screen Recorder.
How to use iTop Screen Recorder
Video Tutorial
We provided this method in the form of a video Tutorial for our reader’s convenience. If you are interested in reading, Skip the video for now and watch it after the completion of reading this article.
You can easily record every moment with iFun Screen Recorder! Only 3 steps are enough for a high-quality recording.
- STEP-1: Set up your preference – Record full screen or any selected area at the highest 4K definition and 0 lag technique and adjust other settings as per your own needs.

- STEP-2: Record the Screen – Record what is happening on your screen without lagging on the frame.
- STEP-3: Save and edit – iTop Screen Recorder outputs the video to any popular format and allows you simply edit your video, which is no barrier to use. No matter video or audio, every single frame is under your control.
Extra Features of iTop Screen Recorder
iTop Screen Recorder brings you far beyond recording. Check out the other user-friendly and easy-to-use extra features of iTop Screen Recorder.
- Download Replacing
- Use iTop Screen Recorder to replace inefficient downloads. Low download speed, unstable network environment, and content limitation are no longer problems.
- Video Saving
- Record hot videos at the highest 4K definition and 0 lag technique. Originally and legally. Save your favorite video to your private space.
- Video Editing
- iTop Screen Recorder also provides tools to edit your recorded videos, which are capable of basic and practical functions, and effortless to use. Perfect your screen record and later edit.
4. How to record your screen with sound on Windows 10 Using FonePaw Screen Recorder
Video Tutorial
We provided this article in the form of a video Tutorial for our reader’s convenience. If you are interested in reading, skip the video for now and watch it after the completion of reading this article.
For those who need to record more than one app with system & microphone sounds or even your face, I will recommend you the app I have always been using, FonePaw Screen Recorder. This app is light-weighted and easy to use. I use it to finish my first screen recording without reading any instructions or watching any tutorial. I just clicked the icons based on my common sense and experience but I finished it perfectly. Next, I would like to show you how this recorder works and hope you will find anything helpful to you.
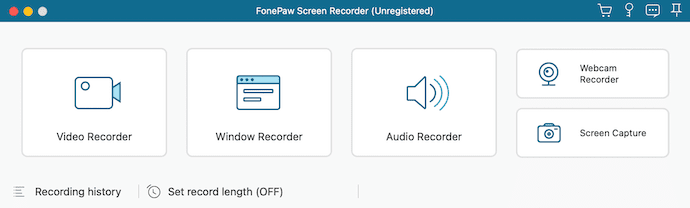
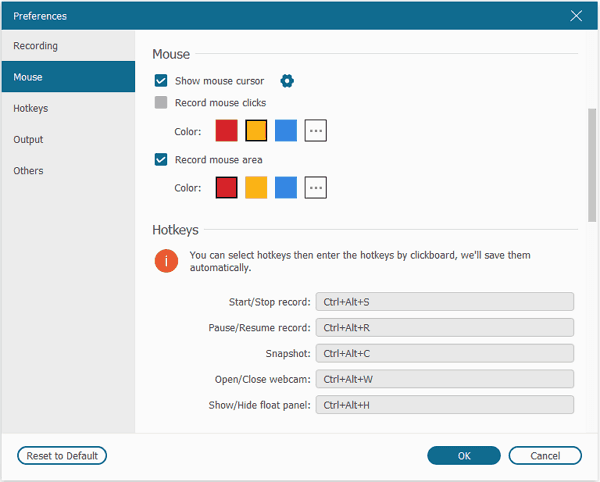
First of all, I like the design of the FonePaw Screen Recorder. The light-blue and office-style interface can always make me feel eased and the simple icons and concise layout refresh me immediately. There are mainly 3 tools on the recorder. Below I will briefly introduce the three main functions respectively, Video Recorder, Audio Recorder, and Snapshot.
1) Video Recorder
- STEP-1: Click the Video Recorder button on the main interface.
- STEP-2: Select the recording area by drawing the light-blue-dashed line and adjust other settings like whether to record system sound and microphone sound or adjust the volumes of them, like whether to turn on the webcam.

- STEP-3: Hit the orange button REC on the right to start the screen recording.
- STEP-4: You can hit the double-bar icon on the floating bar to temporarily pause the recording and resume it by hitting it again. Or you could click the light-blue square to stop and finish your recording. After finishing, a recorded video window will pop up for your review. Then you can click the “Save” button to save this video or leave it out by closing the window.
More user-friendly and powerful functions
There are some very powerful and convenient functions that cannot be achieved by Windows 10 built-in recording tool.
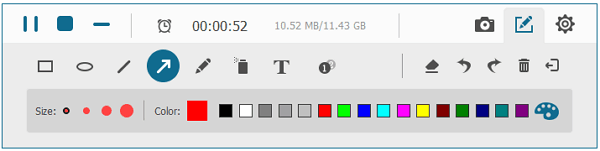
- A drawing panel for marking on your screen & mouse effect – when making a tutorial by screen recording, it is quite convenient for me to use annotation tools to highlight things on the screen. In addition, you can add a coloured circle around your cursor and set a different coloured circle around your cursor when clicking. In this way, it’s easy for your audiences to follow your cursor moving and clicking.
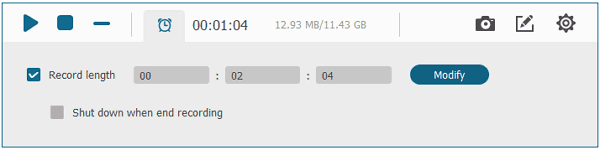
- Time recording: I especially like this function! There are many videos online which cannot be downloaded or live stream videos but I need to watch them during the no-network conditions. So I don’t need to sit by the table to watch out for its ending while recording the video. I just need to set the recording length to the video length or the expected length. Then I can leave my PC to do other things.
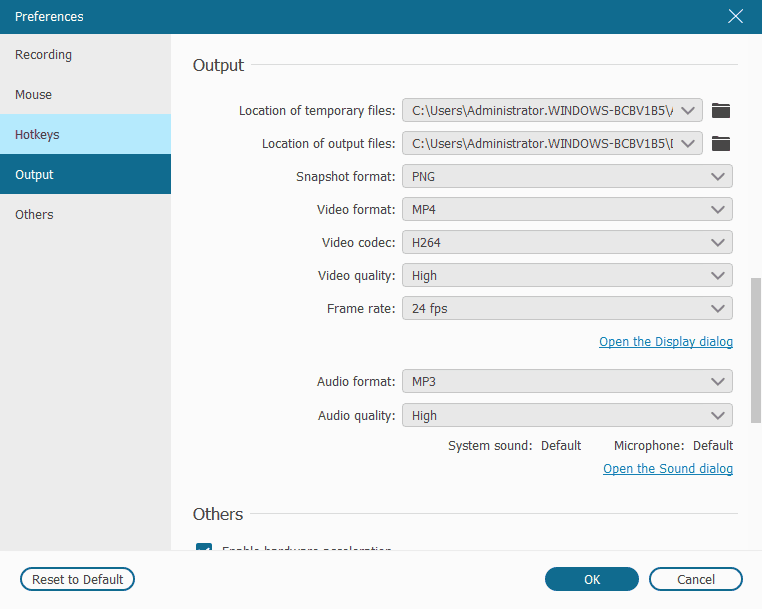
- Multiple video formats to choose From – I usually upload different videos to different platforms. The required uploading format differs from platform to platform. FonePaw Screen recorder helps me easily satisfy this complex requirement by providing options of almost all possible output formats.
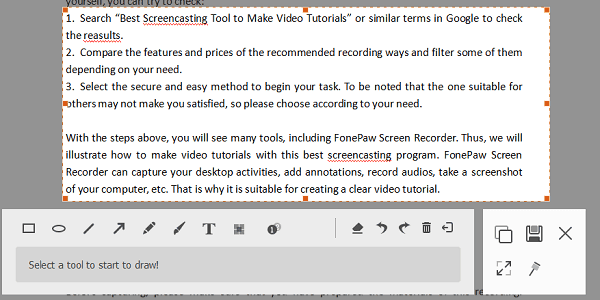
2) Snapshot
On the FonePaw recorder, Snapshot can be fulfilled by either hitting the Snapshot button or tapping [Ctrl] + [Alt] + [C]. After capturing the screen, a marking panel will float beside the snapshot and you can make necessary marks and blur onto it directly by using tools on the panel.
3) Audio Recorder
I rarely use this function in fact. It can record system sound as well as microphone sound just like a Screen Recorder. And it can also be set to a fixed recording length. The operation and process are similar to Screen Recorder.
- RELATED: How to compress video files for YouTube, Facebook, Whatsapp, etc.,
- 3 Ways to Download YouTube Videos
Best Windows screen recorder Software
Video Tutorial: 5 Best Free Screen recorders for Windows
1. Camtasia Studio (Premium)
Camtasia Studio is the number one tool in screen recording software. It is from Techsmith. Famous bloggers and YouTube video creators use this software. You can record videos on your screen and you can edit that video with many effects. It is famous because of its video editing tool. It will give you amazing video editing features. If you use it, you will love it. You can also take screenshots of your screen. But it lacks image editing features. It is the must-have software for YouTube video creators. It is available for Windows and Mac. You can import and edit any video with its editing tool. You can also share videos very easily. It will also give you a Trial version.
Highlights of Camtasia
- User-Friendly Interface
- Easy to Export
- Provides Preview after recording
- Best for beginners
Pricing
Camtasia Screen Recorder is included in the Camtasia Studio. It is available for both Windows and Mac Platforms. The pricing of Camtasia Studio is $299.99.
2. Snagit (Paid)

Snagit from Techsmith is wonderful Windows screen recorder software for your personal and professional both. It is TechSmith has included features that are not in Camtasia. You can edit images like you were using Photoshop. It is eligible to capture the screen faster and you can share it with your friends and colleagues. Snagit does not take time in downloading and it supports various platforms apart from Windows. It is quite responsive in cloud-based services and this editing tool is multi-tasking. It is true that it is paid but the smoothness it offers is incredible. Snagit is very popular in screen recording or screen capturing. Note: Free Version is also available so you can have its trial before going to invest in it.
Highlights of Snagit
- All-in-One Capture
- Scrolling Screen Capture
- Extract Text from the recorded file
- Record iOS Screen
- Annotations
Pricing
Snagit is available for both Windows and Mac Operating Systems. The Price of Snagit starts from $62.99.
Snagit will give you image editing features that are not in Camtasia. You can record videos but you can not edit videos with Snagit. For editing videos, you need to go for Camtasia. So when you want complete features, you need to buy the Camtasia/Snagit bundle. TechSmith is selling bundles for discounted prices.
Techsmith will also give you discounts for high-volume purchases, for students, and for government organizations.
3. Camstudio(Free)
When you don’t want to spend money on Camtasia, then Camstudio is the perfect choice for you. Camstudio is the open-source software for screen recording. Of course, it lacks Video editing features. But it offers too many features. It can also record your voice along with the video. I can say it is the number one screen recording software among open-source software. It will create a video in AVI format. First, You need to spend some time learning about this software.
Highlights of CamStudio
- Completely Free to Download
- Easy to Use
- Records at Best Quality
Pricing
CamStudio is an open-source software to record your Screen.
4. TechSmith Capture (Free)
TechSmith Capture(Formerly Known as Jing) is a good option but it is not everyone’s mind to invest bucks in purchasing software. In that case, Jing is a good alternative. Its offerings are unlimited as it is effective in capturing the screen in no time. It is supportive but not in all cases. When it comes to capturing the big screen recording then it is not a pleasant option. Though Jing is very popular and has gained millions of users.
Highlights of TechSmith Capture(Jing)
- Supports Longer Video Recording
- Provides video output with .MP4
- Full Screen and Regional image capture
- Annotation Tools
Pricing
The TechSmith Capture is free to download.
- RELATED: Best free screenshot software for Windows, Mac and iphone
- Best 3 free video compression softwares to reduce file size
5. EZVID (Free)

EZVID is a good way to improve the speed of screen recording or screen capturing. Though, it is free even if it does its task instantly. This screen recording software for Windows is supportive of other platforms also. EZVID is a better choice and comes with a video editor. It is useful and in-demand with its multi-tasking ability. It has better control and all the noticeable features are many in this Windows screen recording software.
Highlights of EZVID
- Fast and Easy Screen Recorder
- Instant Facecam & Voice Synthesis
- Fun to use
- Draw on your screen
- Free Music included
- Supports all the versions of Windows
Pricing
EZVID is available for Free to Download
- RELATED: 5 Best free video editing apps for android
- Best free converter to convert Video, audio, picture formats
6. Webinaria (Free and Open Source)

Webinaria is coming with various features. It will not let you down when you need it. Webinaria is mind-blowing in making Flash Videos or Screen recordings for PC. You can also engage yourself in recording the voice with the recording. Hotkeys are essentially an easy task in Webinaria. Webinaria is a screen recording tool for Windows that offers unlimited workable features. It is impressive to use as all the offerings are active and innate.
Highlights of Webinaria
- Open-Source
- Easy to use
- Supports all the versions of Windows
Pricing
Webinaria is available for free to download.
7. VEED.io (Free & PRO)
VEED.io is the ultimate podcaster’s companion. With its easy access to sharing screen/recording audio across different devices, you’ll never miss out again! The transcripts of these recordings are also available after each session so there’s no need to worry about missing any important information! All these features are available with their free version – get started now on how it can change your life for podcasting better than ever before.
Highlights of VEED.io
- Easy to Use
- Supports to stream
- Free to Download
Pricing – Free
By far the above-mentioned Windows screen recorder software is eligibly active and gives outstanding results in accomplishing your project or task. Any of the Windows screen recording software can be your favorite so download it to have fun with sharing images, uploading content, and more.
How to Record Your Screen on Mac
There are several methods to screen record on mac. Inbuilt tools are available to do the work. However, other options are available if you really want to try the new ones.
Here we will be discussing methods to screen record on mac. In short, here I will be explaining all the aspects of how to record video on a mac.
Firstly we start with the free inbuilt options and then the other ones. The process of how to screen record on MacBook Pro is the same well.
1. How to screen record on Mac with QuickTime
Quicktime is an inbuilt free application that comes with mac. It is a much simple process than any other.
In This Section, I will show you the step-by-step procedure to record your screen using QuickTime.
Total Time: 5 minutes
STEP-1: Launch the QuickTime
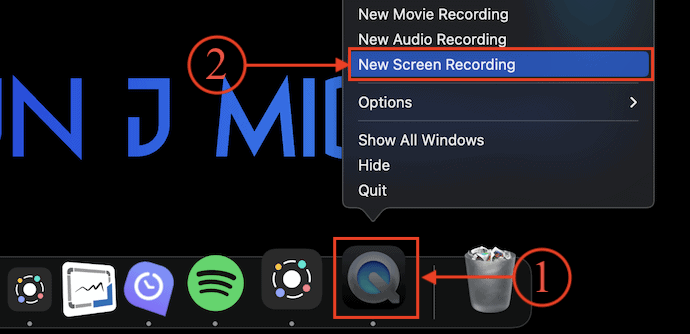
Firstly go to the Apps section and Launch the QuickTime application on your Mac. Then the application will be displayed in the dock. Mouse over the QuickTime Player and right-click on it. Then a menu will pop up and shows the options as displayed in the screenshot. Choose the “New Screen recording Option”.
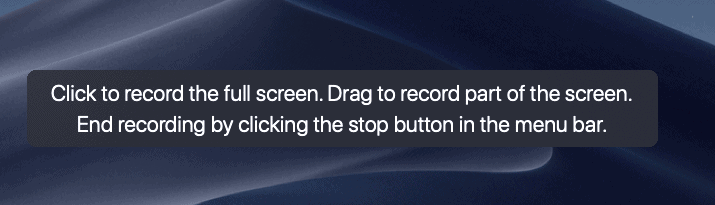
STEP-2: Set Borders
Then a frame will be displayed on the screen. You can adjust the frame and recording can be done only to the screen which is within the frame. Set the border by holding and dragging the corners of the border.
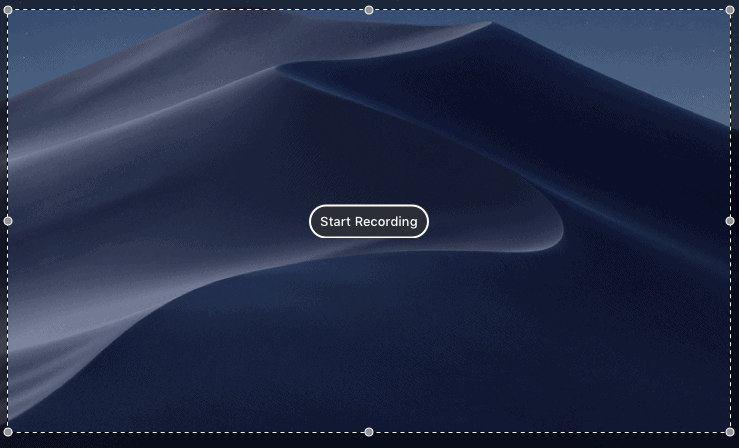
STEP-3: Start Recording
Later, Click on the “Record” option to start the recording. Only the selected part of the screen will be recorded.
STEP-4: Stop the Recording
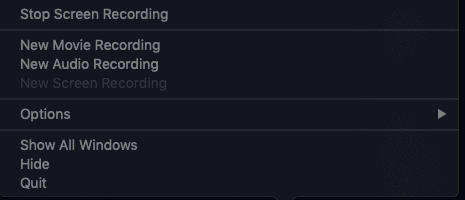
After the completion of the recording, click on the “Stop” icon available in the top right corner menu. That’s it, the screen recording will be stopped and saved automatically. Else, Right-click on the QuickTime application from the Dock to launch the options list. There, Click on the “Stop Screen Recording” option to stop and save the screen recording.
With this process, one can’t record the screen audio. The only possible way is to use your voice for the clip. The running audio cannot be recorded along with the video.
2. How to screen record on Mac without quick time (using screenshot toolbar)
With Mojave, the process of recording became much easier. Although QuickTime is an easy and available screenshot is better advanced and simple to operate.
- Press “command+shift+5” at once to open the screenshot toolbar.
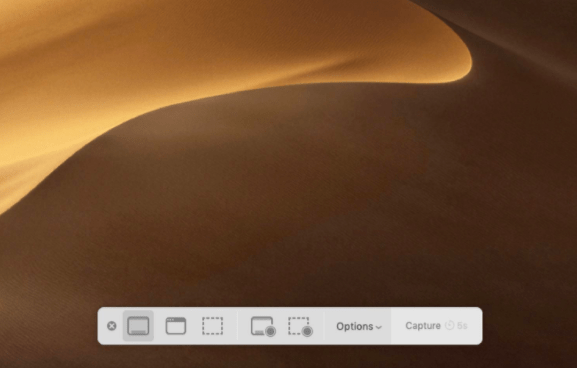
- Same as above, you can record the complete screen or just a part of the screen by using the icons which is just beside the options.
- To add audio, go to “options>built-in>Microphone”. As usual, screen audio can’t be recorded.
- If you wish to record the entire screen, simply click on “record” and go ahead.
- The small stop button which is near to battery indicator confirms about recording.
- When recording is finished click on the “stop” button or simply hold “command+shift+5” to get options.
- The current recording will appear at the bottom of the desktop. Have a quick overview. However, it will be on the desktop too.
- To edit or make changes to the recorded video use the ‘Trim’ option and hold the recording part which you need by dragging.
- Click on “done”.
3. How to screen record on Mac with Audio
In both, the above methods audio on the screen cannot be recorded. however, you can add your voice using headphones while recording the screen.
The only way to record the screen with ongoing audio is to use third-party paid software/applications. The best part they can also be used for video editing after recording. They are more advanced and can be used for face time recording and related things.
3.1 Record screen using Camtasia
Camtasia is a paid tool and a one-stop solution for video things. It is a TechSmith product used for video editing as well. Have a quick look at its features. Snagit and Camtasia are different. Snagit is for screen recording and only a part of small editing can be done through it. Camtasia provides you with everything that is required.
Features of Camtasia
- Adding audio is a complex work to any video but it makes it look professional. The audio used must have the same pattern from start to end. Camtasia levels audio automatically which is really great.
- Shortcuts are a quick way to get the work done. It adds customizable keyboard shortcuts for more productivity.
- It also records video from the FaceTime camera at the same time.
- It supports themes and other images, logos too
The best part is capturing and editing can be done within a single application which saves a lot of time.
3.2 Record screen using Capto
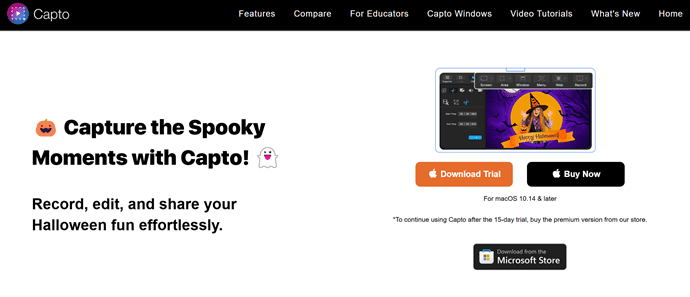
Capto is a free screen recorder and video editor with a ton of handy options. Video editing, audio adding, cropping, and cutting are available for the recorded video. In simple, it is a basic recorder with editing options. All that is for free. Have a look at the features below.
Features of Capto
- You can hide your desktop while recording. While shooting a video, arranging the desktop every time might be annoying as we don’t want to share everything on the desktop. Simply hide the desktop using capto.
- Recorded video can be sharable to all popular platforms.
- Record the complete screen or choose a part of the screen as per your choice.
- It is too good for recording tutorials.
- Upon all, editing is possible.
It is more similar to the screenshot tool but with an audio option.
Pricing
Capto is available in three licenses, such as Single License, Student/Educator Pack, and Family Pack. The prices of all three licenses are as listed below.
- Single License – $17.99
- Student/Educator Pack – $19.99
- Family Pack – $74.99
Hope I had explained everything regarding methods to screen record on mac with audio too. What to use completely depends upon your need. For example, if it is needed for a sample or normal purpose without audio in-built options are good enough to do the work. If you are recording tutorials then go with professional tools as they require video editing and audio modulation as well.
We can also suggest Wondershare Filmora scrn to screen record on Mac with Audio.
However, this article will also be suitable for how to screen record on MacBook Air and MacBook pro with audio. It is the same for all versions.
Top 4 Free Online Screen Recorders for YouTubers
YouTube’s gaming scene has seen a massive 343% increase in live game streaming in 2017, while Twitch grew 197%. Although the percentage is not always true (because Twitch is still far ahead of YouTube when it comes to streamers and live game viewers), the YouTube gaming scene has certainly attracted quite a few game streamers live recently.
As a whole, the YouTube video game market is booming, as are gamers who want to cash in on the trend. People think starting a YouTube gaming channel just needs a few things.
Starting with a PC with a good graphics card that is capable of running the latest video game titles and game recording software for YouTube. Let’s not forget the patience needed to grow a YouTube gaming channel.
Some of the best YouTube video recording software offer features like a built-in video editor for editing gameplay, two-way recording (screen and webcam), text/graphics properties, etc. To create sponsored videos, you will also need a video editor that adds graphics and text to the gameplay.
Today in this article, we will look at the best game recording software for YouTube in 2021. This list consists of free and paid game recording software to help you get your game online.
1. RecordCast
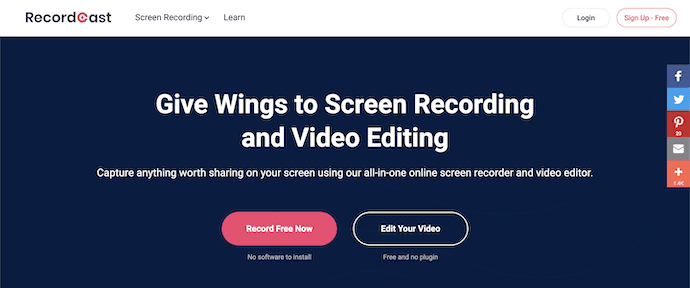
RecordCast screen recorder comes with all the features to record the game for YouTube. The software has been around not for a long time, and it’s free with no ads and watermarks.
The user interface is clean and offers most of the control panel functions. You can record full screen or manually specify the area to an application or just a browser tab. In addition, users can also record themselves using the webcam with both internal and external audio recording support.
The customization features are easy to understand. You are able to use its built-in video editor to fine-tune your recorded videos with text, music, audio, other elements, etc. You don’t need to download even a launcher or plugin to use it.
Highlights of RecordCast Screen recorder
- Simple to use
- All-in-one Screen Recorder and Video Editor
- 3 Modes of Screen recording
- Private and Secure
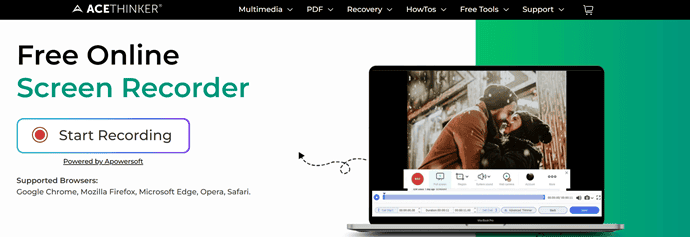
2. Apowersoft Free Online Screen Recorder
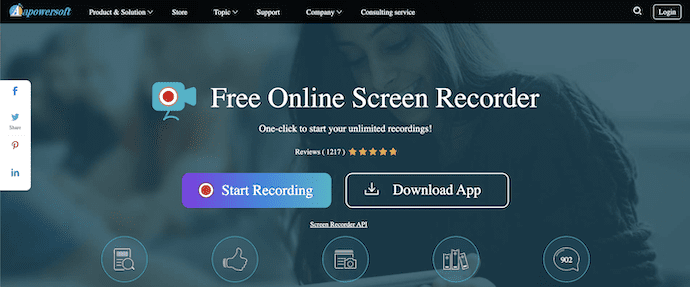
The Apowersoft Free Online Screen Recorder requires you to download and run a small launcher on your computer (available for Windows and Mac) the first time you use it. Once this is done, you can make as many recordings of your screen as you want, without limitations.
The tool allows you to select different recording areas (including the webcam, which you can insert directly into the captured image), record sound, add annotations to your capture, and finally save the video on the hard drive or share it online. Very complete and with a pleasant and easy-to-use design, Apowersoft Free Online Screen Recorder is a great alternative.
Highlights of Apowersoft Online Screen Recorder
- Ultra Simple Recording
- Record Anything on Screen
- Flexible Screen Capture
- Insert Webcam While Recording
- Make Annotations while Recording
3. Screencastify
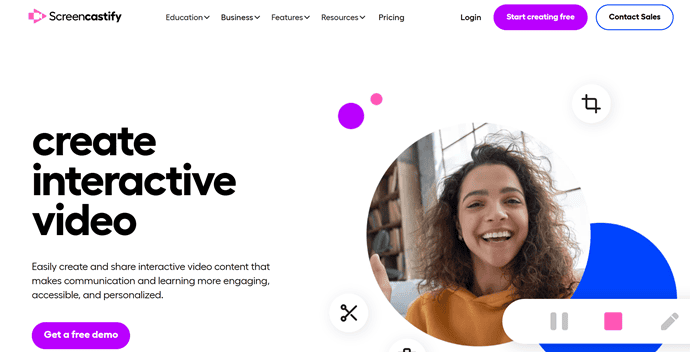
If you use Chrome as your browser, a good option is Screencastify. This extension allows you to record all the activities (including audio) within a browser tab and outside your browser.
You can even use Screencastify on Chromebooks. And videos recorded with this app can be saved to your hard drive, uploaded to Google Drive, or posted directly to YouTube with a simple click.
The free version allows you to record videos of up to 10 minutes, which in many cases is more than enough.
Highlights of ScreenCastify
- Powerful tool
- Share in a flash
- Monitor Engagement
- Built-in Google Drive
Pricing
Screencastify is available in three plans, such as Free, Starter, and Pro. Payment can be done in Monthly and Annual billing. The prices of all the plans are as listed below.
- Monthly
- Free
- Starter – $15
- Pro – $20
- Annual
- Free
- Starter – $7
- Pro – $10
4. Animated GIF Capture
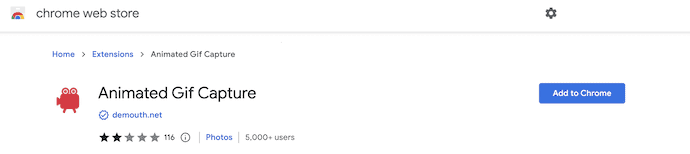
Finally, another interesting option within the Chrome extensions is the possibility of capturing your screen in animated GIF format. That is what you can do with Animated GIF Capture, an extension that converts captured recordings of your screen to animated GIFs.
With this extension, you can capture a browser tab’s content, a specific application, or the desktop itself. Once the recording is complete, the result is converted directly to an animated GIF and is then saved to your hard drive. The extension includes some configuration options with which you can, for example, adjust the number of frames per second of the recording or the file name scheme.
How to screen record on iPhone
There are a few applications that allow us to record the activity on our iPhone’s screen. iPhone Screen Recorder is one of these apps that come in very handy when you want to record your iPhone/iPad screen. Its computer software (Win/Mac) has the feature of connecting wirelessly to your iPhone using AirPlay. After the iPhone is connected to your PC, it shows you a mirror of your iOS display on your computer screen.
Now just go through this article to know the complete details on how to record the iPhone screen using AceThinker iPhone Recorder.
Premium Features and Review of iPhone Screen Recorder
There are several different applications that allow you to record the activity on your mobile’s screen. There are several tools of this kind for Android to power smartphones. But when it comes to the iPhone, the options are very limited.
Fortunately, some of the companies understood the despair of iPhone users. And developed different applications to meet the requirement of allowing the user to record the screen activity of their iPhone or iPad. AceThinker is one of those companies. It developed an application named iPhone Screen Recorder which allows iPhone users to record the activity of their iPhone using a computer.
AceThinker iPhone Screen recorder Pricing and Plans
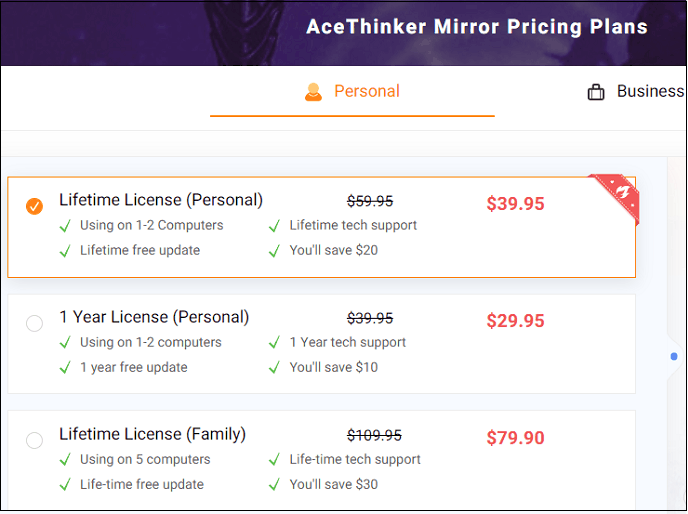
AceThinker offers Yearly, LifeTime, and Family plans for Personal and Business. The starting price of the AceThinker iPhone Screen recorder is around $39.95 (Lifetime License). And is $29.95 for 1 year. And is $79.90 for a lifetime (Family).
Minimum Requirements
If you want to use this handy tool, your devices require matching some minimum requirements. It works on iPhone 4S or later versions, which means that you cannot run it on iPhone 4. Your iPhone must also have support for the AirPlay Mirror feature. In addition to this, you need a computer installed with a WLAN network card that offers wireless connectivity. This app is designed to be used on Windows and Mac computers only.
- RELATED: How to transfer data from PC to iPhone without iTunes
- How to Password Protect Notes on iPhone or iPad
How To Record iPhone Screen on Your PC using AceThinker iPhone Screen Recorder?
First of all, you need to download the software. You can easily do it by visiting the web page of the AceThinker iPhone Screen Recorder. Once the download is finished, you need to install the package on your PC. When you are done, you need to open the software.
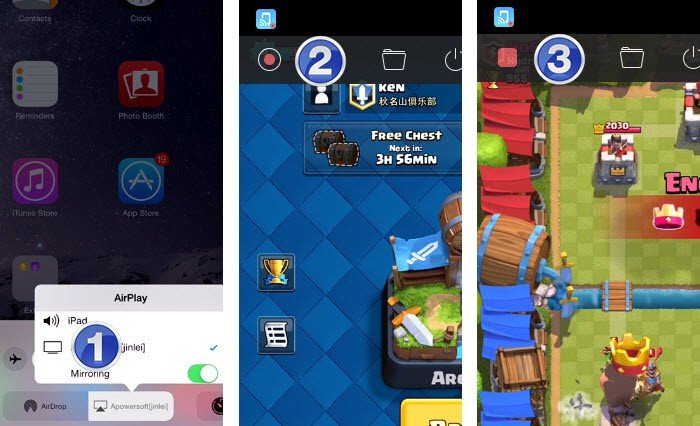
When you have opened the iPhone Screen Recorder on your computer, you have to configure your iPhone or iPad for working with the application. To do that, you need to head to the control centre of your iPhone or iPad. You can simply do that by swiping from your device’s screen bottom. Once you are through, you need to select the “AirPlay” option to launch it on your phone.

A new screen will appear, and you will be asked about where you want your AirPlay screen to be played. You need to pick up the icon with your computer’s name from the list which would take you to another dialogue box saying “Mirroring”. Then you need to toggle it ON to allow the streaming of your device on the computer. Once you are done with that, you need to click on “Done” to complete the wizard.
This would allow you to view all the activity on your iPhone’s screen on your PC. To record it, you can move your cursor to the top side of the application. There you will see a red-coloured button that would allow you to record the screen activity of your iPhone screen. You need to push it. This will start the recording along with the audio as well.
When you want to stop the recording, select the “Stop Recording” option which is located at the top left of the side of the application in the form of a red square button.
After you tap the button for stopping the recording, you need to pick up a name as well as a format to store the video file on your computer. This tool offers the facility of recording the video activity in 9 different formats. These include animated images as well.
After selecting the name and format for the video, you can save it on your computer. Once you press enter, this will open up a folder that contains the recorded video file. You can easily access it using any media player of your choice.
The application has a simple console which makes it very easy to use. So anyone who knows basic computer skills can easily install and use the software. There are no unnecessary steps involved here that might have made the process a bit more complex.
- RELATED: Free Method to convert PDF to Word on iPhone
- Free Method to Convert image to Excel on iPhone
Comparison with other applications
In addition to iPhone Recorder, there are a few other applications that are designed to do the same task, i.e. recording the screen activity of an iPhone or an iPad. The majority of these applications are designed to run on the iPhone itself. Moreover, they are a bit harder to use.
On the other hand, iPhone Screen Recorder allows you to record the screen activity using a computer. This makes it more convenient and easier to record your iPhone’s screen since you see the entire activity on a bigger-sized screen. It is much easier and simpler to use since you can have your recorded videos in just a few simple steps. All these features make the iPhone Screen Recorder much better than any other similar application.
Methods/Apps to Record your Screen on Android
You will find a lot of methods and apps to record the screen of an Android device. In the present Android devices, every brand is providing its own screen recorder application along with the audio recorder application. Here In this section, you find the best methods and applications to record your Android Mobile Screen.
Video Tutorial: 6 Best Free Screen recorders for Android
1. Screen Recorder (In-built Application)
Every Android Mobile has its own screen recording application to help its customers to record the screen without downloading any third-party applications. This will free up the storage and improve the performance of the Device. The video recording application can be found on the installed apps list and can be accessed by opening the application or right from the notification panel. Here, I’m showing you the screen recorder provided in MI brand phones. As this is an inbuilt application, it doesn’t occupy external storage on your device.
Open the screen recorder and then, you will find an interface as shown in the below screenshot. There, you will find the past screen recordings. You can customize the Screen recording settings by clicking on the gear icon, present on the top right corner. To start recording, you have to click on the camera icon, which is on the right bottom and then you will get a small overlay to start recording.
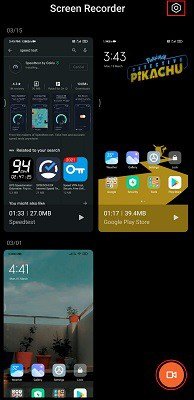
Various options regarding the quality, resolution, orientation, frame rate, audio source, and more to customize the screen recording. The list of the settings is shown in the below screenshot.
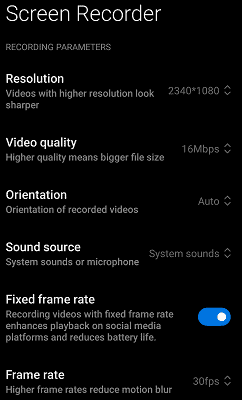
Select or choose the best settings for better video output. When you start the recording, you will find the time of recording and the stop icon on the overlay. Click on the Stop icon to stop the screen recording.
Key Features
- Doesn’t occupy more space (External Space)
- Trusted App
- Supports recording your screen in High-Quality
- READ MORE – Top android apps: 13 Best most popular free android apps list
- 6 Cheap & Best Video Editing Software For YouTube
2. Google Play Games
Google Play Games is an application from Google that allows you to access and play games. Everyone knows it as a gaming application but only a few know about using Google Play games as a screen recorder. This is available for free and secure to use. You can record the screen in high quality with a camera and external audio. If you want to record your screen while playing gamers, then the Google Play Games application will suit you best.
How to record your Android using Google Play Games
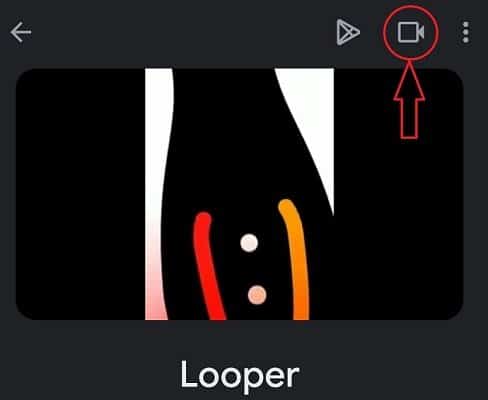
- Open the Google Play Games application on your device. Go to the specific game which you want to play and record. There you will find a camera icon on the top right corner.
- Click on the “camera” icon. Then, you will find a pop-up as shown in the below screenshot. Choose the quality to record and click on “Next”.
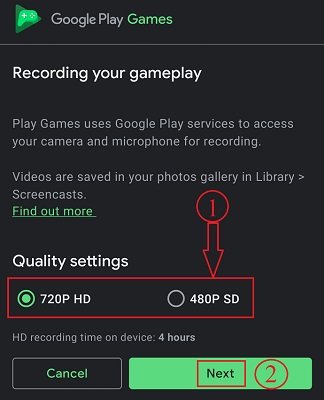
- Then, the game will be launched and the screen recording also starts automatically.
Key Features
- Can record 720p and 480p
- Best suitable for gamers
- No external storage occupied
3. Screen Recorder – AZ Recorder
Screen Recorder – AZ Recorder is one of the best applications to record your screen with high quality on Android. This application is available in the Playstore and can be downloaded for free. This application helps you not only to record your screen but also serves you to record smooth and clear videos. You can also edit videos and make live streams directly using this application. AZ Screen Recorder provides you with an easy and best way to record your screen videos such as Video Tutorials, video calls, game videos, and live shows.
After opening the application, you will find a ribbon on the notification panel and also a small icon on the edge of the screen. The interface of the AZ Screen Recorder looks as shown in the below screenshot.

Key Features
- Free to download and use
- Supports High-Quality video recording – 1080p, 12Mbps, 60FPS
- Records your screen with FaceCam
- Video Editor
- Live Streams
- RELATED – What is a Smartphone? 7 Must-have features in a smartphone
- How to recover deleted files from Windows, Mac, iPhone, USB, etc.,
4. Mobizen Screen Recorder
Mobizen Screen Recorder is one of the best and most used screen recorder applications for android users. This app is especially for Samsung users. This application has 100 million users across the world and it is awarded as the best app of the year 2016. You can record your screen in the highest quality, that is 1080p at 60FPS. Both screen and the face cam can be recorded at the same time. It provides other features like video editing, adding favorite BGM, and intros and outros to the videos. It also gives the clean recorded output video without adding its watermark.
Key Features
- No Watermark is added
- Records in Full HD
- You can Recording, capture, and edit all are Free
- Allows you to save on External storage
5. Rec. (Screen Recorder)
Rec. (Screen Recorder) is another best recording application that allows you to record your screen on Android. This is flexible and fully compatible with all Android devices. It has an intuitive user interface. You can customize the recording settings like quality, resolution, and Bitrate. This application is available for free to download and if you want the pro version, then you can purchase it from the application.
Key Features
- Save your Favourite configurations as Presets
- Automatically show screen touches for the duration of your recording
- Longer screen recording with audio
- Customizable countdown timer so that you can get your screen recording set-up perfectly
- You can stop the recording by shaking the device, or simply switching the screen off.
6. ADV Screen Recorder
ADV Screen Recorder is a free android application that helps to record your screen. This application has the best features that help you in screen recording effectively. It allows you to record using two engines ( Default & Advanced). You can also type text while recording using your favourite colour.
Key Features
- Recording with 2 engines (Default and Advanced)
- Draw on the fly with your favourite colour
- Trim video
- You can set your Text with full customization
- It allows you to set Banner with full customization
Conclusion
To sum up, the average Windows 10 user can make up with a built-in recording tool to record the screen without sound, preset length, and annotation tools.
The process of recording, editing, and uploading games takes time and effort, but with the right game recording software for YouTube, you can create professional-looking videos for your audience.
For beginners, I would recommend RecordCast if you want a less complicated option. Otherwise, invest a few dollars and try Screencastify and other video game recorders above.
But we suggest you go with Allavsoft. You will get the screen recording option in its free version. It will give you many more features like downloading audio or video from all most all online sites and converting video/audio formats. Moreover, it comes with a lifetime license.
Offer: Our readers get a special 25% discount on the Allavsoft lifetime license.
Grab 25% Special discount for Windows
Grab 25% special discount for Mac
Please visit our Allavsoft promo code page for the 25% offer on other Allavsoft licenses.
I hope this tutorial helped you to know about the 26 Ways To Record Your Screen on PC, Mac, Android, and iPhone. If you want to say anything, let us know through the comment sections. If you like this article, please share it and follow WhatVwant on Facebook, Twitter, and YouTube for more Technical tips.
24 Ways To Record Your Screen on Pc, Mac, Android & iPhone – FAQs
How to screen record on MacBook pro
Well, it is the same as MacBook Air. Simply use Quicktime or screenshot toolbar. however, tools work the same on all Macs
Can we record audio with Quicktime?
Yes and No. External audio can be added using headphones. But the on-screen audio can’t be recorded.
Can we edit the recorded video with the screenshot tool?
Yes. It can be edited but is good enough for the basic purpose only
How good is it to use a third-party software?
Completely depends upon the need. But those trusted tools like Camtasia etc are really good and handy. Use it without a thought for professional purposes.
How good is AZ Screen Recorder?
AZ Screen Recorder is a good tool for recording video on your Android device. The output quality of the video is good: no watermarks, no frame loss, and no time limit.