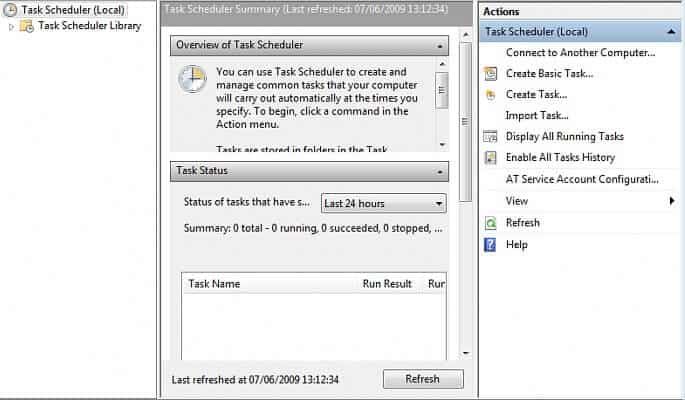
You can easily schedule a task in Windows with a task scheduler. If you are in the habit of using a program often at the regular intervals the advent of the latest tools in your OS. The computer users can schedule programs in the Windows that automatically runs in the predetermined time. This short article is aimed to educate the readers as well as the users to do schedule programs in windows 7,8,8.1 and 10.
What is a Task scheduler in Windows ?
Task Scheduler wizard which come pre-installed in all the versions of windows runs certain program automatically at a scheduled time. In Windows 7 version more options are added along with it. It has transformed into a new name called System Scheduler in the recent Windows versions.
How to Locate Task scheduler in Windows?
There are three approaches to launch scheduler.
1.Go to the Start menu, then All Programs -> Accessories -> System tools, and now under it, you find Task Scheduler.
2.In the Start Menu search box type “Schedule” and hit enter. The Task Scheduler will be opened.
3.You can find Task Scheduler through the control panel too. Task Scheduler lies in System and Security Administrative tools.
- Read: How to connect bluetooth speaker to Windows 7
- How to create a WiFi hot spot in Windows laptop with cmd
How to Schedule a Task in Windows with Task Scheduler?
- Launch Task scheduler. A three-panel window will appear. Click Task Scheduler (Local) below Action on the right.

- Find Create a basic task for Disk Cleanup or backup. However, Create Task enables you to add more properties. Click on either will open a new wizard.
- Enter a name and a description (optional) in your create task wizard. Click next.
- To add trigger click Next this opens a new trigger dialogue box. You can select a scheduled frequency as per calendar or general persistent happenings or even program the launch based on a specific event. Choose the radio button before your selection. Click Next.
- This opens the Action dialog box, choose from “Start a Program” or “Send an e-mail” or “Display a message”, click Next.
- Enter or browse the program or the script that you want to configure for the automated run. Click on Open
- Add the argument and set the folder to start the program. Click Next
- Click on next and Finish to complete setup.
If you want to run an automatic mail application, start setting up with the “Send an e-mail” option at above. When you click Next you are required to enter the sender, receiver, subject, and the e-mail body. In order to send a message first enter the SMTP server address. Mostly the server requires authentication to send messages to prevent any problem. To “Display a message” at regular intervals feed the title and message body click Next. Finish the job by hitting Finish on the forth window. The above email and display message task only work in Windows 7, the last two are not available in successive versions i.e. Windows 8, 8.1, and 10.
- You may also like: What’s new in Windows 10
- How to set disk quota limits for users in Windows 7
- How to make a new user on Windows 7
Now that you are through the steps and know scheduling a task in windows 7 is simpler you can take advantage of Task Scheduler utility and sit back. Interestingly these new tool does not need the inputs from the usual keyboards. Thus it not only saves a lot of time but also avoids human error.
I hope you knew about How to Schedule a task in Windows with Task Scheduler. If you like it, please share it with your friends in social media.
For more tips, follow WhatVwant on Facebook and Twitter. Subscribe to whatvwant channel on YouTube for regular updates.


