
Want to Create a Group In Gmail? Are you getting irritated by sending the same mail to the group of contacts separately and thinking of creating a group in Gmail? Here you are in the right place.
These days Gmail has become important in our day-to-day life for students, working individuals, etc. It is accessible from a Web browser or in the mobile app anywhere in the world so long as an Internet connection is present. If you are a tech-oriented person or an inquisitive person, you will know that Gmail has many unique features.
Similar to WhatsApp, and a contact group in Gmail one can create a Gmail Group. If you would like to send Gmail to all your contacts at once just simply type the name of the group to send mail to all members of that group. Here is the step-by-step procedure with pictures to create a Gmail Group.
How To Create a Group In Gmail?
Video Tutorial
We Provided this article in the form of a Video Tutorial for Our reader’s convenience. If you are interested in reading, skip the video for now and watch it after the completion of reading this article.

In This section, I will show you the step-by-step procedure to create a group in Gmail.
Total Time: 5 minutes
STEP-1: Login to Google Account

Open any browser on your computer and visit the Official site of Gmail. Enter your Email address and password to log in to your Google Account.
STEP-2: Visit Google Apps
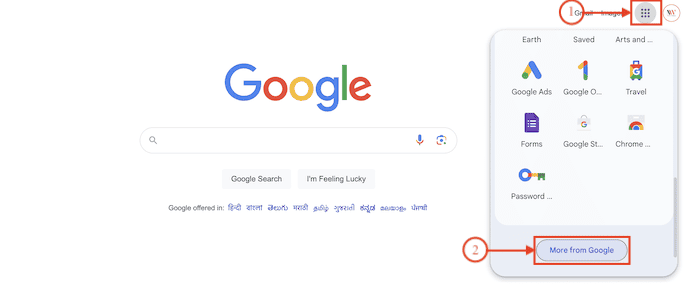
Click on the “9 Dots” icon available on the top-right corner of the window. A popup will appear and display the list of Gmail accounts that are logged in. Scroll to the bottom of that pop-up and there you will find the “More from Google” option.
STEP-3: Choose Google Groups
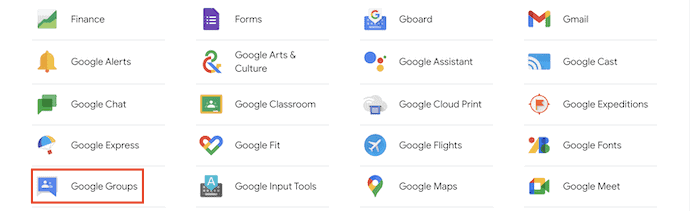
Then it displays the list of all Google Products or Apps. Click on the “Google Groups” Product available under the All section.
STEP-4(i): Create Group(Set Group Name)
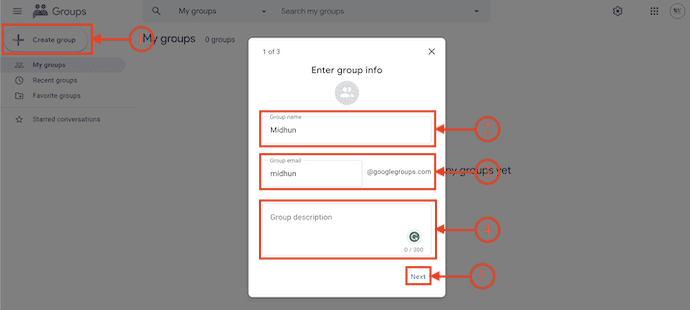
Click on the “Create Group” option available on the left-top corner of the window. Then a pop-up will appear. Enter the Group Name and it will be taken as the email name. You can also add a description to the Group and later, click on “Next”.
STEP-4(ii): Choose Privacy Settings
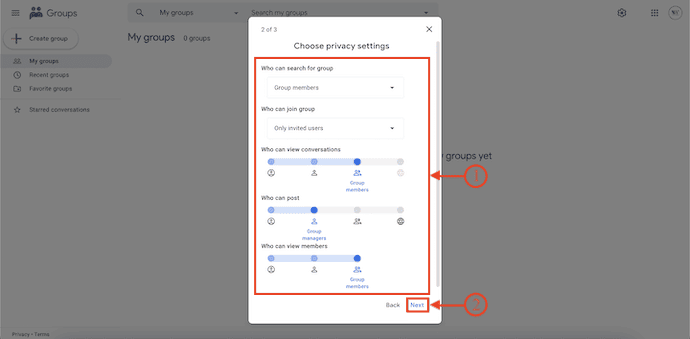
In this section, You need to choose the preferences for the audience to perform actions like Join, View, Post, etc., Set your preferences and click on “Next”.
STEP-4(iii): Add Members
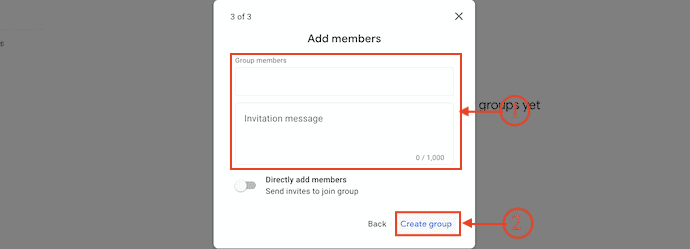
In the third step, it asks you to add members to your Group. You can also add members later. After adding members, click on the “Create Group” option.
STEP-5: Group List
After the completion of the group, you will find the group on the homepage. Click on the Group to view its details. That’s it, this is how you can easily create a Group in Gmail.
How to Use Gmail Group?
Similar to Facebook Groups, Google Groups to create an online group for your team, organization, class, or another group to do things like:
- Email each other
- Organize meetings
- Find people with similar hobbies or interests
- In this, you can change your group’s type, name, and description, and choose who can join, post, and view topics.
How to Change Your Gmail Group Name
- STEP-1: Go to the Groups page by following the steps discussed in the above section. Otherwise, just click here and you will be redirected to the Groups page. There you will find the list of all your groups. Click on the “Gear” icon available on the right side of the group.

- STEP-2: Then it takes you to the settings page. From there, you can modify the Group Name, Group Email, and Description easily. Later, Click on the “Save Changes” option to confirm changes.

How to Change Gmail Group Type?
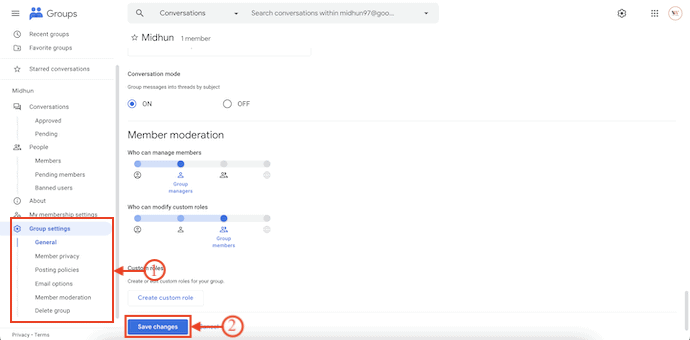
- STEP-1: Go to the Groups page by following the steps discussed in the above section. Otherwise, just click here and you will be redirected to the Groups page. There you will find the list of all your groups. Click on the “Gear” icon available on the right side of the group.
- STEP-2: Then it takes you to the settings page. On the left side of the window, you will find various sub-settings like General, Member Policy, Posting Policy, Email options, Member Moderation, and Delete Group under the Group setting option.
I hope this tutorial helped you to know about “How to Create a Group in Gmail”. If you want to say anything, let us know through the comment sections. If you like this article, please share it and follow WhatVwant on Facebook, Twitter, and YouTube for more Technical tips.
How to Create a Group in Gmail – FAQs
What is a group email address in Gmail?
An email group (Contact group) is a collection of email accounts to which you send emails. When a group owner sends an email to an email group, all the email contacts in that group label will receive the same email.
What is a group email?
A group has an email address and whenever an email is sent to that address everyone in the group receives the email.
What is Google Group?
Google Group allows you to communicate with colleagues, by sharing a common email address. Once a group has been created, you can use the group to set up chat rooms, invite all users to a Google Meet, and share documents for collaboration.
Why create a group email?
Email groups are primarily useful for organizing your contacts and allowing you to send messages to large numbers of relevant people at the same time without adding their individual addresses.
What is the cost of Google Group?
Google Groups is completely free to use.