Want to create a Windows 10 image backup so as to do system recovery in event of system failure? This tutorial shows you how to backup Windows 10 OS. When it comes to system image backup, you should know this image file copies everything on your hard drives, such as the operating system, boot sector, settings, programs and more. All data on your system partition are compressed to an image file.
Usually, system failure or system corruption happens to your computer, which renders your Windows 10 useless. In this case, a system image backup can let your PC run again quickly. Well then, how can you create a Windows 10 image backup?
I also recommend you to use any one of the Cloud Backup Services like iDrive (75% Discounted Link) to store your OS image and all other important files.
How to Create Windows 10 image backup?
As to this issue, two kinds of backup tools are available: Backup and Restore (Windows 7) and third-party backup software. Let’s see the details about them.
1. Backup and Restore (Windows 7)
As you know, Backup and Restore (Windows 7), is the built-in backup tool in Windows 10. By means of it, you can easily create a Windows 10 backup. How can you do this work?
- Select “Control Panel” by right-clicking the “Start” button.
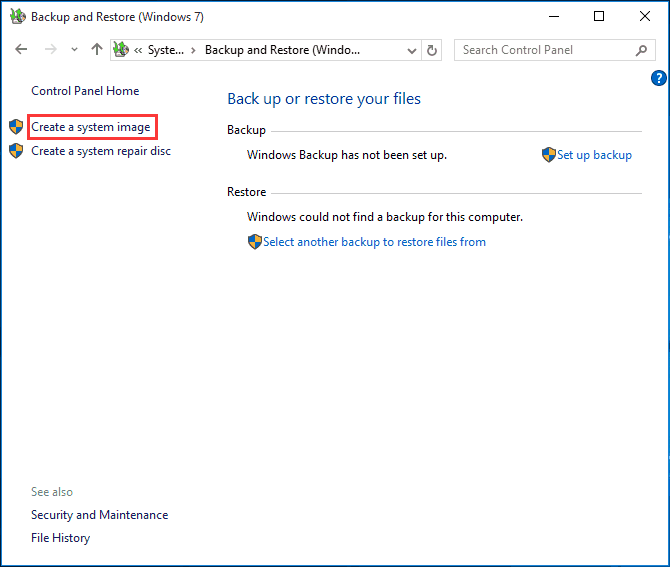
- Navigate to “System and Security” and click “Backup and Restore (Windows 7)”.
- Choose “Create a system image” to set up system backup.
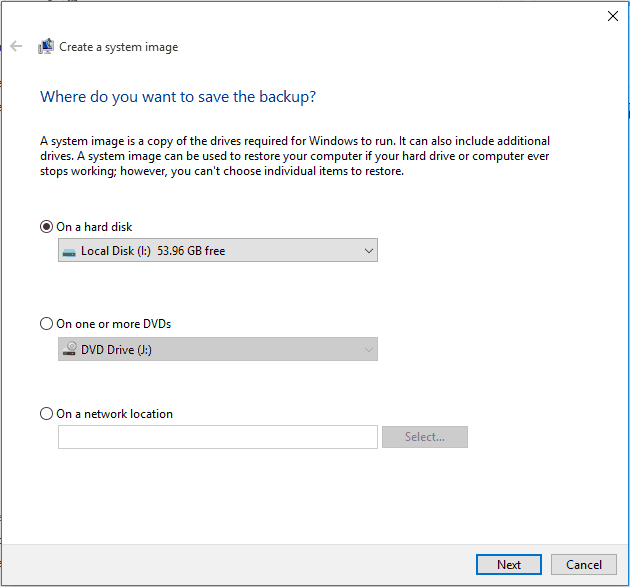
- Please decide which place you want to store the system image file. In short, the snap-in backup tool supports saving the backup file to a local disk, DVD, and a network location.
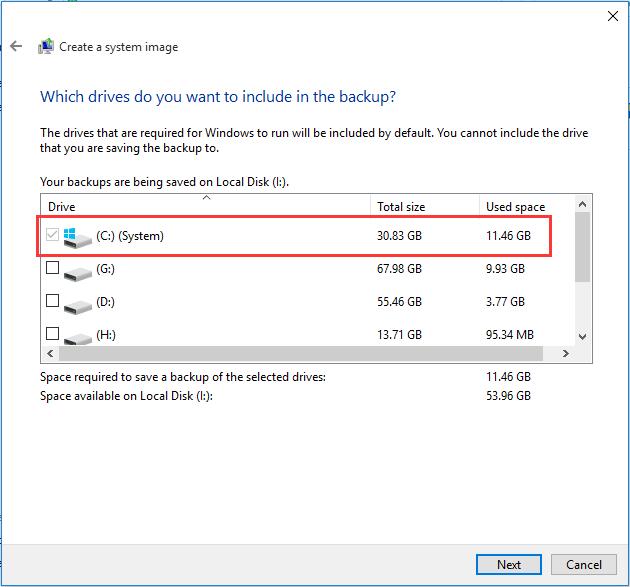
2. Then, you can see the drives required for Windows 10 to run will be selected by default. Here, in the figure below, C drive is chosen.
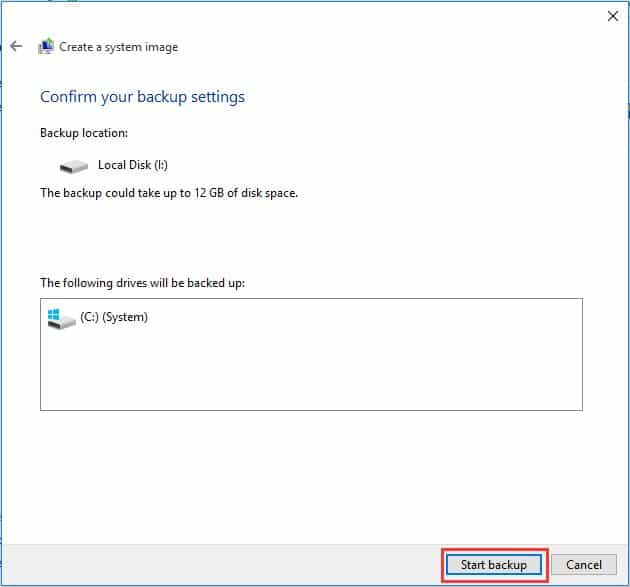
3. Confirm the system image backup settings for Windows 10. Then, click “Start backup” button.
- Read: How to Enable or Disable Hibernation in Windows 10
- 2 Ways to Extend C drive partition on Windows
2. Make Windows 10 Image Backup with MiniTool ShadowMaker
When using the Windows built-in backup tool, some issues may happen, for instance, Windows backup failed not enough disk space (0x80780119 code), Windows backup did not complete successfully error and more. In order to make a successful system image backup for Windows 10, many users choose to use a piece of third-party backup software.
Here, we will recommend you MiniTool ShadowMaker. As a professional backup & recovery program, it is available to back up system, partition or disk. Besides, you can set an automatic backup to protect your system security well. Moreover, MiniTool ShadowMaker also provides you with an ideal backup solution, for example, incremental backup and differential backup are supported for the only newly added or changed data.
How to backup Windows 10 OS with MiniTool ShadowMaker? Follow the steps here.
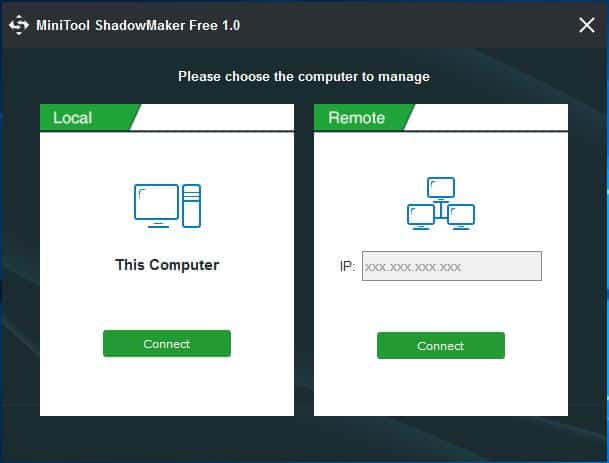
Step 1: Run this free backup software, and then click “Connect” in the Local section.
Step 2: Then, go to the “Backup” page and you can see two modules are here. Please choose the source drive and storage path for Windows backup by clicking the corresponding section.
Note:
- MiniTool ShadowMaker always checks the system-related partitions by default.
- Generally, an external hard drive is selected for image file storage.
- Scheduled backup is supported.
- With the “Scheme” feature, you can manage disk space well.
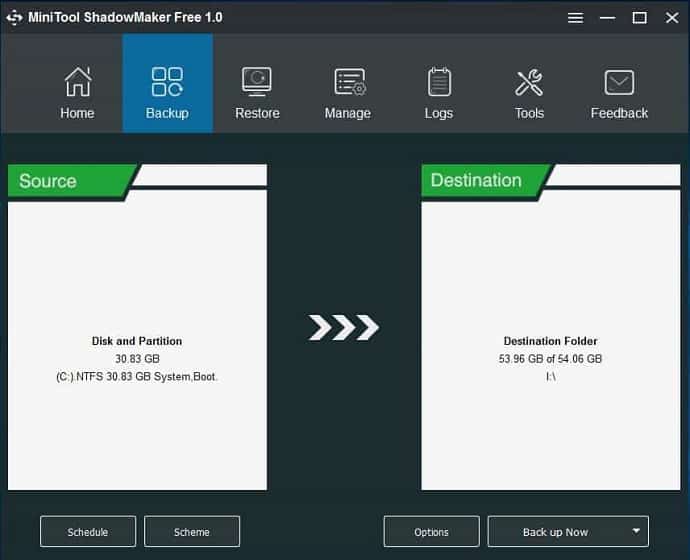
Step 3: Click “Back up Now” button to perform the backup for Windows OS.
Conclusion
It is always better to make your OS image backup. I also suggest you to use iDrive (75% Discounted Link) to store your entire files in the cloud so that you will never lose your data.
If you like this article about How to create a Windows 10 image backup, please do me a favor by sharing it with your friends. Please follow whatvwant on Facebook and Twitter. Subscribe to whatVwant channel on YouTube for regular updates.

Great software! My Windows 10 crashed, and I used this FREE software to put it back EXACTLY the way it was before the disaster! No need to find all my old programs and load them up again, everything looked just like before, from the desktop to the trash bin!