
Want to know How to change the time zone in Windows 10? Then you have selected the right blog to solve your problem. In this tutorial, we are giving the guidelines for how to change the time zone in Windows 10. just read on and follow the tips given below.
1. why should I change the time zone?
The timezone differed between countries or some boundaries. Time zones tend to follow the boundaries of countries and their subdivisions instead of strictly following longitude because it is convenient for areas in close commercial or other communication to keep the same time.
When you travel from one part of the earth to another the timezone change and the time also differed between places.
If you shouldn’t change the timezone then the system shows the wrong time on the desktop and also you can’t receive any update at the correct time. So, it is necessary to change the time zone of the system when you move from one zone to another.
2. How to change the time zone in Windows 10
Here are 4 possible methods to set the time zone on your device. They are:
- Using settings(automatically).
- Using settings(manually).
- Using command prompt.
- Using a power shell.
- Using Control panel
2.1. How to change the time zone in Windows 10 automatically?
In this section, we are going to explain to you how to change the timezone automatically.
Total Time: 1 minute
Step:1 Selection of Adjust date/time from the taskbar.
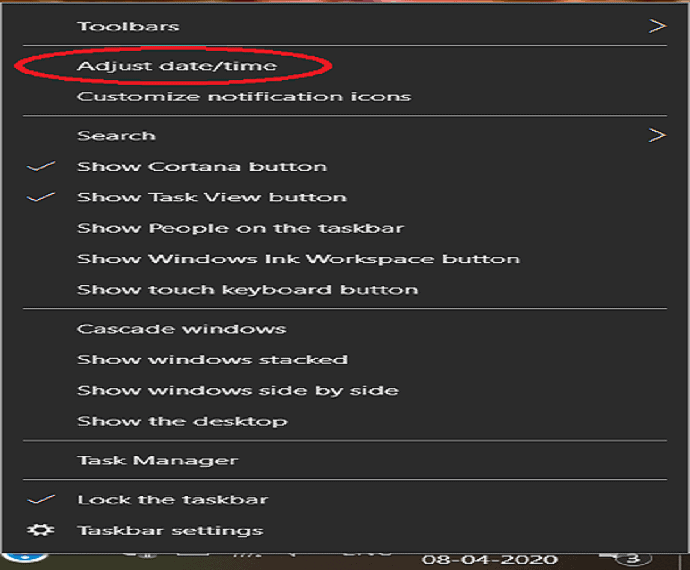
Login into your PC. You can see the date and time at the right bottom of the screen, Just right click on it. Several options are displayed on the screen from that tap on Adjust time/date.
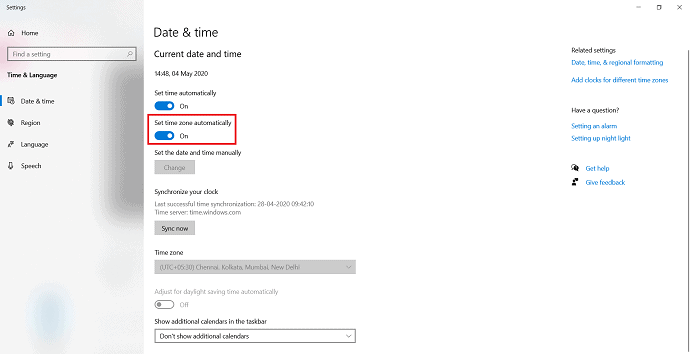
Step:2 Toggle the “set timezone automatically” slider to on state.
Time and Language window is opened from that select date & time. You can see the “set time zone automatically” on the right plane. Toggle the slider button ON position.
After the completion of the process, the system updated with the timezone automatically based on the place.
2.2 How to change the time zone in Windows 10 manually?
To set the time zone manually using settings, follow the below guidelines:
Step:1 Login into your PC. You can see the date and time at the right bottom of the screen, Just right click on it. Several options are displayed on the screen from that tap on Adjust time/date.
Step:2 Time and Language window is opened from that select date & time. From that click on time zone.
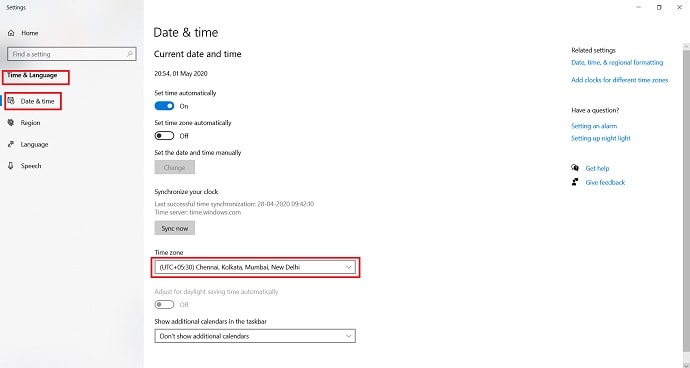
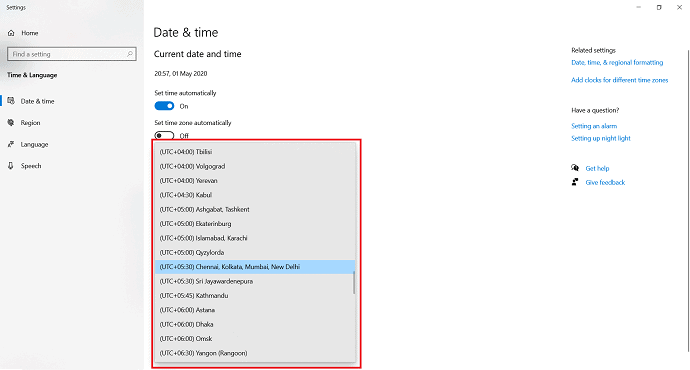
Step:3 Several time zones are observed from that select your desired time zone.
After completing these steps, Windows 10 will update its settings with the time zone that you specified.
2.3 How to change the time zone on Windows 10 Using the command prompt
If you are looking to change the time zone using a command, You can use the command prompt app with the guidelines given below:
Step:1 Search for the “command prompt” app using the search bar. After finding the app, just give a right-click on the app and select “Run as Administrator”.
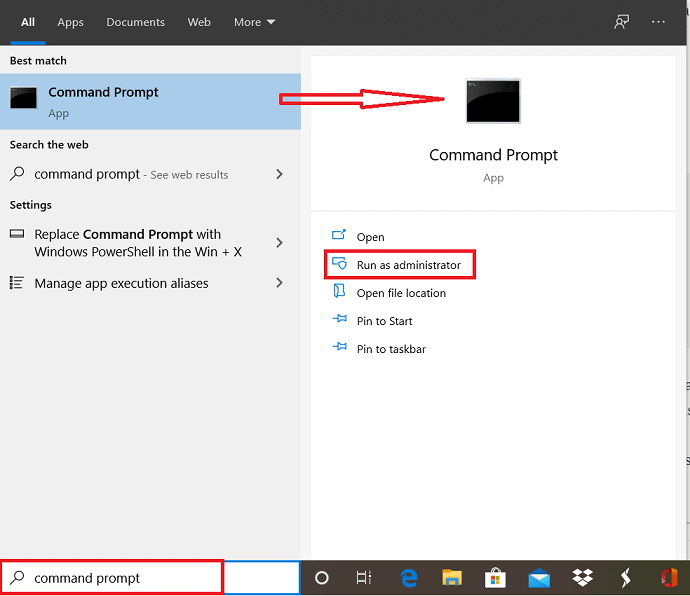
Step:2 Before opening the app a confirmation message will be displayed on the screen. Tap on “Yes” to run the command prompt app as administrator.
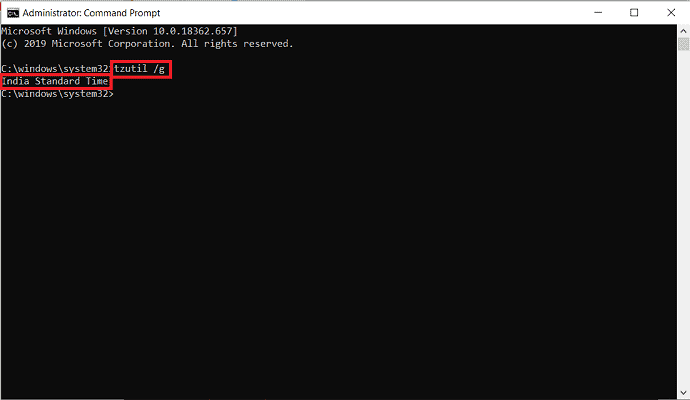
Step:3 The command prompt window is displayed on the screen. Use the tzutil /g command and tap enter to confirm the current timezone.
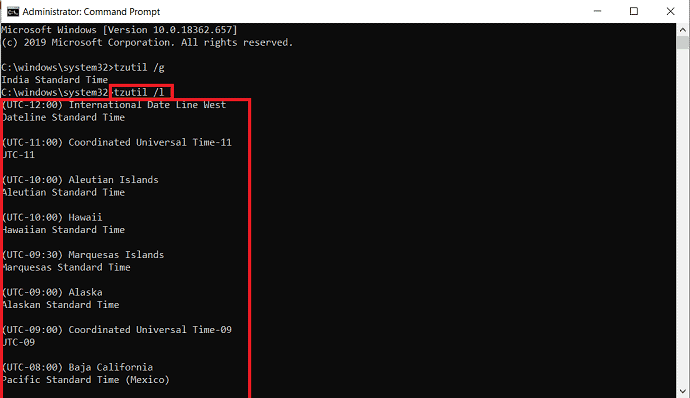
Step:4 Enter the following command in the command prompt window to get the list of different time zones: tzutil /l. Don’t forget to hit enter for the list of timezones. Note the time zone which you want from the list.
Step:5 Use the following command to set the new time zone and hit enter.
tzutil /s “Indian Standard Time”
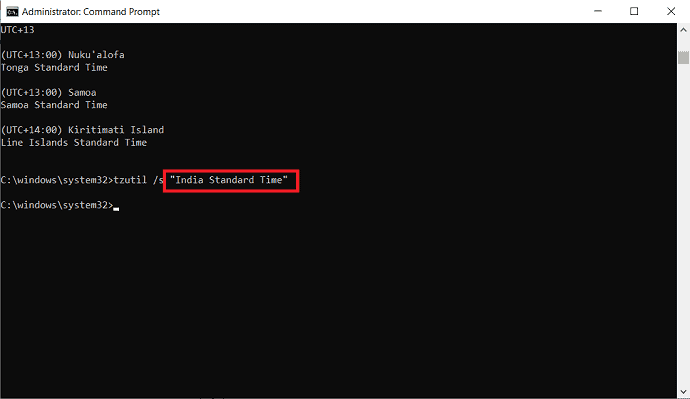
Step:6 In the command, make sure to change “India Standard Time” with the correct time zone that you noted in step No. 4. Also, make sure to type the full name exactly as shown in Command Prompt.
To check the time zone is updated or not, enter the tzutil /g command in the command prompt window and tap enter.
Once you complete the steps, your device time zone will change to the setting you specified in Command Prompt.
- Also read: How to recover missing files on windows 10
- How to create a windows 10 image backup with ease
2.4. How to change the time zone in Windows 10 Using power shell
Instead of Command prompt, you can also use the Power shell app to change the timezone using a command on your device with the help of following steps:
Step:1 Search for the “Power shell” app using the search bar. After finding the app, select “Run as administrator” from the options below the windows power shell app.

Step:2 A confirmation message is prompt on the screen before opening the Powershell app. Click on “Yes” to give permission.
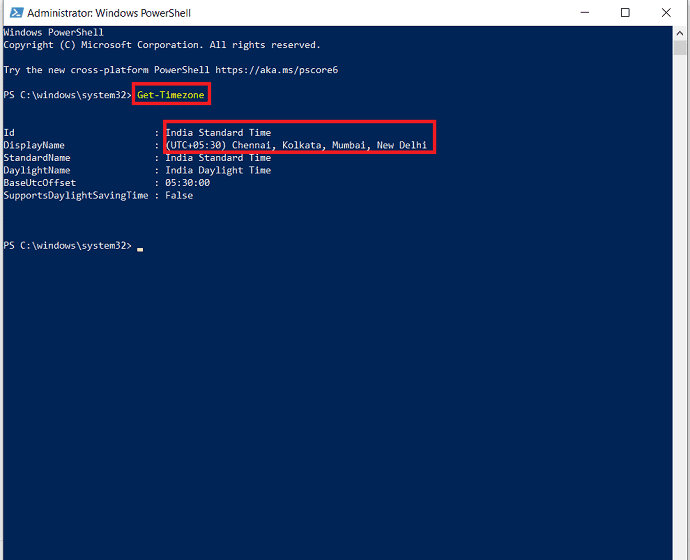
Step:3 The power shell window is opened. If you want to check the current time zone of your system, then use the Get-Timezone command in the power shell and click on enter. The current time zone is displayed on the window. Otherwise, go to the next step to set the timezone.
Step:4 To get the list of time zone use the following command in a power shell window: Get-Timezone –ListAvailable. Click enter for the list of time zones.
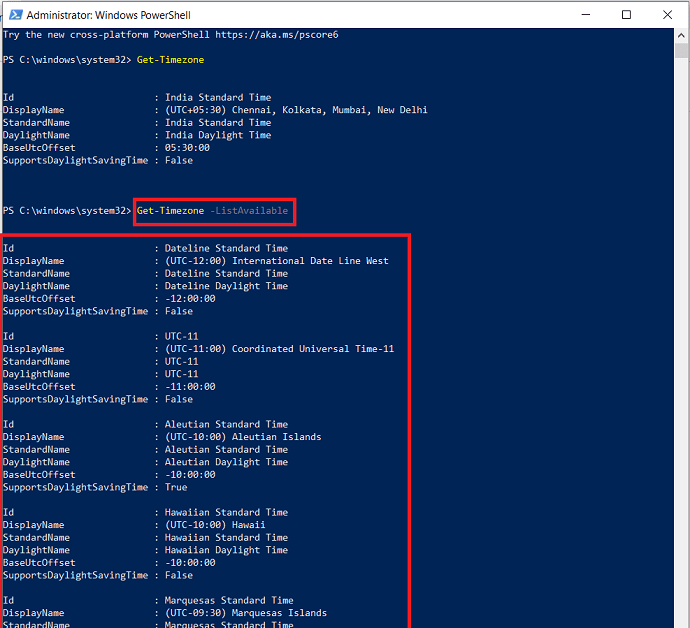
Step:5 Navigate through the list of time zones available until you stumble upon the one you want to use. Take a note of it.
Step:6 Now enter the following: Set-TimeZone -Name “India Standard time” with the correct time zone that you note. Remember to hit Enter.

Step:7 Use the “Get-Timezone” command and hit enter to check that your system updated with the new time zone successfully or not.
After the completion of steps, your system updated with the new time zone that you indicated using power shell.
2.5. How to change the time zone in Windows 10 Using control panel
The Control panel is another way of setting the time zone in Windows 10 instead of settings. You can change the timezone in your system with the help of the following steps.
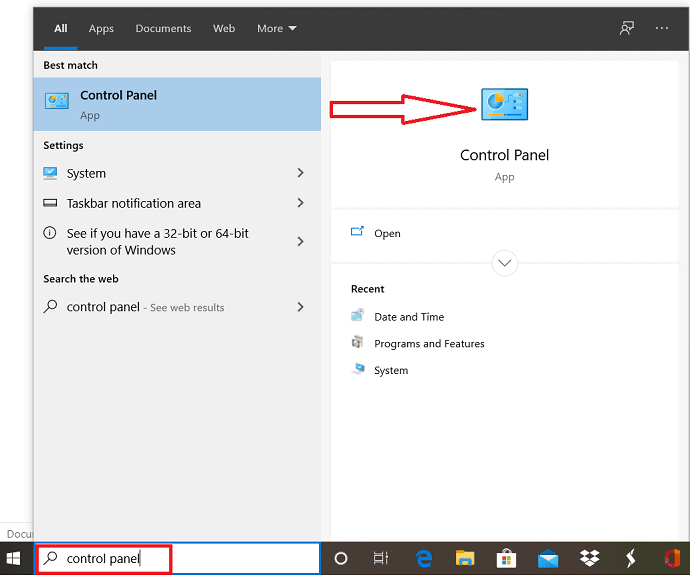
Step:1 Open the control panel app by searching from the task bar.
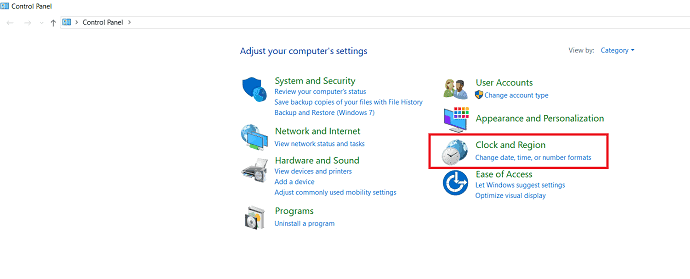
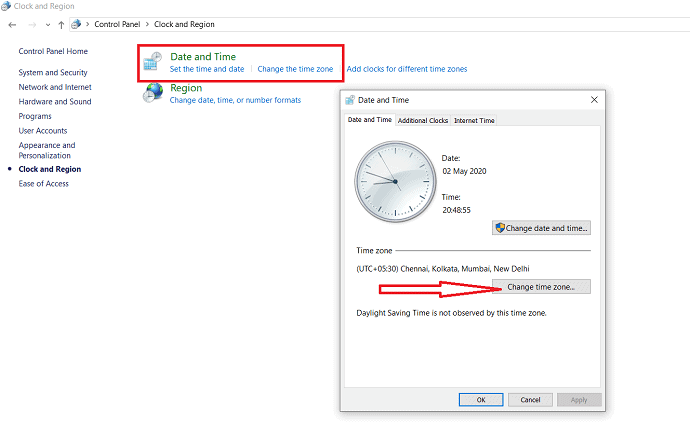
Step:2 Control panel window is opened and select clock and region.
Step:3 Click on Date and Time under the clock and region window. select the change time zone option in the date and time dialogue box.
Step:4 Then Time zone settings dialogue is displayed. select your desired time zone from the time zone drop-down box.
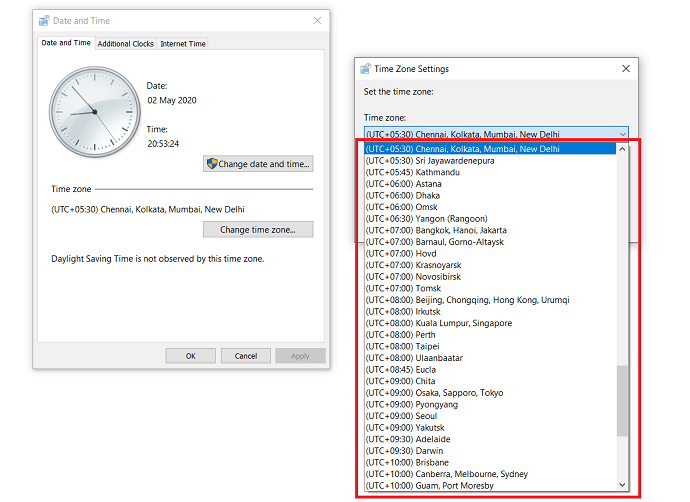
Step:5 Finally click on “OK” to update your system with the new time zone.

- Also read: How to show or hide desktop icons in Windows 10
- 3 steps to change the desktop icon size in Windows 10
3.Conclusion: Which is the best methods to Change the time zone in Windows 10
In this tutorial, we have explained several methods to set the time zone. By using the given guidelines for each method you can change the time zone in Windows 10. Among the five methods, it is better to use both manually and automatically to set the timezone because it has only 3 steps.
Now, I think you can change the time zone of the system easily using the directs given in the article.
I hope this tutorial helped you to change the time zone in Windows 10. If you like this article, please share it and follow WhatVwant on Facebook, Twitter, and YouTube for more tips.
4.How to change the time zone in Windows 10? – FAQ
How do i change the time zone on my computer?
You can change the timezone on your computer by using any one of the method explained in the above article.
Can windows automatically adjust time zone?
yes. You have the option to adjust the timezone automatically in windows using settings. The processes is explained above.
How does set time zone automatically work?
“Set time zone automatically” changes the time zone of the system when you move to other zone.