
Do you want to use Windows movie maker on WIndows 10? This article gives you information on how to use Windows movie maker on Windows 10.
Before you are going to know the use of window movie maker on windows 10, make sure that you have windows movie maker on your PC.
1. What is a windows movie maker?
Windows movie maker is one of the Best video editing software for Windows. Windows movie maker is used to edit video clips or images by adding music, animations, and voice over. Finally, you can make your video more beautiful with animations and visual effects. The created and edited movie can be posted on One Drive, Facebook, YouTube, Vimeo, and Flickr.
You were getting Windows movie maker on older versions on Windows. But you will not get it on Windows 10. If you want to use it, you need to download the Windows movie maker from here.
Hint: If you need the professional Video editing features, you need to go with anyone of the Top Professional Video editing software. We suggest Cyberlink PowerDirector.
2. Use Windows Movie Maker on Windows 10?
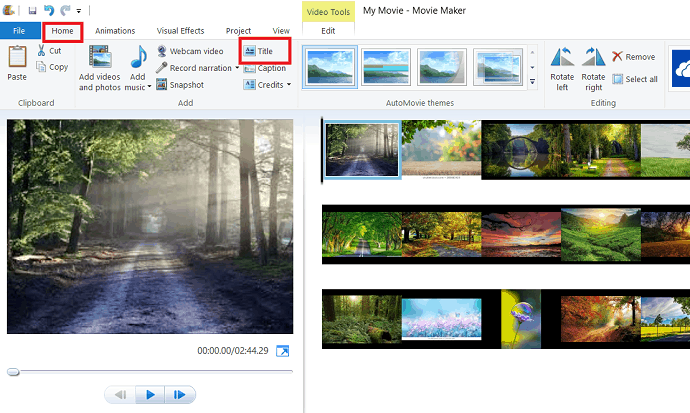
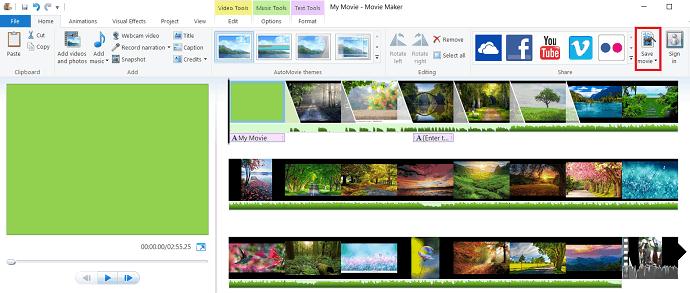
click on windows movie maker icon on your PC to open the screen. The windows movie maker screen has four regions which are used while creating a movie or editing a video.
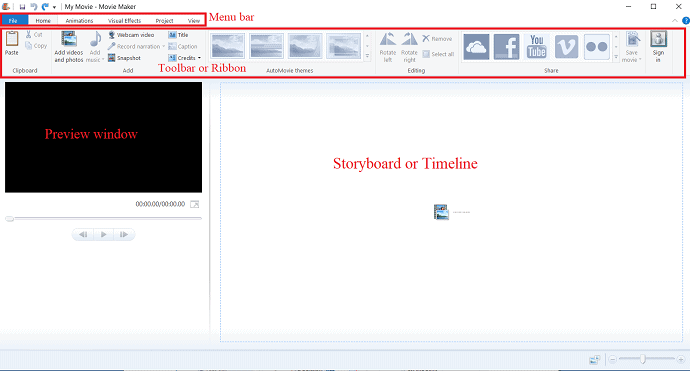
The top of the screen is the Menubar which consists of different Menus like File, Home, Animation, Visual effects, Project and View.
Below the Menubar, there is a toolbar or Ribbon where you can access the various editing tools such as transitions, visual effects, adding videos and photos, adding music, auto movie themes and so on. There are also share icons that are used to share the video after the completion of editing or creating.
Below the Ribbon and to the left of the screen is the preview window. The function of the preview window is to preview all the changes made in the movie. So you can view it as you edit.
The right of the screen and beside the preview window is the storyboard or Timeline. It displays the video clips, images arranged in the sequence and the effects added to that. It is the location of your video sequence.
2.1 How to add photos and videos?
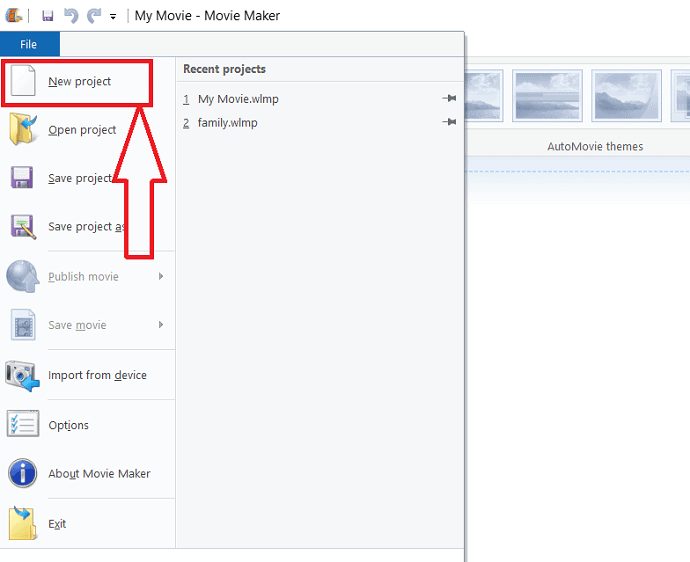
open the window movie maker software. To create a new movie/project, click on the file in the menu bar and select a new project from the list.
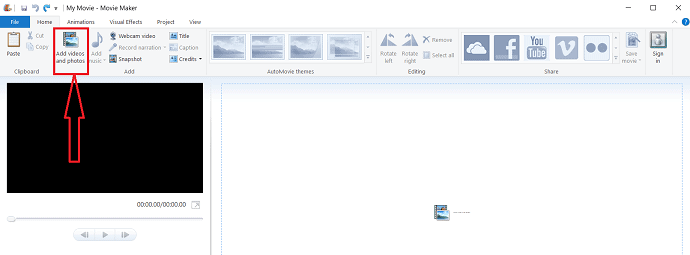
you can add photos or videos to the timeline in two ways. One is to select the”Home” menu and then tap on “Add photos are videos”.
Another way to add photos to the timeline is simply double tap on the storyboard or timeline.
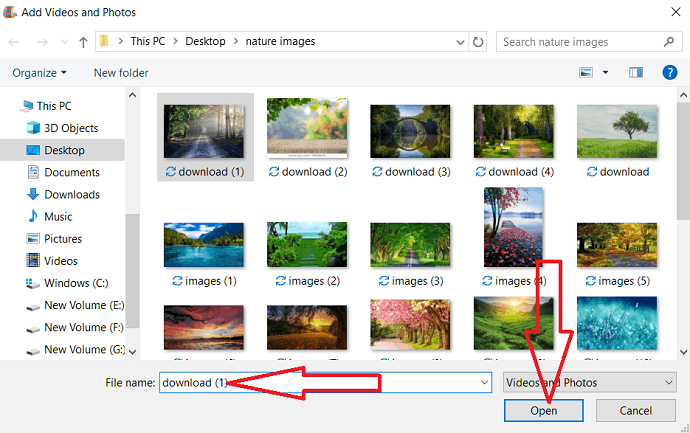
In the Add videos and photos dialogue box select your desired photos or videos from the folder. Name of the selected photo or video copied in the “Filename” bar automatically, then select “open”.
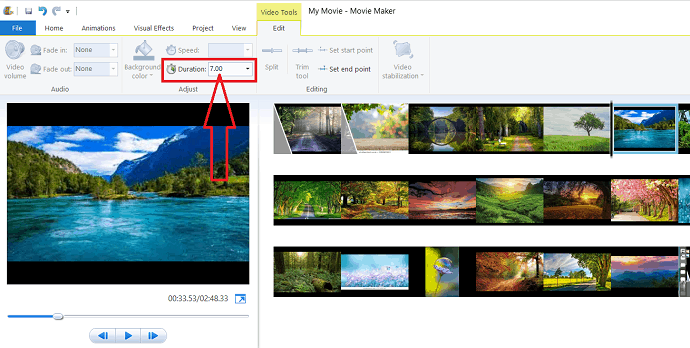
The photo or video will be displayed on the timeline. select “Duration” under edit option which appears in the menu bar after selecting the image. Then set the duration of the image. If you want to select multiple, then use the ctrl option from the keyboard.
you can also import video from devices like camera and other to create a movie.
After adding videos or photos to the timeline, you want to decide which comes first. you can re-arrange the photos and videos in your desired order simply drag the file and move to the location where you want to place it. Make sure that the images are in the desired order or not.
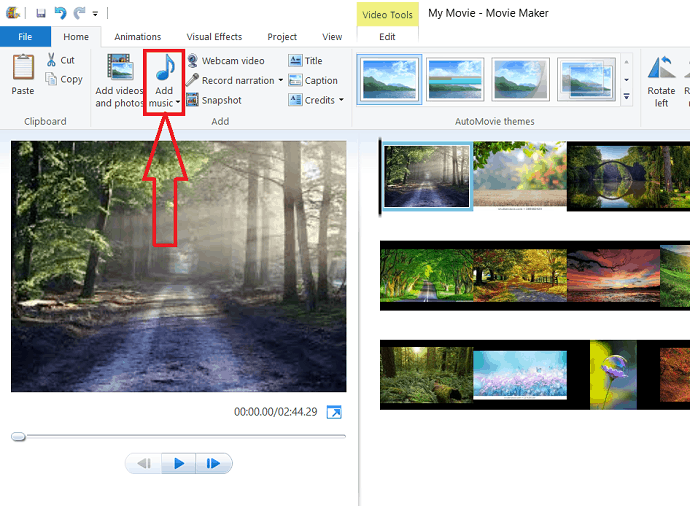
2.2 How to add music?
Click on “Add music” under the Home tab.
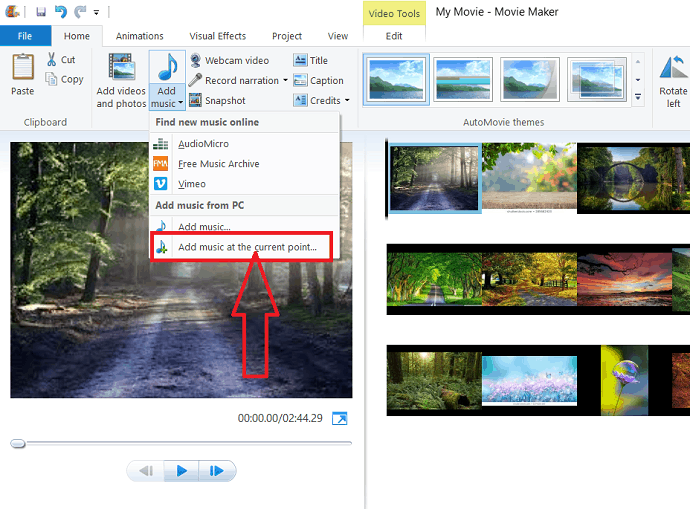
you have two different options like “Find new music online” and ” Add music from PC”.
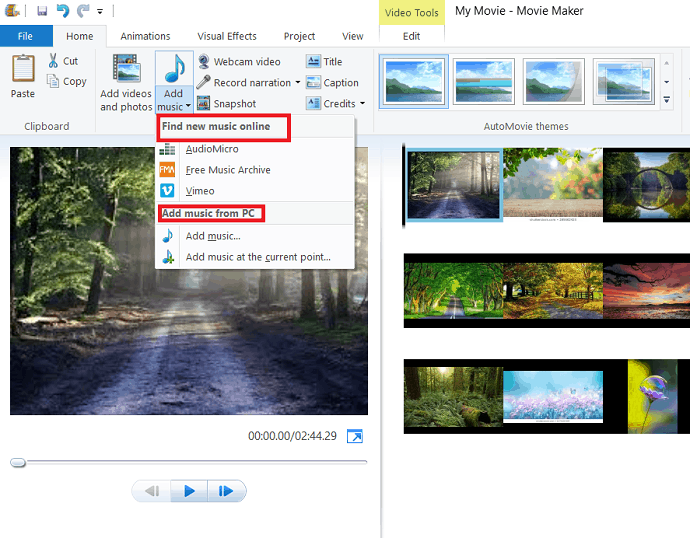
you can select music from either of the two options. Under “Add music from PC” you have “Add music to the current point”. Select “Add music to the current point” which adds music that starts at the current point in the project. you can add multiple Music to the video with the help of this option very easily.
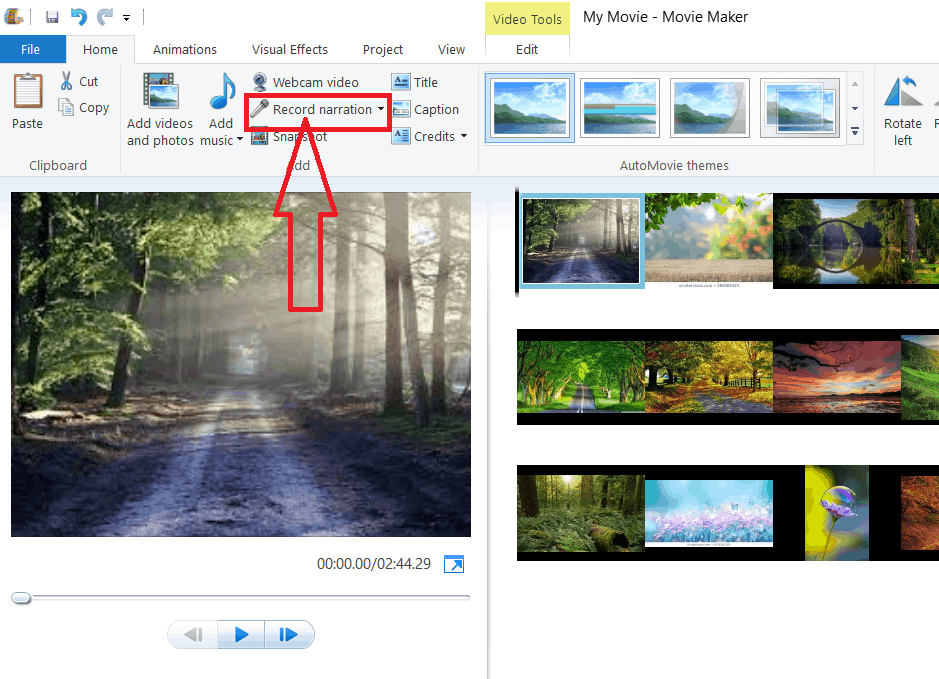
if you want to add your own voice to the video, then select “Record narration” besides the Add music option.
2.3 How to add and remove Animations and add Visual effects to video?
2.3.1 Adding Animations and Visual effects
Adding Animations and visual effects to your video/movie gives extra beauty to your movie/video. it is very simple work.
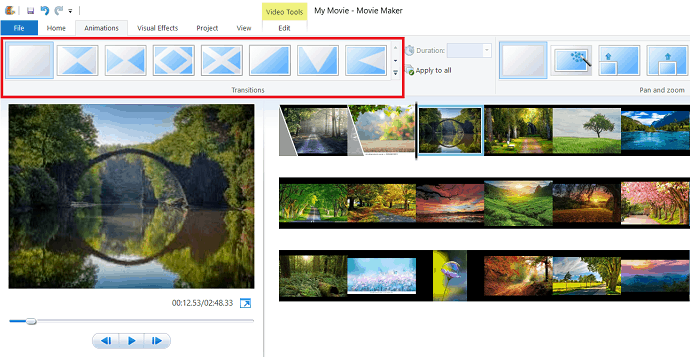
Select “Animation” beside the home option, Animation dialogue box displays with several options like “Transitions” and “Pan and zoom”. you can use any of those.
Select the clip where you want to add a transition. Hovering your mouse on the specific transmission, it displays in the preview window. Decide which transmission you want to add to your clip and click on that transmission.
windows movie maker has a wide variety of effects to give you a deep set of the visual fair. Select the clip where you want to add visual effects.
Then click on “visual effects” in the menu bar. Hover your mouse on a specific effect to preview what the effect will look like in your movie. Once you find your desired effect then click on that effect, it automatically applies to the clip.
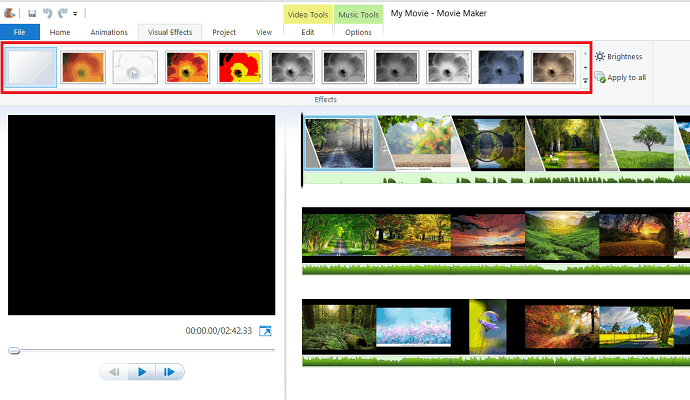
The brightness of the effect is also adjusted by using the “Brightness” option under the visual effects.
if you want to apply the same effect to the entire movie, then simply select your desired effect and click on the “Apply to all” option which at the right bottom of the ribbon under “visual effects”.
2.3.2 Removing animations and visual effects
Removing animation and effects is as simple as adding them. The process is the same for both removing animation and effects. First, select the image/ video one having transmission or visual effect. Select the animation tab on the menu and then select “No Transmission” which is at the starting in the transmission section. similarly, Select the visual effect tab in the menu and then click on “No effect”.

2.4. video editing tools
Double Click a video in the timeline to display the video editing tools on the ribbon.
2.4.1. video volume
In this video editing, you can change the volume of the video by selecting “video volume”.

2.4.2 Fade in & Fade out
There are two more options to make changes in the audio. They are “Fade in” and “Fade out” which are used to fade the audio in or out at the beginning or end of the clips to create a more polishable video.
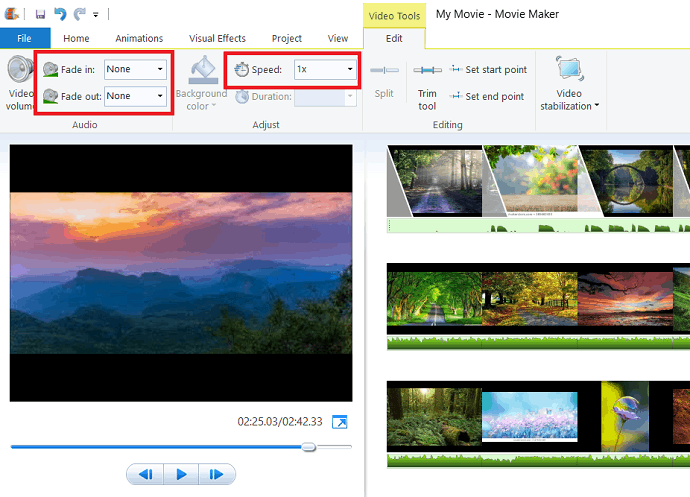
you can change the speed of the video by selecting the speed in the “speed” option under video editing tools.
2.4.3 Trim tool
Trimming clips in your sequence is a worthwhile tool. windows movie maker makes it easy.
Click on the Trim tool under the video editing tool.
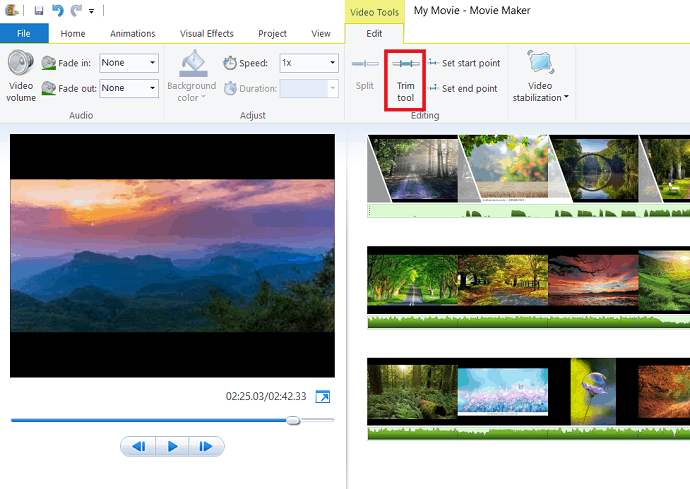
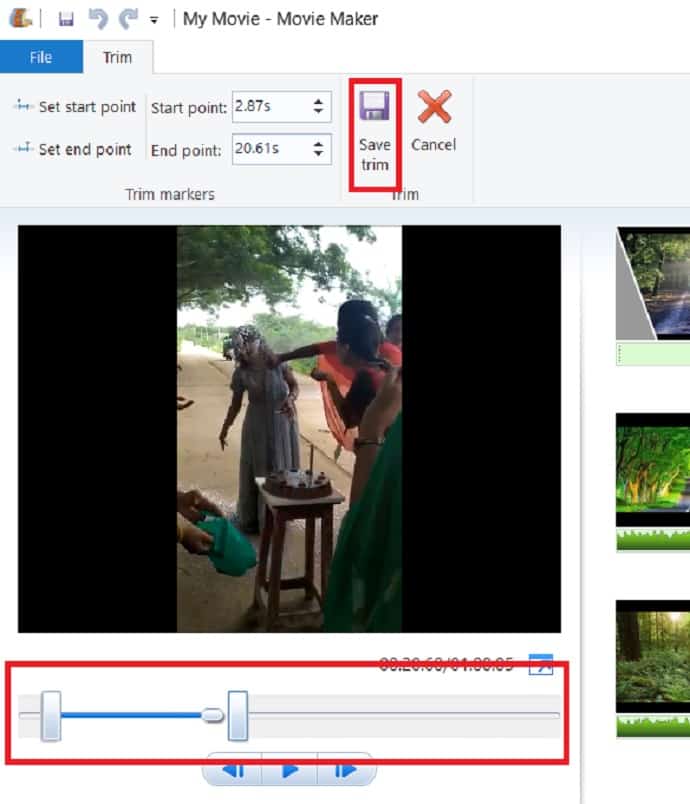
The trim tool dialogue box will be displayed, set the starting and ending point of the video in the preview window. Then it removes the unwanted part from the start and end of the clip. Finally, click on the “Save trim” option. The trimmed video automatically adds to the timeline. The trimmed part does not delete, rather it just hides during playback.
2.4.4 Split video
In your video sequence drag the black cursor or play the video and click stop where you want to split the clip. Then click on the “Split” option. Now the video clip was split into two separate clips at the exact time which you have chosen.

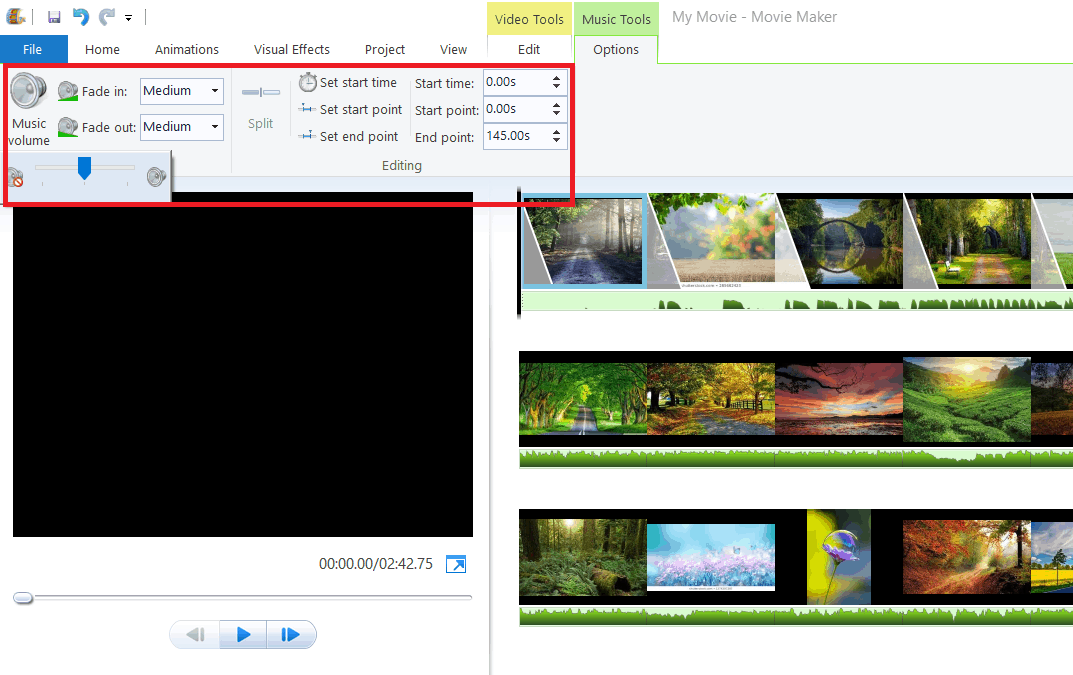
2.5 Music editing tools
Click on the music to display the Music tools options. Under Music tools options you can adjust the volume of the movie simply by selecting the Music volume.
set the starting point of the music by moving the cursor on the movie sequence and select the “set start point”. Similarly, select the “Set ending point” to set the ending point of the music by moving the cursor.
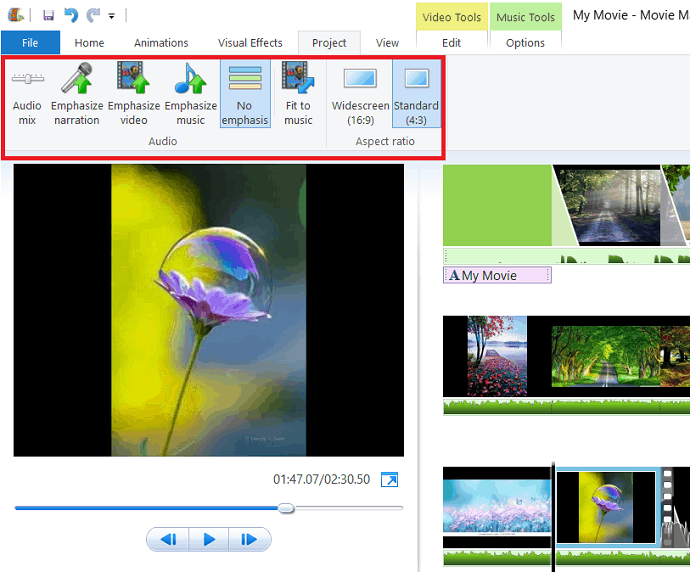
Under the project tab you some more options which are used to emphasize the audio. Emphasize narration is used to make the narration louder than the video sound and music. Emphasize video is used to make the video sound louder than the narration sound and music. Emphasize music is used to make the music louder than the video sound and narration sound.
Fit to music one of the useful option to adjust the photos and music end at the same time. When you select the “Fit to music” under the project tab it automatically adjusts the duration of the photos so that the music and the photos end at the same time.
2.6 Add Title, caption, and credits
Adding Title, Caption, and cretins make your video more authentic and showcase the persons who worked for production.
2.6.1 Add title
Click on the clip where you want to add a title or Place the cursor at the starting of the movie and select “Title” under the Home tab.
The title dialogue box displayed as shown in the below figure. you can change the type and size of the font by selecting the options under the Font.
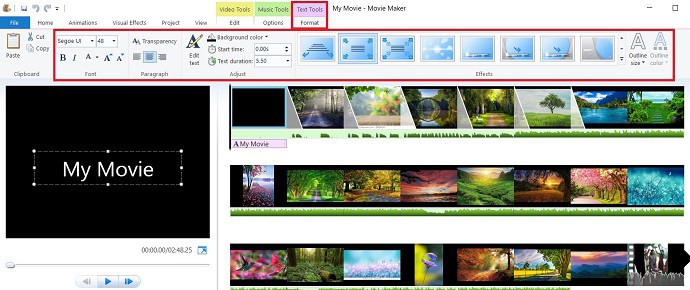
you can also make changes like changing the background color, setting the time duration of the title on the screen and adding effects to the title simply by selecting the option which performs the specific operation. These changes give extra beauty to your movie.
2.6.2 Add captions
If you want to add a caption to the clip, select “caption” under the Home tab. You can make changes like changing the type, color, and size of the text. background-color, the time duration of the caption and effects to the caption by selecting the specific option.

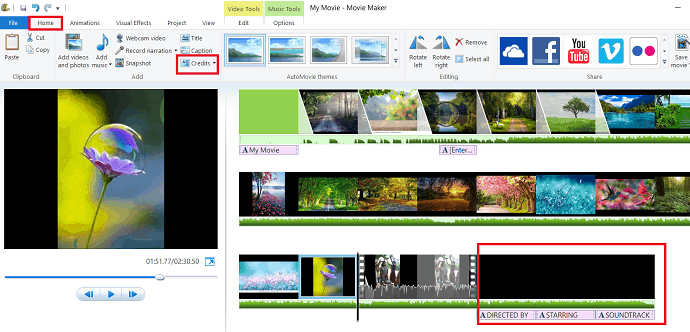
2.6.3 Add credits
Finally, you want to add the credits to showcase the persons who worked for the production. under the credits, there are several categories like director, starring, soundtrack, location. you can add credits simply by selecting the “Credits” under the Home tab. These credits are added at the end of your movie.
After completing the creation of the movie with all your desired effects click on “save project” or “save project as” and save with the name whatever you want.
- Read: 5 ways to fix Restart to repair drive errors on windows 10
- 3 ways to reset windows 10 password
3. How to publish/share the created movie/video?
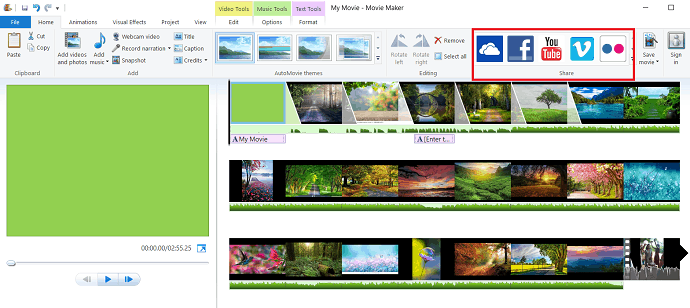
Once you have given the final touch to your movie it’s to share your finished movie on different social media like Facebook, Vimeo, YouTube, Onedrive and Flickr. you can save your movie on your computer with the recommended settings of the project or click the dropdown box to choose the different settings.
3.1 Publish on social media
Click on the Home tab, you observe share icons at the right of the ribbon. Select your desired social page where you want to share your movie and select the quality of the movie. Windows movie recommends the best quality for each site. Before publishing the program require to sign in to your Microsoft account and the social media where you are going to publish.
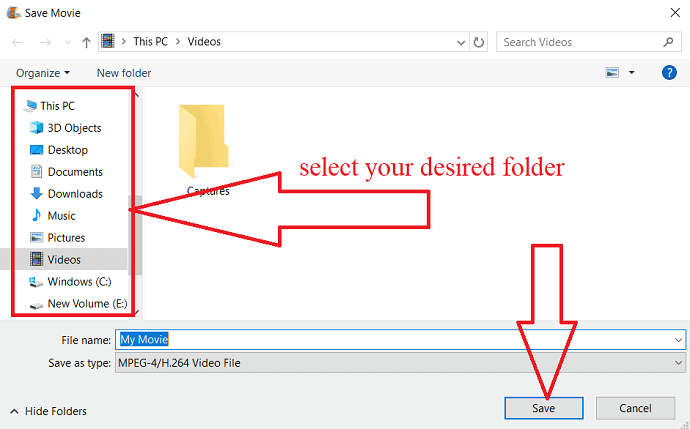
3.2 Save into computer
You can save your movie instead of posting it on social media. It is as simple as you think, just click on the save video option which is at the right of the share section under the Home tab.
save option recommend some settings to save your movie, to avoid those recommendations just double tab on the save movie option. Save movie dialogue box will be displayed. select the location where you want to save your movie, then click on save.
4. conclusion
After the completion of reading this article, you can feel that creating a movie/video with the combination of images and videos or individually is very easy. By using this windows movie maker you can create your own video/movie with more beautiful effects and animations with the help of this article.
I hope this tutorial helped you to use windows movie maker on windows 10. If you like this article, please share it and follow WhatVwant on Facebook, Twitter, and YouTube for more tips.
Windows Movie Maker on Windows 10 – FAQ
What is Windows Movie Maker?
It is a Movie creator or Video editor for Windows.
Does Windows 10 has Windows Movie Maker built in?
No. But you can install it.
What is the cost of Windows Movie maker?
It is a free software.