
Want to resize images online? Want to compress images online? Resizing and compressing are different. In this post, you will be going to learn how to resize and compress not one but multiple images online quickly. We researched about 30 online image editing service providers and filtered out the best methods for you.
If you want the offline methods,
What is image resizing
Image resizing could have multiple meanings. It is a matter of fact what you want to achieve. Maybe you want to scale up the dimension of your image, or perhaps you want to reduce the image’s storage size.
Type of Image resizing
Resizing Image Pixels
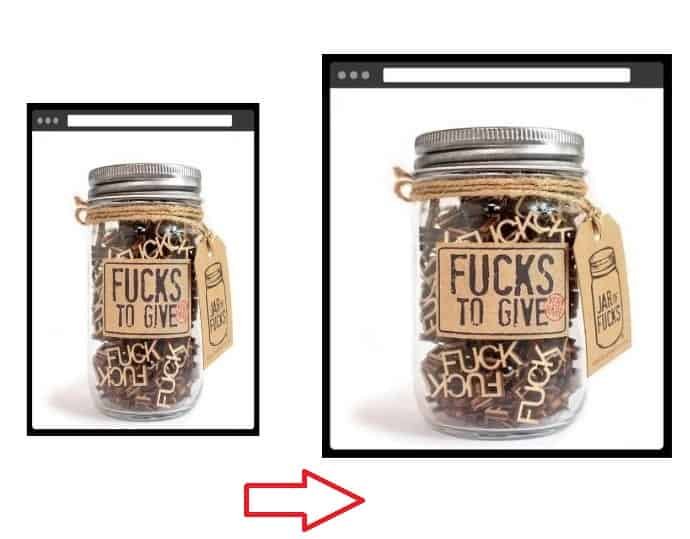
This is the type of image resizing in which you just want to increase or decrease the physical dimension of the image or say pixels dimensions. (For example, 1366*768 to 1920*1080)
Resizing Image Size
This is the type of image resizing in which you don’t want to scale down or scale up the pixel dimension of the image but only want to reduce the image’s storage space. This type of image resizing is also called an image compression technique. When you want to upload a large size image on a platform where the image size is a limitation, it is advantageous.
How to Resize Images online by resizing the Pixel dimensions of an Image online without losing a quality
Under this section, you will find methods that help you scale up or down the image by keeping high quality.
If you want only to compress or reduce the image’s storage space, refer to the next section.
Method 1: Using Adobe Photoshop Express – The online version of Photoshop
Adobe Photoshop Express is the lite version of Adobe Photoshop. From simple resizing to cropping now, you don’t need to purchase an entire photoshop. This is on number one in the list because of its image quality retaining technique. It can almost work as an offline photoshop does. Apart from resizing, it can offer the most common daily use tools that a user could use along with image resizing.
Online Adobe Photoshop Features
- Image resizing can be done manually by entering a custom width and height pixels, or you can use X-scale and Y-scale sliders to resize the image based on percentage. For example, a 200% X-scale is telling the photoshop to enlarge the picture’s width by double the size of the actual image.
- The resized image can be exported in two formats: png and jpg. With jpg, you can control the quality of the image to be exported with the slider.
- By tapping on the adjust image button: You can apply different kinds of effects to the image, including high contrast, Vintage, b&w, high sharpen, etc.
- This free version of photoshop also has a separate tool for removing the background.
- Crop, flip, rotate, and image straightening tools are available to play around.
- The last tool this lite version of photoshop offers is spot healing brush. It is an exceptional and useful tool that helps heal or remove imperfections from the images—Example white spots, pimples, etc.
How to resize image online using Photoshop Lite Or Adobe Photoshop Express
Video Tutorial:
We provided this tutorial in the form of a video tutorial for our reader’s convenience. If you are interested to read, you can skip the video and start reading.
This section will tell you how to Resize image online using Photoshop Lite or Adobe Photoshop Express
Total Time: 2 minutes
Step 1: Open the online Photoshop website
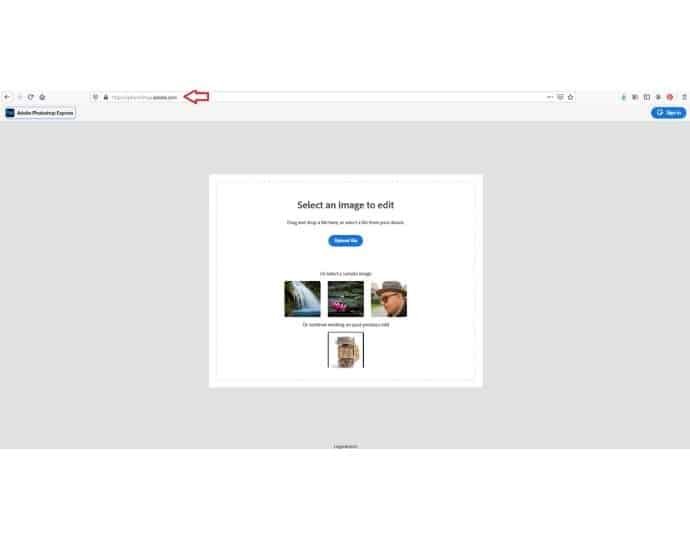
The user doesn’t need to log in or register until unless you want to use the spot healing brush. Prior logging doesn’t require for image resizing. Just Visit Adobe Photoshop Express page.
Step 2: Upload file
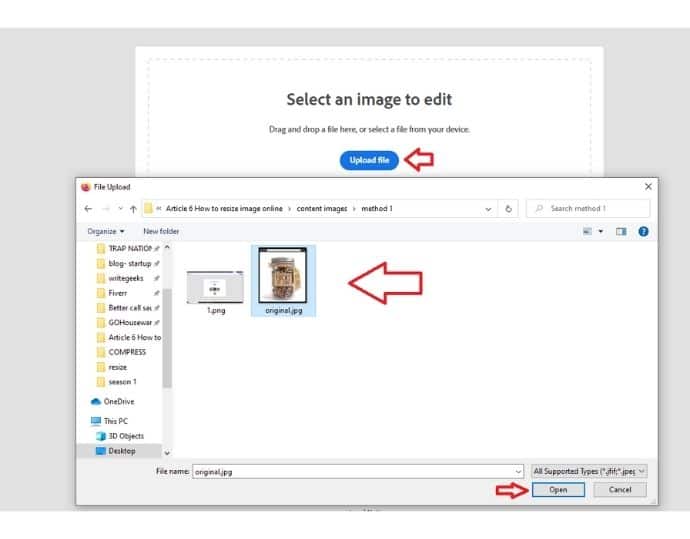
Click on the upload file button and select the image you want to resize.
Step 3: Resize Image
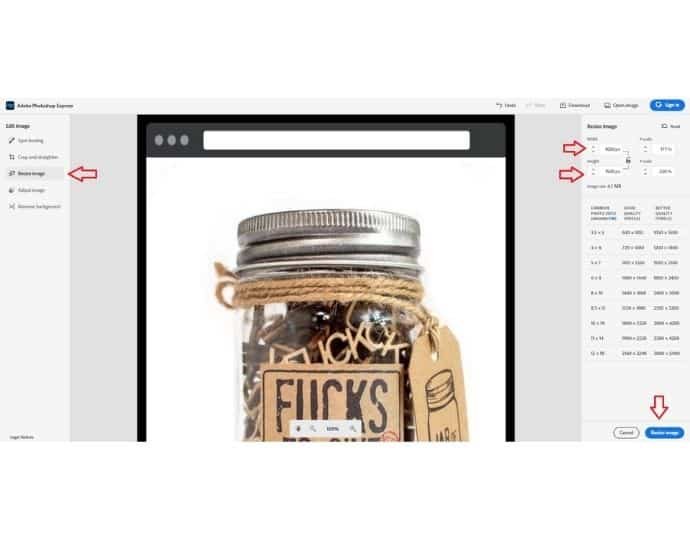
As soon as you upload your file, you will see the different types of available tools on the left bar. Click on resize image and enter the new dimension in the width and height textbox display at the top-right screen. You can also use X-scale and Y-scale to specify new dimensions of the image. After defining the width and height, click on the bottom resize button.
Step 4: Download
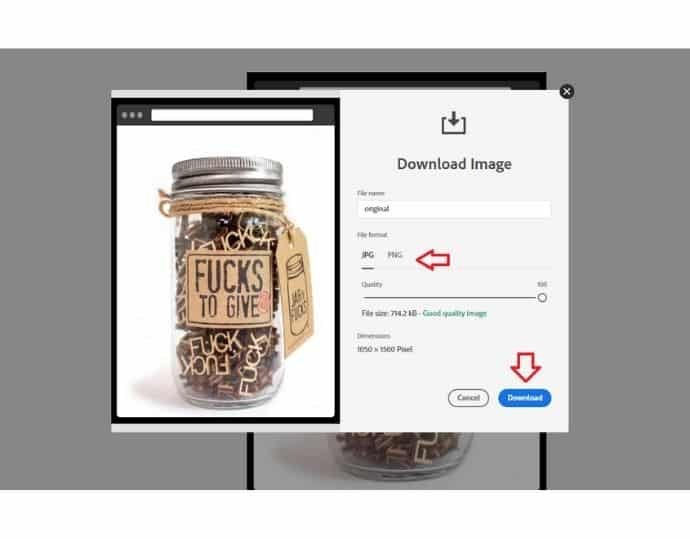
Your image has been resized. Choose an export file format and click on the download button.
Online Photoshop: Pricing & Plans
It is totally free, and you get 3 inputs daily. After that, you need to just sign up for future use.
Online Photoshop Pros
- Best quality because of the Adobe company.
- Multiple tools are available.
- Free of cost.
- It will save your changes even you close the browser accidentally.
- No file size limit.
Online Photoshop Cons
- Sign-up required after 3 attempts.
- Only a single image can be resized at a time.
Method 2: Using Unstop Online Image Resizer
Online Image Resizer by Unstop is a simple, free, and easy-to-use tool that helps you resize the images in any dimension you want. The resized picture can also retain the same proportion of height to width as the original picture (this is called ‘proportional’ resizing). This way, your photos will look good no matter where you share them – on social media sites like Facebook and Instagram, blogs, emails, and websites.
Additionally, they’ve made it easier for you to reduce the size of a high-resolution image or downsize a screenshot. This is especially useful when uploading images that are too large for your blog or web page.
Unstop Online Image Resizer: Pricing & Plans
All the features of the resizer are free of cost.
Unstop Online Image Resizer Pros
- No signup required
- Good quality
- Preset dimensions for all social media platforms
- Free of cost
How to resize an image online using Unstop Image Resizer
The simple drag-and-drop interface makes it easy to resize an image in only 3 steps.
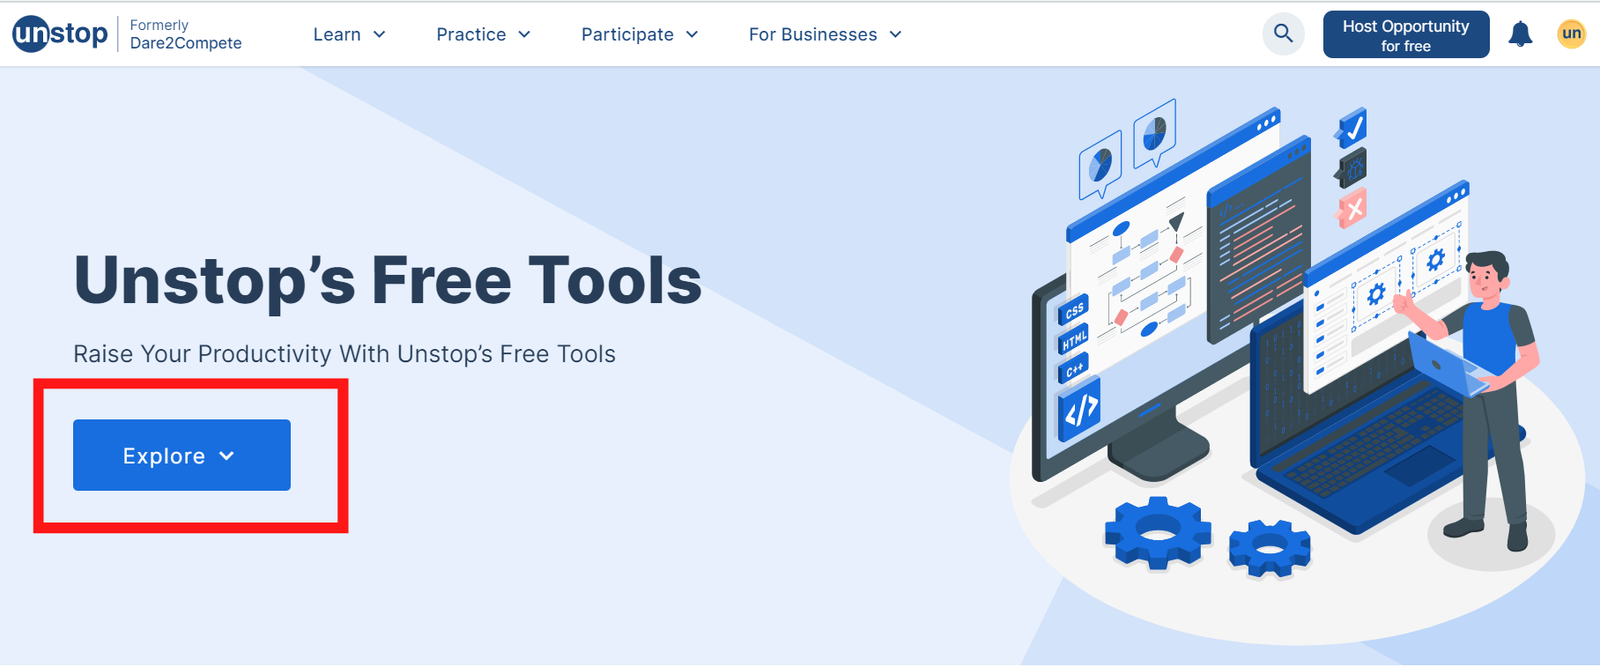
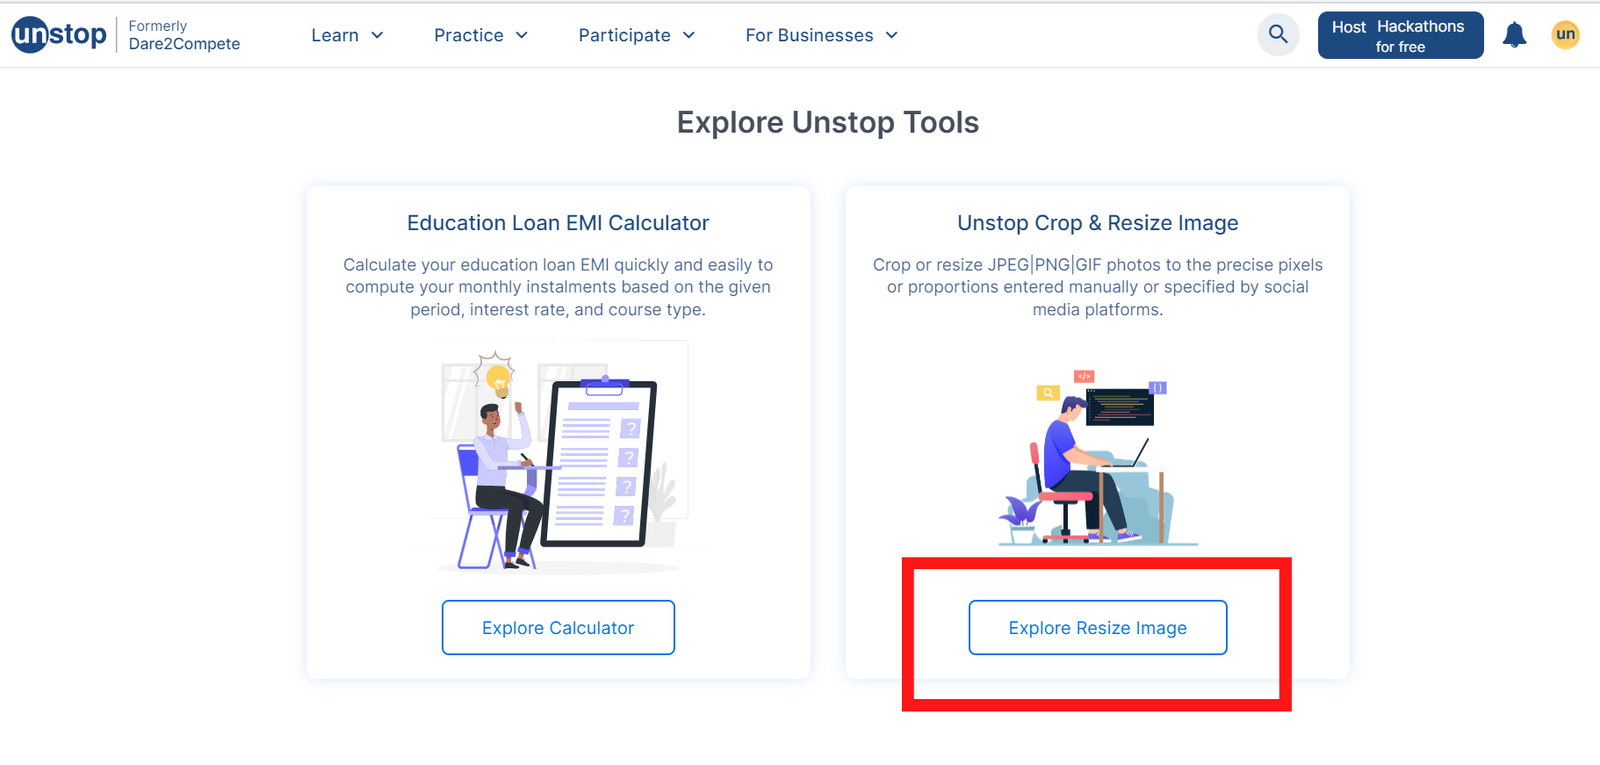
Step 1: Visit https://unstop.com/tools and click on Explore Resize Image
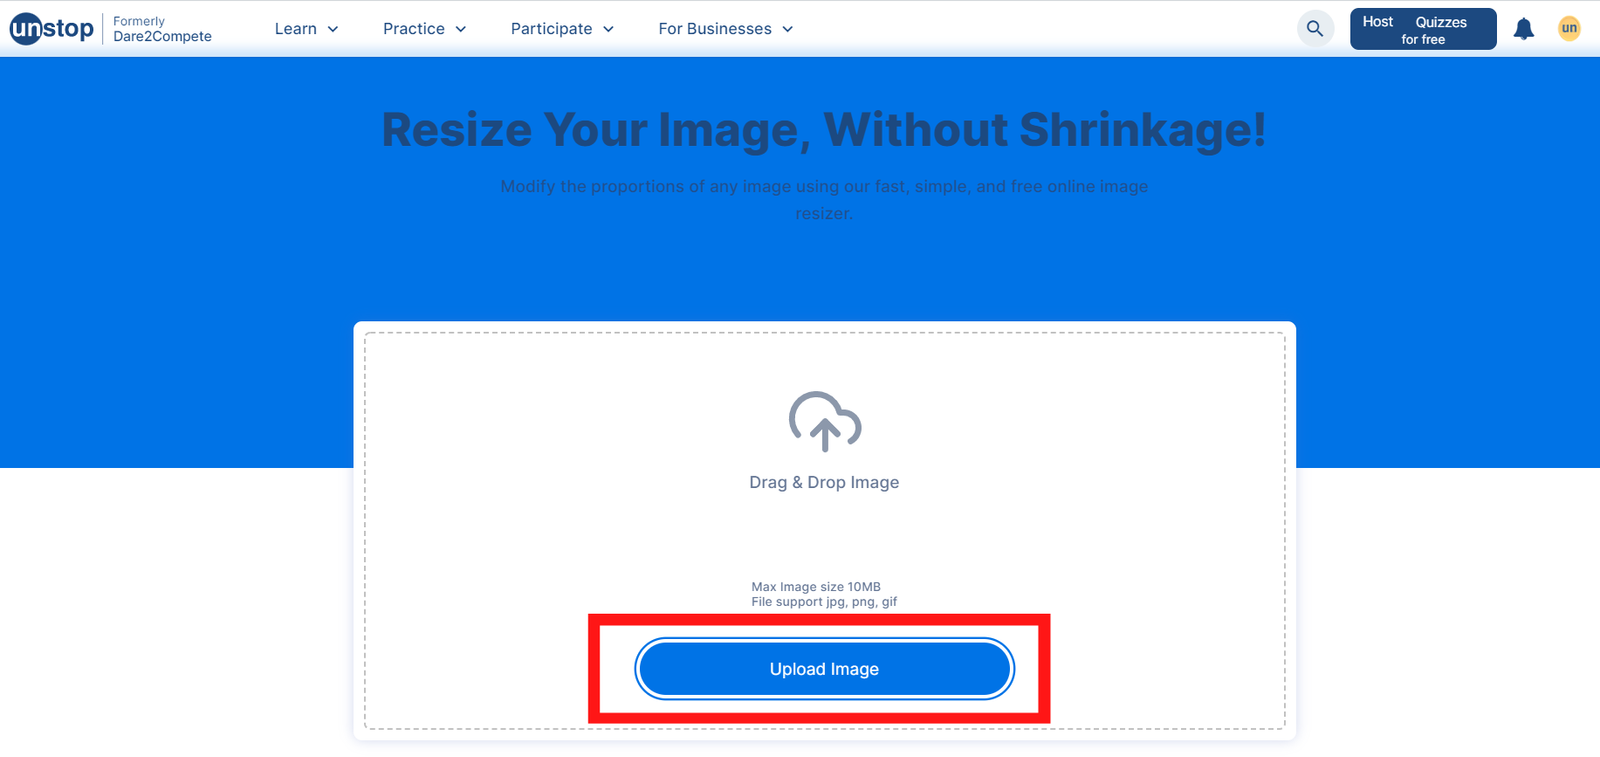
Step 2: Drag your picture onto the drop zone or upload the image
Step 3: Select the tools and the aspect ratio from the editing panel on the right and download (or)
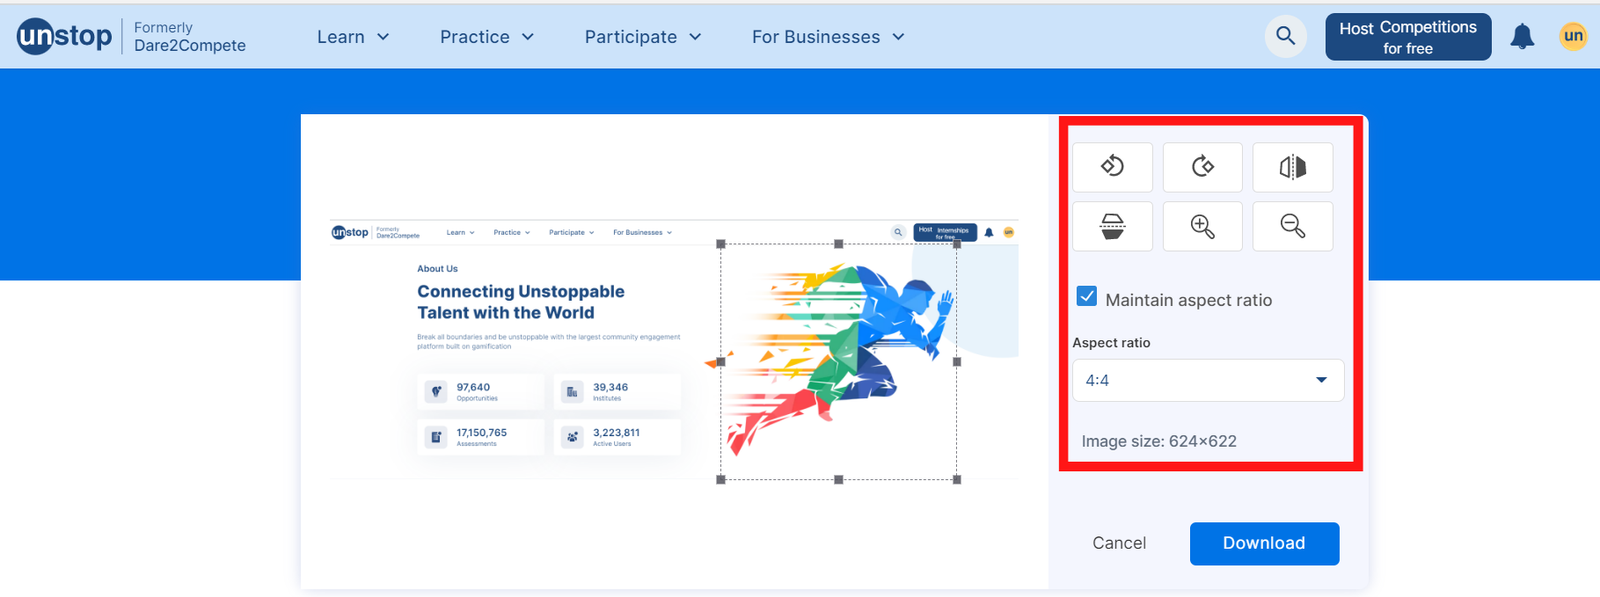
Go through different templates for social media platforms, and edit or download the resized image
Voila! You are image is ready to be shared within seconds
Method 3: How to resize multiple images at once using Bulkresizephotos.com
Bulkresizephotos is a website that enables a user to resize upto 150 images at a time. This is the only website available in the market that can resize 150 photos with a single click. BulkResizePhotos is a simple web application with an easy to navigate user interface. The menu appears on the left side. Different options are available for resizing, including scale by percentage, longest side, height, width, and exact size.
BulkResizePhotos Features
- Resize upto 150 images at a time.
- Inbuilt image conversion is available. You can change your Image into PNG, JPG, WEBP formats.
- This tool uses javascript to perform operations on the images, which means no image will be physically uploaded to any server, which ensures the complete security and privacy of the image.
- Multiple scaling settings are available to configure.
How to resize image online using Bulkresizephotos
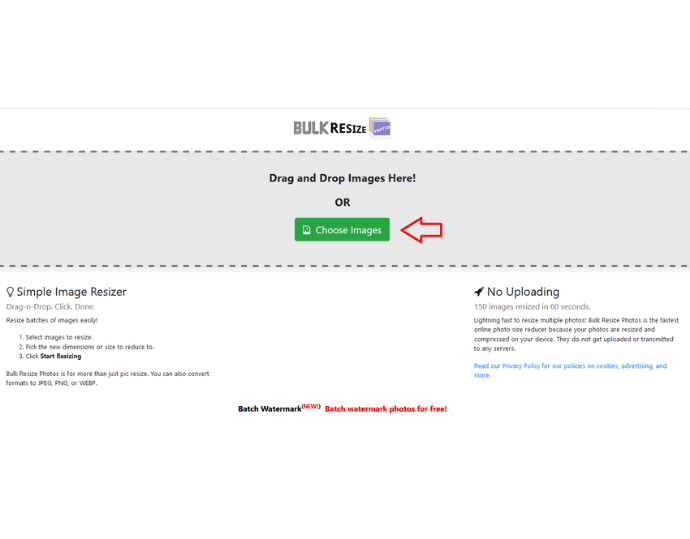
Step 1: Open up the website and click on the choose images button.
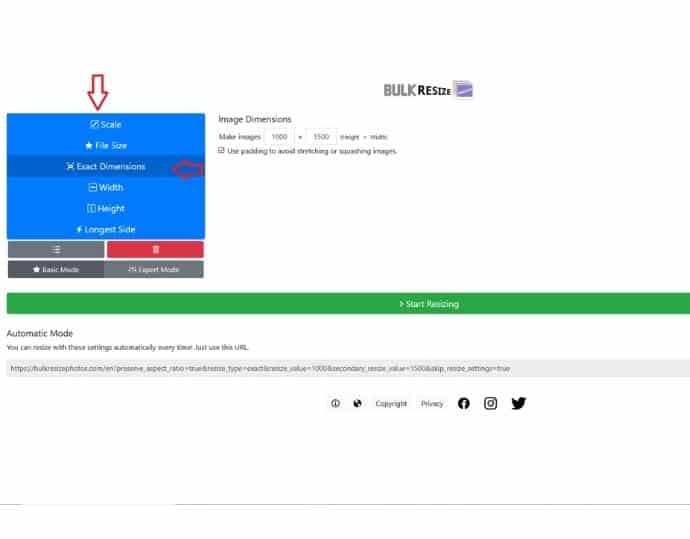
Step 2: After selecting a single image or multiple images, you need to choose the preferred scaling setting. For this example, I am resizing the image by “exact dimension.”
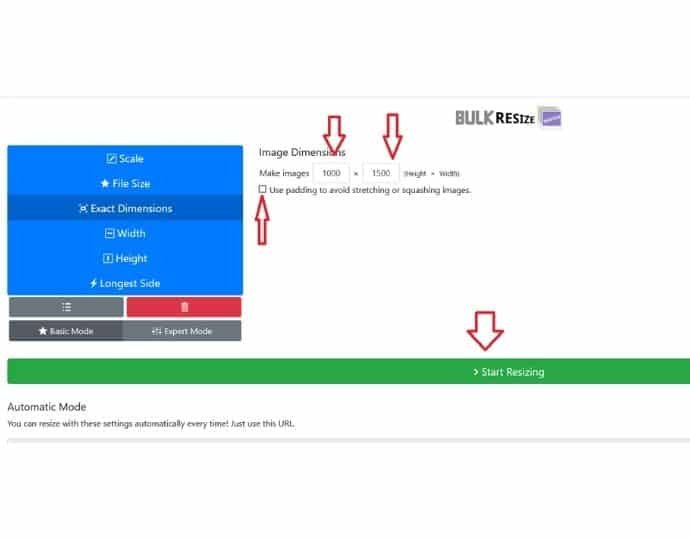
Step 3: Insert a new dimension of width and height. And finally, click on the start resizing button. As soon as the resizing process complete, the resized image will download start automatically.
BulkResizePhotos : Pricing & Plans
This tool is free.
BulkResizePhotos Pros
- Multiple image support
- Image privacy and security support
- Free of cost. No registrations and sign-up required
- Inbuilt image converter support.
- No file size limit.
BulkResizePhotos Cons
Other features such as image editing, cropping, effects are absent.
Related: Resize image on android
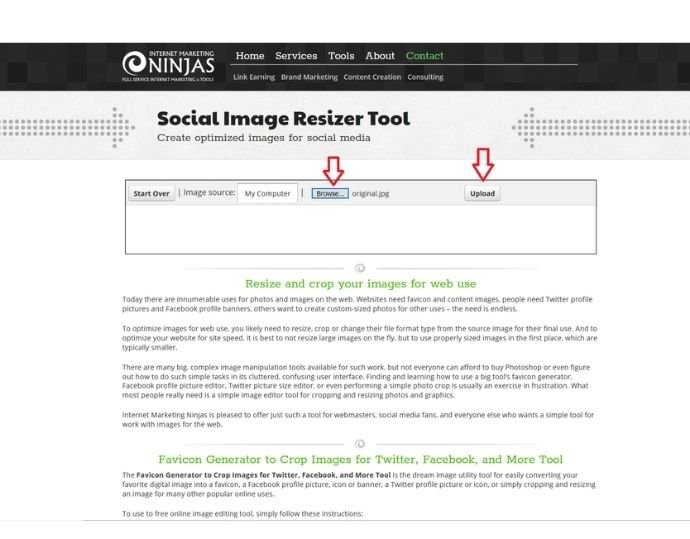
Method 4: Using Social image Resizer
Social Image resizer tool is for those folks who are dealing with social media posts daily. This tool lets you quickly resize your original image to any social media template. Example Instagram post, Facebook post, LinkedIn post, etc. This tool is developed by a company called Internet marketing tools, which mainly involves developing a marketing tool, and this tool is one of them.
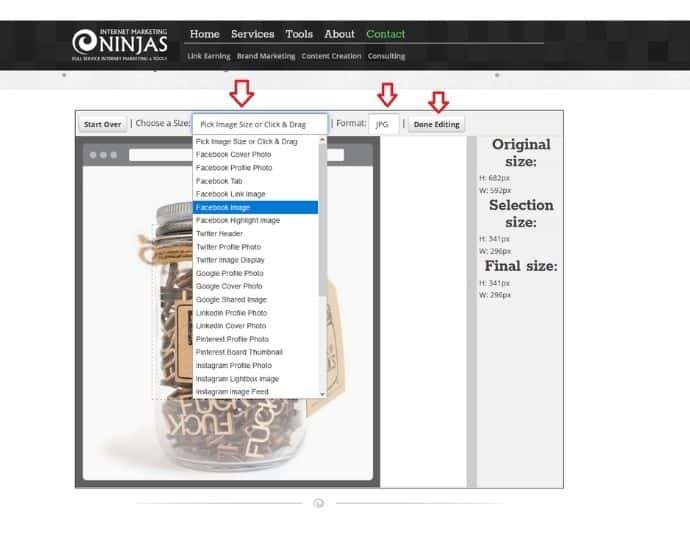
Social Image Resizer Features
- It has multiple options for uploading an image, such as directly from the pc or by the URL.
- Apart from the predefined social media presets, the user can also resize the image to the custom dimensions.
- The output file format supports: JPG, PNG, GIF, and ICO (icon file)
- After finishing resizing, the user can send the resized image directly from the site to other users by entering the email address.
How to resize image online using Social Image resizer
Step 1: Open up the website and upload an image and then click on the upload button.
Step 2: After uploading, specify size from the given presets and select an output image format. At last, click on done editing to start the resizing process.
Social Image resizer: Pricing & Plans
Social image resizer is entirely free service.
Social Image resizer Pros
- Multiple options to upload a pic
- Support every social media platform
- Free of cost
- Support ICO format as an output, which is very rare.
- No registrations and sign up required
Social Image resizer Cons
- File limit: 2MB
- Only resize a single image at a time.
Method 5: Using Befunky Online Editor
Befunky is another image editor, just like the online version of Adobe Photoshop. It offers more features than photoshop. You can perform simple tasks like image resizing, cropping, rotating, smoothing in a free of cost. For more advanced editing features, you need to sign up for their pro plan. Under paid plans, you will get a lot of extra features, including photo filters, effects, touchups, and many more.
Befunky Features
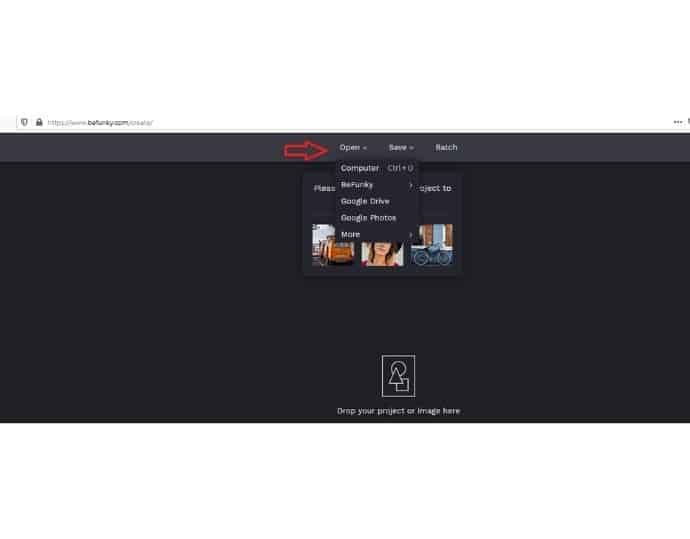
- The user has multiple options for uploading an image to resize, including a local computer, google drive, google photos, stock images, dropbox, or directly through capturing by the device camera.
- Likewise, users can save or share the resized image to one of the options, including a computer, Facebook, Pinterest, Twitter, etc.
- Under the resizing tool, the lock aspect ratio option is given to check or not. This helps to resize the image based on the one input (width or height)
- Just like the photoshop, Befunky allows you to access or restore your last saved session.
- Befunky editor also allows you to make image collage.
How to resize image online using Befunky editor
Step 1: Open the Befunky website and click on open to upload your image from the local computer. You can also drag an image to the editor.
Step 2: Choose Resize option from the left menu
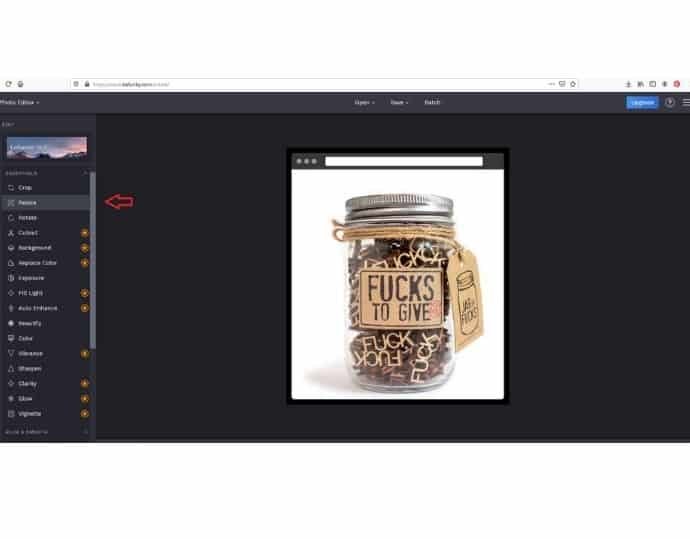
Step 3: Enter the required dimensions in width and height box and click on done to apply the changes.
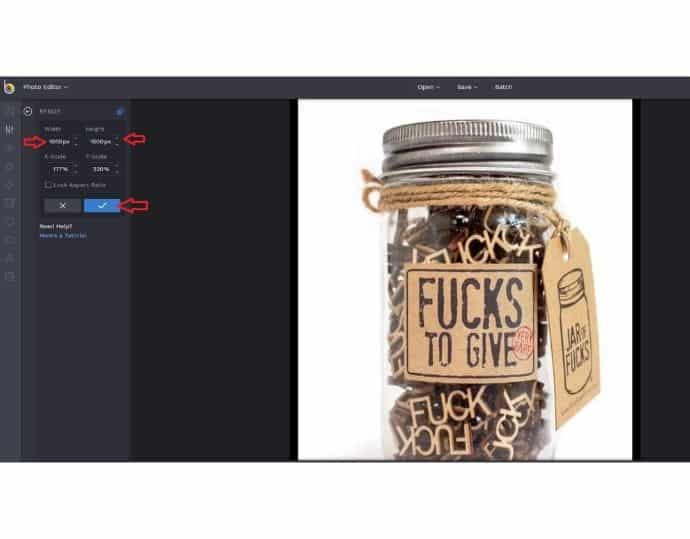
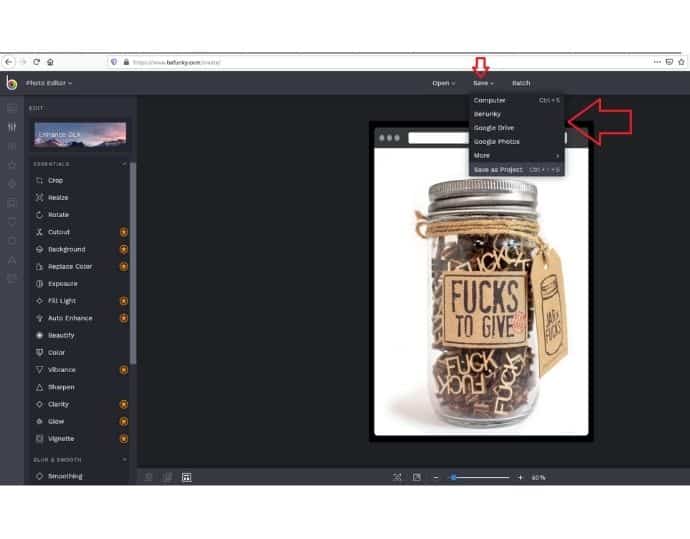
Step 4: Click the save button from the top bar to download the resized image into your computer.
Befunky editor: Pricing & Plans
- Befunky offers its advanced image editing features in two plans:
- Monthly: $6.99
- $4.99
Befunky editor pros
- Multiple language support
- Ability to restore the last saved session
- In a free plan, Befunky editor can able to export images in the pdf file format.
- Multiple file format support, including png, jpeg, SVG, gif, etc.
- No restrictions on file size limit
Befunky editor Cons
Only resize one image at a time. Multiple images support in a premium version.
Related: Best Professional Image Editing Software
Method 6: Using Resizing.app – Chrome Extension
Resizing.app is the last one in the list, and it is unique among all because of its fantastic clean user interface and chrome extension support.
Resizing.app Features
- Resizing.app supports different image formats such as PNG, JPEG, BMP, TIFF, HEIC, GIF, WEBP.
- It has different types of resizing options, including width, height, percentage, largest side, or user-specified custom dimensions.
- Along with resizing, this tool also compresses the exported image based on a user-defined compression level.
- The user can export a resized image in an original format or a converted format. Resizing app can able to export any image in jpg, png, tiff, BMP file formats.
How to resize image online using Resizing.app chrome extension
Step 1: Visit the Resizing.app website and click on Add to Chrome for free
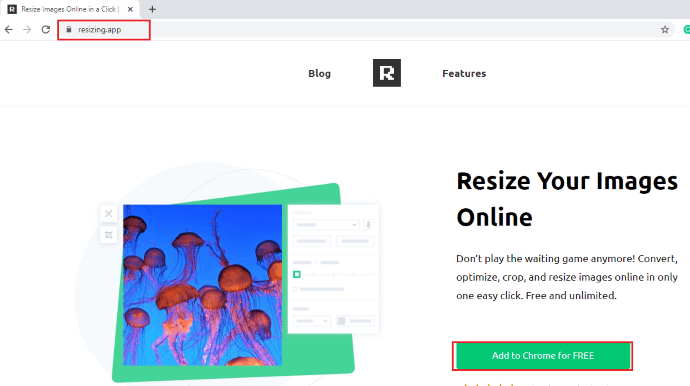
The first thing you need to do is, visit the resizing.app website. In that you can see “Add to Chrome for Free” option. Click on that add to Chrome for free that will enable you to add an extension of resizing app to your Chrome browser.
Step 2: Click on the Add to Chrome option
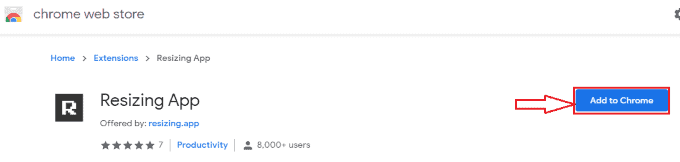
When you click on the Add to Chrome For Free option, then it will open the Chrome web store on new screen. In that you can see the resizing app extension in the extensions section. There you can see Add to Chrome option. Click on that Add to Chrome option.
Step 3: Click on Add Extension option
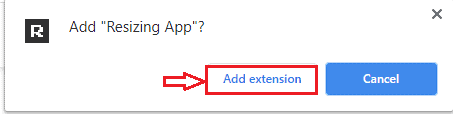
Now it ask you a question that “Add Resizing App?” along with that you can see two options Add extension and Cancel. Click on Add extension option.
Step 4: Click on the resizing app extension
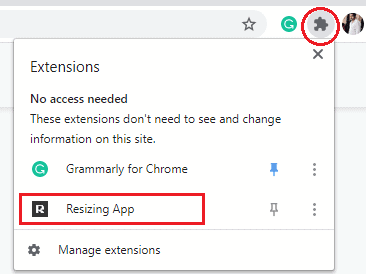
Now at the left corner of the screen, you can see the extensions symbol. In that extensions, you can see resizing app extension also, click on that. When you click on the Resizing app extension then it will open a screen to upload your image. Click on “Click here” option as shown in the below image.
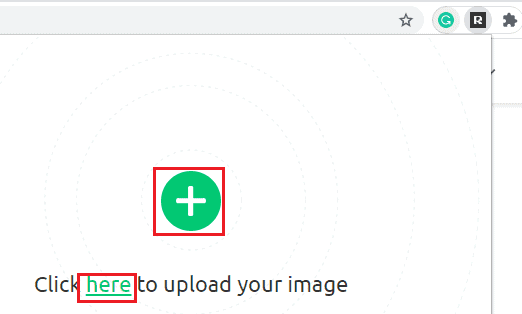
Step 5: Upload image and give the dimensions
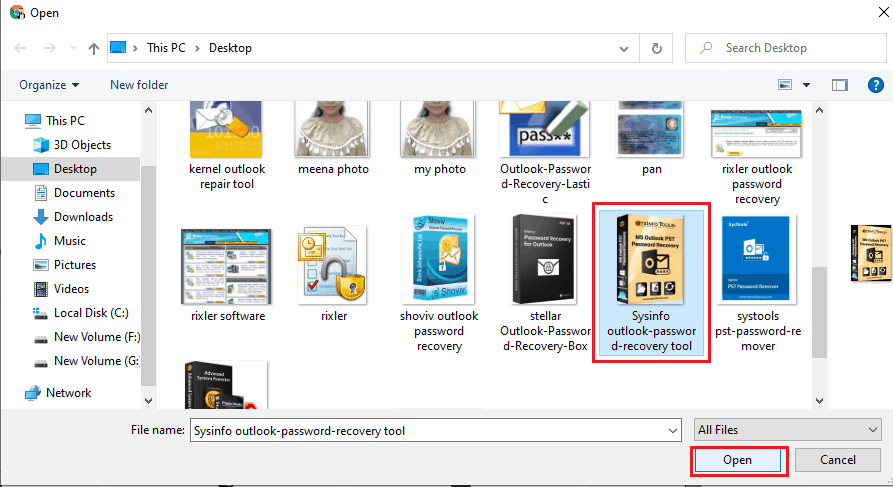
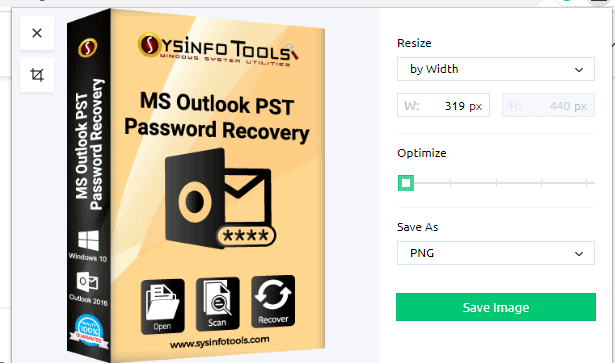
When you click on the “Click here” option then you can upload your picture from your device storage. Select any image, click on Open option. And then in the resize section select “By width” or “By height” as your wish.
In that section, you can see save image option at the bottom of the screen. Click on the Save image option.
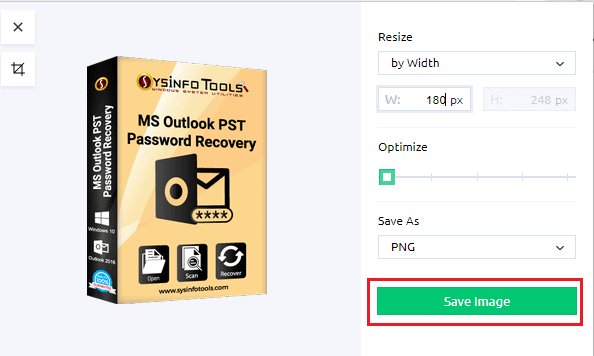
When the resizing process is completed, then it is showing “Completed”. Click on the Open option to view the resized image on the screen.
These are the simple steps to resize an image using the Resize app extension.
Resizing.app : Pricing & Plans
This Image resizing service is totally free.
Resizing.app Pros
- Flexibility and No issue of image privacy or security because this tool works from the chrome extension. No image would be uploaded to their server.
- The bulk image resizing feature is upcoming soon.
- No registration or sign up required.
- Supports compression and conversion
- There is no limit on file size.
Resizing.app Cons
- Only available to chrome extension. Mozilla-addon support is absent.
- Resize single image at a time
- Features such as image rotation, flipping are absent.
7. How to resize images online using Pixlr?
Pixlr is another possible method to resize images online. Follow the below steps to resize the image using Pixlr software.
Step 1: Visit the Pixlr official website
The first and foremost thing you need to do is, visit the Pixlr official website.
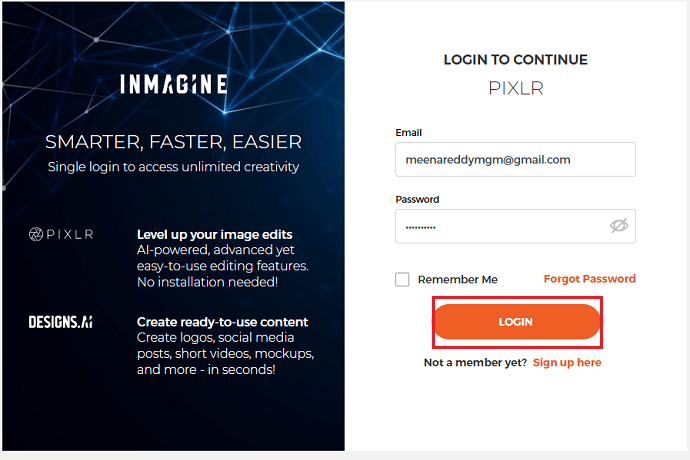
Step 2: Login to Pixlr software
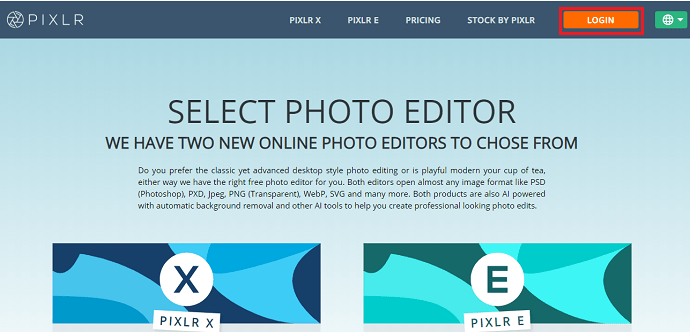
On the official website you can see the “Login” option at the top of the screen, click on that Login option. Then the screen will open the login page. If you have already registered with the Pixlr software, then enter the email and password of the corresponding account and then click on the login option otherwise click on the sign up here option.
If you don’t have account in Pixlr software, follow the below steps.
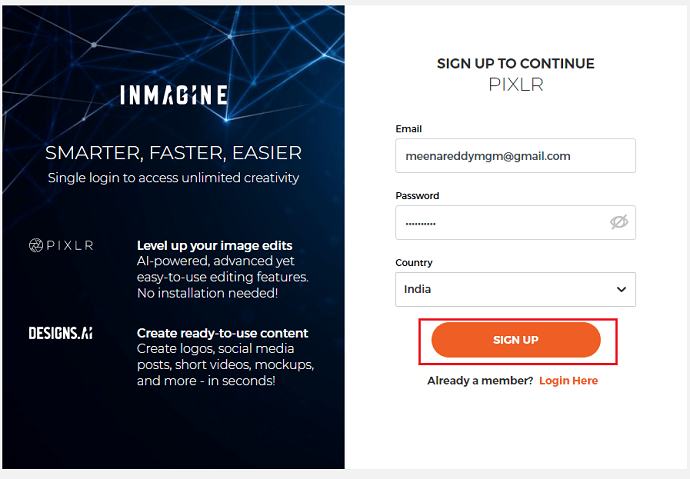
- Click on the Sign up here option, then you can see sign up screen as shown in the below image.

- Now enter the email, password, and select the country and then click on the Sign-up option.
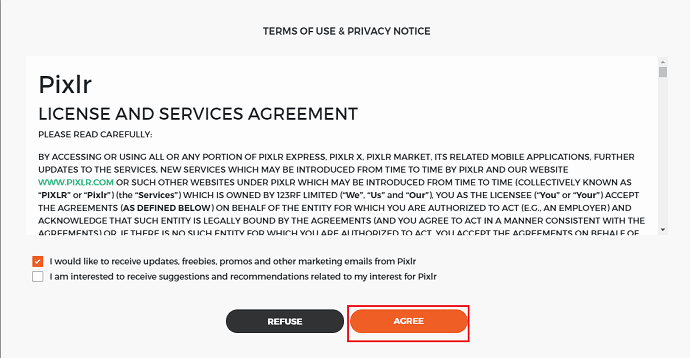
- When you click on the sign-up option, then it shows a screen with “Terms of use and privacy notice”. Read the license and the services agreement carefully and then agree for the license agreement.
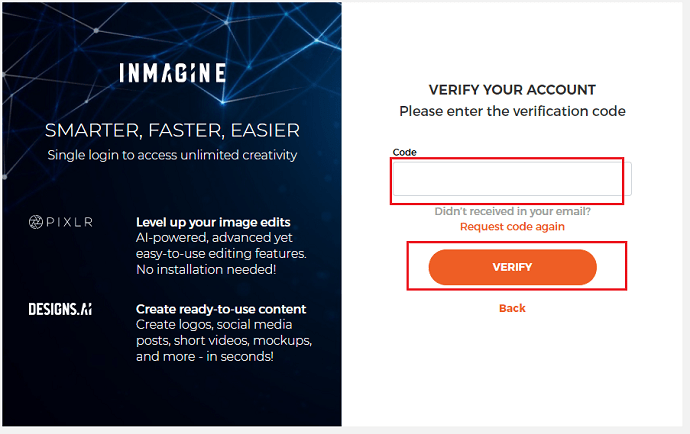
- Verify your account by entering the code, which is sent to the email which you used do sign up. After entering the code click on the verify option which is placed at the bottom of the screen.
- Click on the Login Now option.
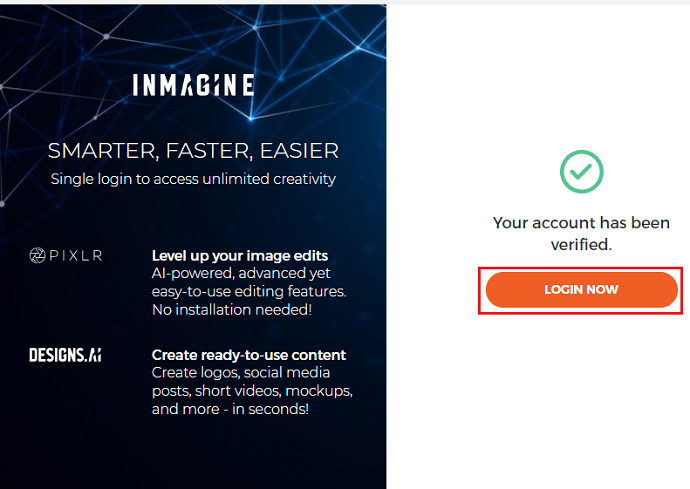
With this, you can sign up for Pixlr software successfully. The login process is the same as above mentioned step.
Step 3: Click on launch Pixlr E
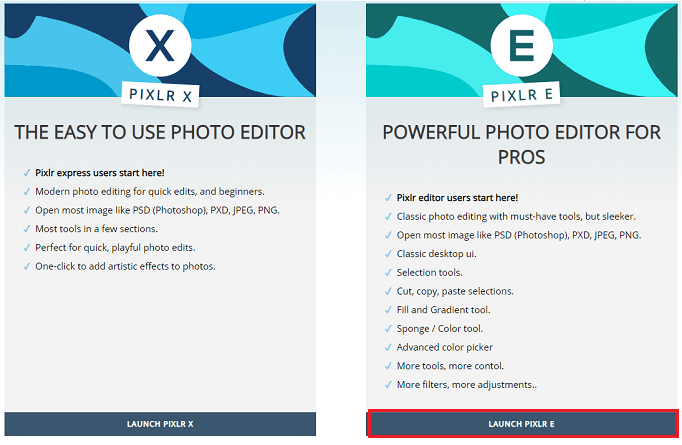
When you successfully login to Pixlr software, then you can see two different types of software for the Pixlr. One is Pixlr X and Pixlr E. Select anyone as you wish. Here I am selecting Pixlr E so click on Launch Pixlr E that means “Powerful Photo Editor For Pros”.
Step 4: Click on open image option and select the image
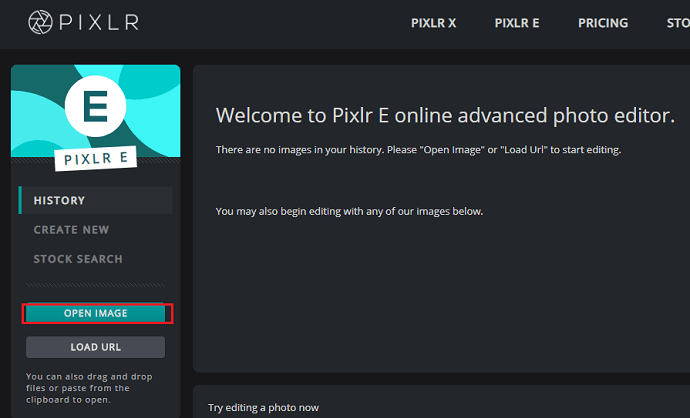
Now the Pixlr E software is open on the screen. In that, you can see an open image option at the right corner of the screen. Click on the “Open Image” option.
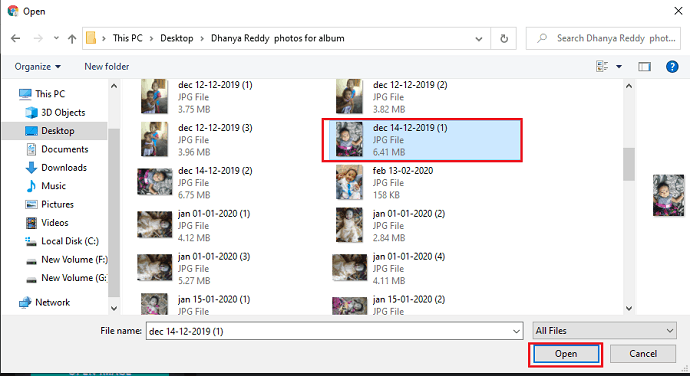
When you click on the open image option then the images on your device will open, select any image as you wish, and click on open option as shown in the below image.
Step 5: Select quality and mention dimensions

Now, it shows a screen with a heading of “Pre- Resize Image”. You need to select the quality of the image here. I am selecting full HD quality.
At the bottom of the screen, you can see the “New size” section for mentioning dimensions for the image. Mention the dimensions as per your requirement and then click on the Apply option at the bottom of the screen.
Step 6: Save the image and view the resized image
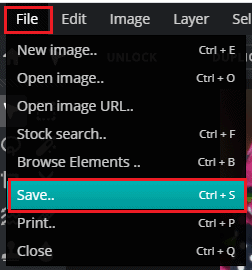
Now the image will be shown on the screen. Here we need to save the image. To save image click on the “File” option at the top right corner of the screen. There you can see some options like New Image, Open image, Open image URL, etc. In those options you can see save option also. Click on Save option.
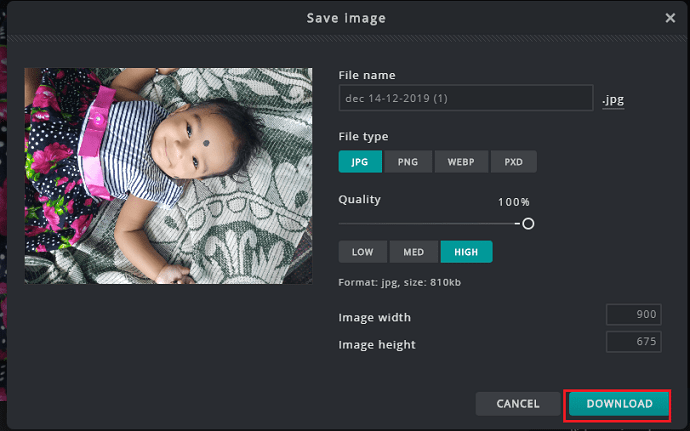
Now you can see the file name and file type on the screen, you can modify those two options. Then select the quality to high and then click on the “Download” option.
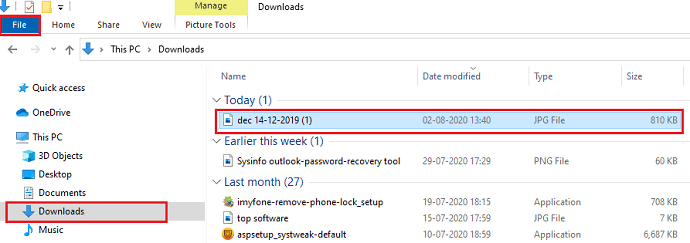
To view the resized image, click on the File option, and then Downloads there you can see the resized image.

- Also read: 4 Methods to download images from word document quickly
- 11 Ways to Extract Text From Image Online
How to resize image online by reducing its storage size (Image Compression techniques)
In the earlier section, you saw methods to resize or change the pixel dimension of any image. But under this section, you will find online ways to compress the image storage size without changing its original pixels (width, height) dimensions.
Method 8: Using compressjpeg.com
Compressjpeg is a free online service to compressing the images. Compressjpeg works straightforwardly. The user needs to upload their pictures, and with the help of a slider, you can set the compression level. That’s it. Apart from the compression, this website also offers an image conversion service. It is the best tool for online publishers such as bloggers, developers, etc.
Compressjpeg Features
- The compressjpeg allows you to compress upto 20 images simultaneously.
- Their interface allows the users to make changes in a preview mode, which is very helpful.
- When compressing multiple images at a time, the user can download either one by one or in a group as a zip format.
- The website claims that all user-uploaded images will be erased after 1 hour.
- The compression slider enables users to control the compression level.
- It supports PNG, PDF, JPEG, PDF, GIF file formats.
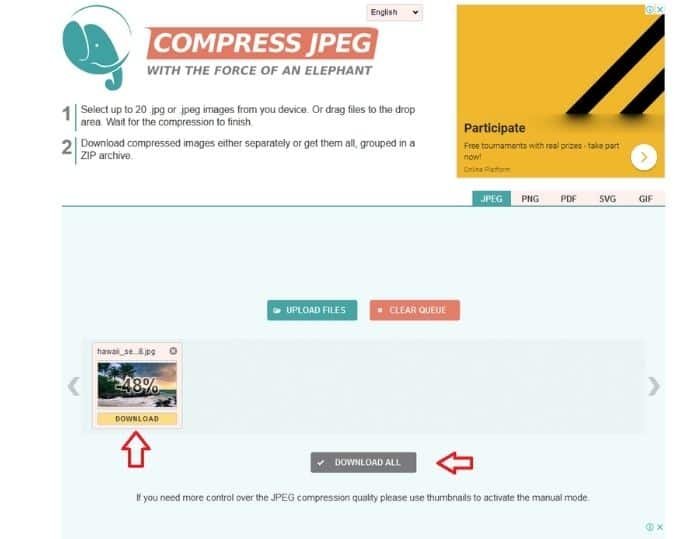
How to compress images online using compressjpeg
Step 1: Open up the site and click on the upload files button to upload single or multiple files.
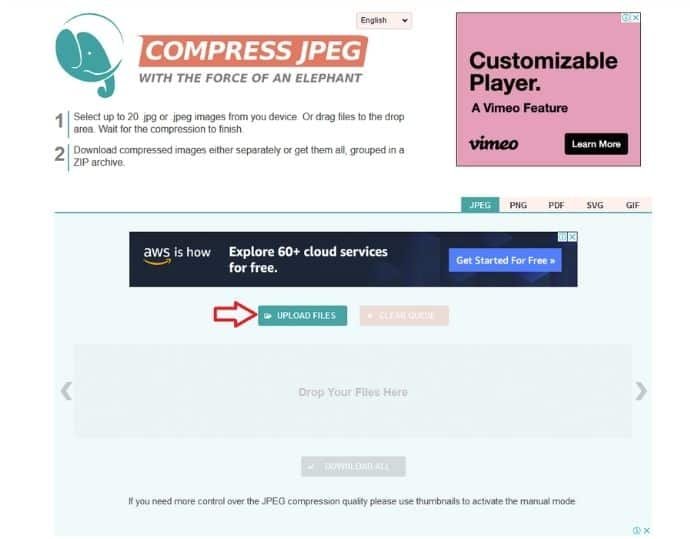
Step 2: As soon as you finish uploading images, the files will automatically start compressing. If you want to adjust the compression level, you can do so by hovering on the image’s thumbnail. Lastly, hit the download button to save your image.
Compressjpeg : Pricing & Plans
This online compression service is free.
Compressjpeg: Pros
- No prior registration required
- No file size limitation
- No privacy and security issue.
Compressjpeg: Cons
- Only able to compress 20 images at a time.
- The file could be exported only in 1 format.
Related: How to edit a video
Method 9: Using img2go
Img2go is another powerful online image compression tool that not only compresses your image but also allows you to convert on the same web page. It will be beneficial if you want to both compress and convert the image at the same time. Img2go has both free and paid plans on their menu.
Img2go Features
- The user can upload their images by local computer, URL, google drive, and dropbox.
- Img2go also has a google chrome extension and Mozilla add-on, which saves the user time.
- Img2go has compression presets. It will be helpful for users who don’t have enough knowledge about how image compression works.
- Img2go allows us to export all images in a zip format with a single mouse click.
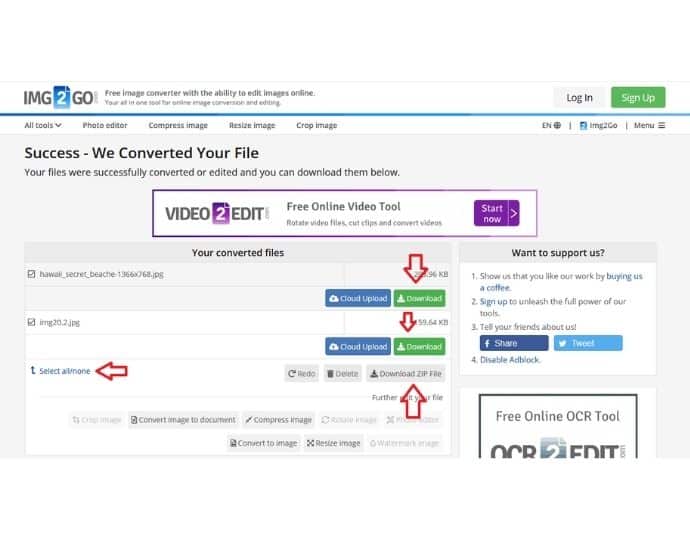
How to compress image online using img2go
Step 1: Open the img2go website and upload single or upto 3 images at a time. Then define the output format and compression settings. After configuring all settings, click on start to initiate the compression process.
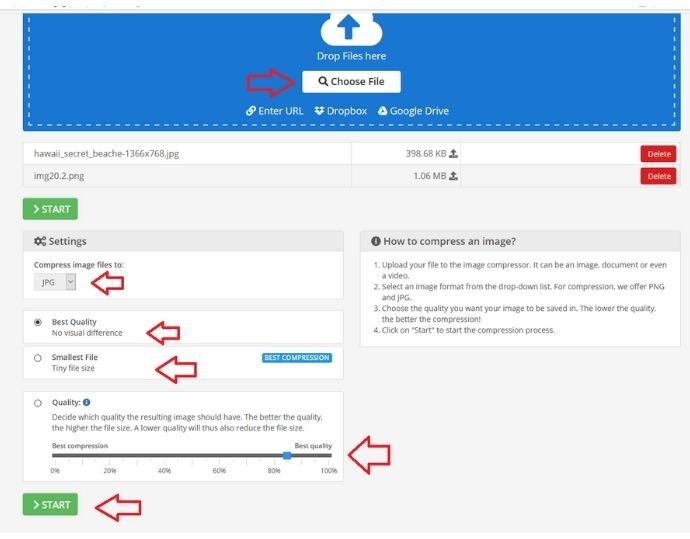
Step 2: Click on the download button to save individually or in a zip format.
Img2go : Pricing & Plans
Img2go has a $6 monthly plan, which allows you to compress 400 images at a single time.
Img2go Pros
- Compression and conversion are possible at a single place.
- Browser Extension support is available.
Img2go Cons
- Only compress 3 images at a time.
- File size limit: 50 MB
Method 10: Using Iloveimg
Iloveimg tool is the last and the recommend online compression tool if you have bulk images to compress at a single time. Iloveimg is a complete online package of image editing services. From compress to conversion to the editor, all services available at an only place. Iloveimg offers more than enough already in their free plan.
Iloveimg Features
- Iloveimg automatically compresses the image to the best quality. User doesn’t need to adjust the compression level manually.
- The user has an option to upload their images from either local device or google drive or dropbox.
- Features such as rotation, conversion, cropping, add watermark is available at the end of the compression.
- Supports formats: JPG, PNG, and GIF
- High privacy controls: The user can delete the image instantly from the server after the compression process.
- The user has the choice to share the compressed image with other users either by sharing the QR code or URL
How to compress image online using Iloveimg
Step 1: Open the website and upload images for compression
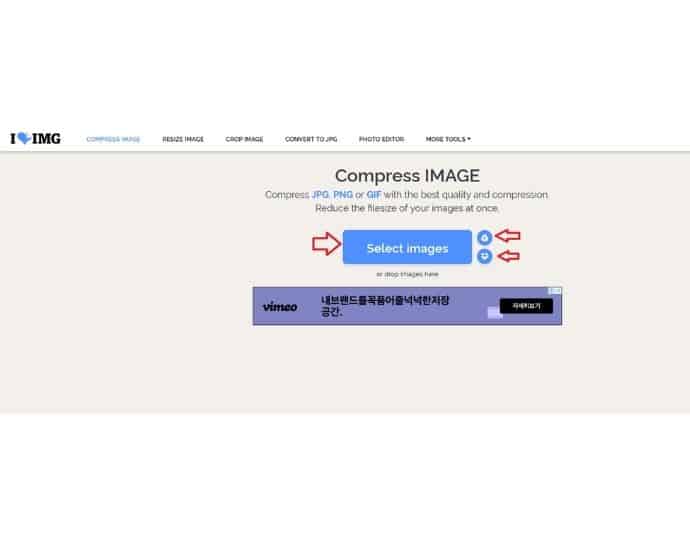
Step 2: Click compress images to firing up the compression process.
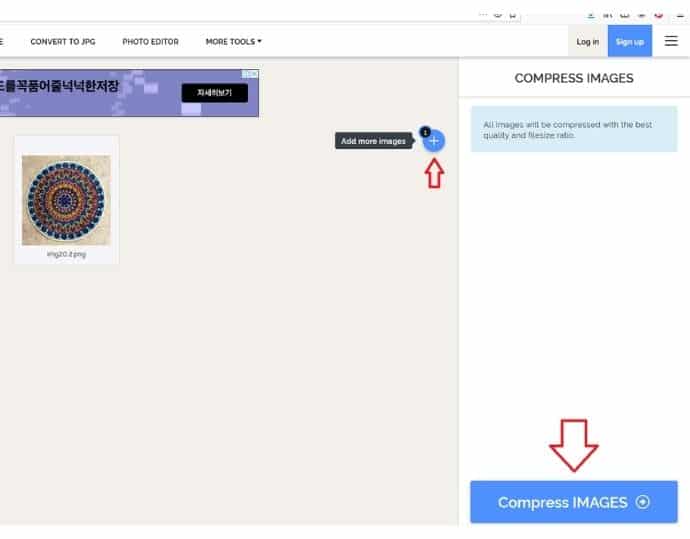
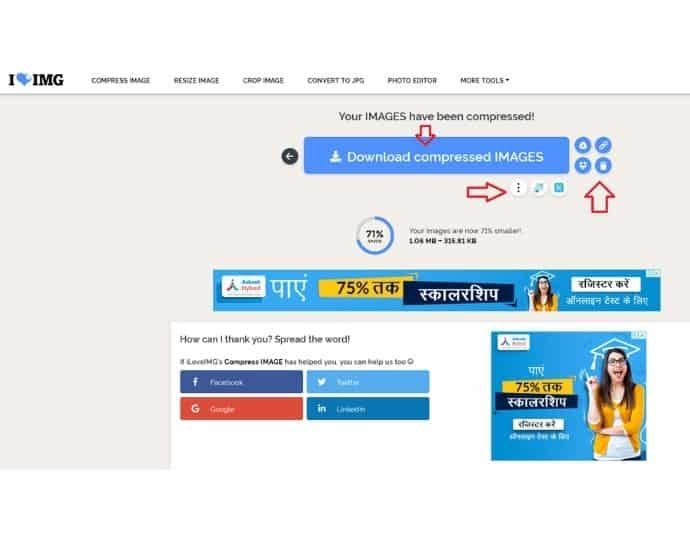
Step 3: Download or share the compressed image.
Iloveimg: Pricing & Plans
Iloveimg has a premium monthly plan starting from $5, which allows the user to compress 60 images.
Iloveimg Pros
- Upto 30 images can be compressed at a single time.
- Multiple sharing options are available.
- 130 MB File limit, which is usually larger than other online compression service providers.
- Maximum privacy control
Iloveimg Cons
No browser extension support is available.
Conclusion
Before finishing, I would like to summarize all methods in a single line so that you can quickly choose the image resizer.
Pixel dimensions Image Resizing tools:
Go with Online Photoshop if quality and professional support would be your first choice.
Go with bulkresizephotos when you want to resize multiple images at once.
Go with Social Image resizer when you quickly want to resize your image for a specific social media platform.
Go with Befunky when you want all kinds of image editing tools and resizing capability in a single place. Also when you don’t want to spend money on the professional application like Adobe Photoshop (offline)
Go with resizing.app when you want to integrate an image resizer tool in your browser extension bar.
Size Reduction- Image Resizing tools:
Go with compressjpeg when you only have jpeg files with the large file size to compress.
Go with img2go when you want to include an image compressor tool in your browser extension bar.
Go with Iloveimg when you have image resizing requirement in bulk.
I hope this tutorial helped you to know how to compress and resize images online. If you like this article, please share it and follow WhatVwant on Facebook, Twitter, and YouTube for more Technical tips.
Resize Images Online – FAQ
How to resize image Professionally?
To edit or transform an image professionally, Online web-based image resizing tools aren’t good enough compared to professional Image editing tools such as Adobe Photoshop. The reason behind that applications such as Photoshop has their own defined image resizing algorithms which is made after years of work. Online image tools generally don’t work like this way. Mostly use web-based java-script to perform the image resizing operation, which will never match the quality of professional desktop editing software.
What is the difference between Image resizing and Image cropping?
Cropping is the process of extracting a part of the image from the original image. Resizing is the process of changing the overall image dimension either upwards or downwards.
What makes a perfect online image resizing tool?
Any online image resizer tool is perfect if it has these features:
It should be able to perform operations such as scaling, cropping, rotation, and flipping.
It should be able to export the resized images in multiple formats.
It should be able to restore the last saved version of the image.
It should be safe to use in terms of image privacy and security.
It should be able to resize multiple images online simultaneously.
It should have multiple device support when uploading an image.
It should have a feature to resize the image according to social media dimensions.
It should not have any file size limitations.
WhatVWant
Image Resize Tool Guest post
Unstop Online Image Resizer: Pricing & Plans
All the features of the resizer are free of cost.
Unstop Online Image Resizer Pros
- No signup required
- Good quality
- Preset dimensions for all social media platforms
- Free of cost
Online Image Resizer by Unstop is a simple, free, and easy-to-use tool that helps you resize the images in any dimension you want. The resized picture can also retain the same proportion of height to width as the original picture (this is called ‘proportional’ resizing). This way, your photos will look good no matter where you share them – on social media sites like Facebook and Instagram, blogs, emails, and websites.
Additionally, they’ve made it easier for you to reduce the size of a high-resolution image or downsize a screenshot. This is especially useful when uploading images that are too large for your blog or web page.
How to resize an image online using Unstop Image Resizer
The simple drag-and-drop interface makes it easy to resize an image in only 3 steps.
Step 1: Visit https://unstop.com/tools and click on Explore Resize Image
Step 2: Drag your picture onto the drop zone or upload the image
Step 3: Select the tools and the aspect ratio from the editing panel on the right and download (or)
Go through different templates for social media platforms, and edit or download the resized image
Voila! You are image is ready to be shared within seconds