Want to make your Word document more attractive? Then inserting images will do that job. Do you know how to insert and format images in Word Document? Here, I am giving you an easy method to insert and format pictures in a word (Microsoft 365 Word and MS Word) document. In this article, I am showing you, how to insert pictures in word and how to format pictures.
You can also do some modifications to the image as well as just adding an image. You can use MS word very effectively if you know how to use it. This tutorial is a part of my MS word tutorial.
- You may also like: How to insert and remove watermark in word
- Simple tips to insert, remove and edit hyperlink in word
In Microsoft 365 Word document:
Video Tutorial:
Some people interested to watch video tutorials instead of reading the article which takes more time. For those who are willing to watch video tutorial we have provided the following video. You can understand the entire article with this video tutorial.
1. How to Insert Pictures?
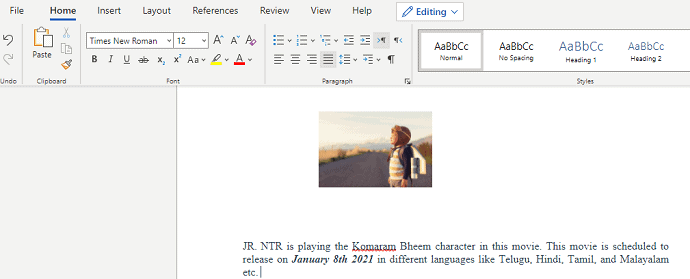
Word documents generally need some pictures for more clarification about the content that you have entered. So in order to make the document more professional and detail we will insert pictures. In this section, we are going to see how to insert pictures into Microsoft 365 word document, follow the below steps.
Total Time: 3 minutes
Step 1: Open document and click Insert

The first thing you need to do is, open the word document in Microsoft 365 in which you want to insert the pictures. Once you open the document you will see many options for editing and viewing that document.
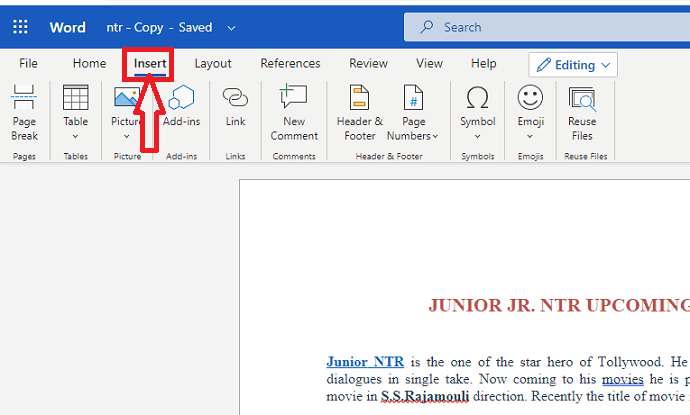
In that Microsoft 365 menu bar, you will see a list of options like File, Home, Insert, Layout, etc. Click on Insert option as shown in the below image.
Step 2: Click on Picture

When you click on the Insert menu then options in that menu will be displayed on the screen just below that menu bar. Our requirement is to insert the pictures so click on the Picture option as shown in the above image.
Step 3: Select a way for insertion
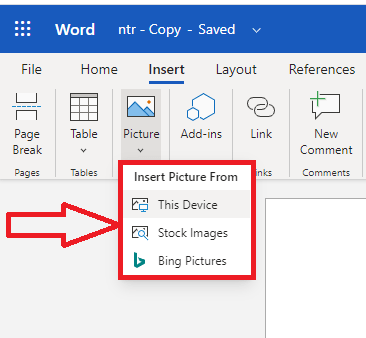
Once you click on the picture option then it will display three options for inserting pictures. Those are This device, Stock images, Bing images.
If you want to insert the pictures which are stored on your device then click on the “This device” option.
If you want to insert the pictures from online then click on the Stock images or Bing pictures which you wish.
Here I clicked on the stock images, so the result images are shown as below. Select any one or more images from those images and then click on the Insert option which is placed at the bottom of the Stock images screen.
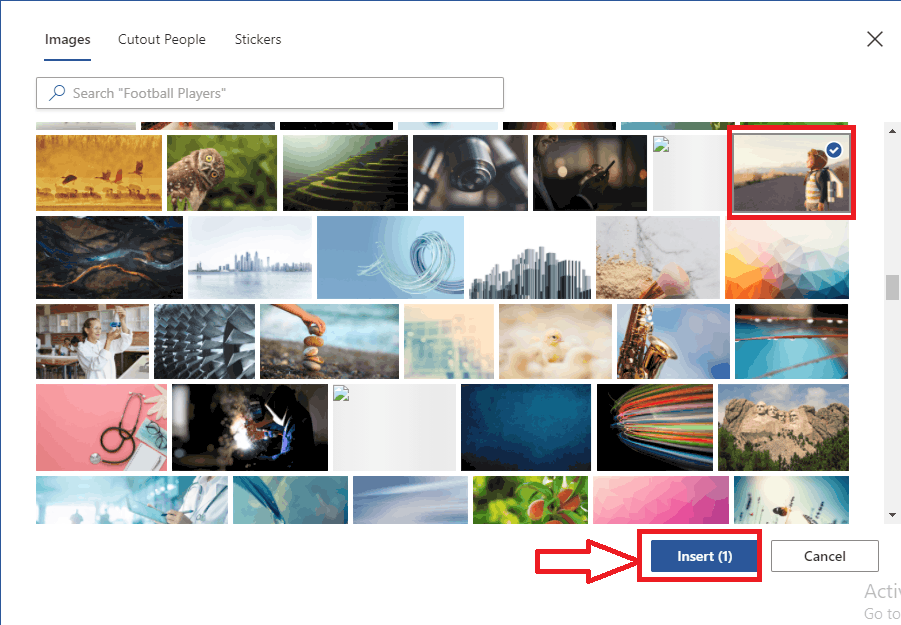

This is the procedure for inserting pictures into Microsoft 365 Word document.
Estimated Cost: 9.99 USD
Supply:
- Microsoft 365
Tools:
- Microsoft 365
Materials: software
2. How to format pictures?
In the previous section, we have seen the procedure for inserting pictures into Microsoft 365 Word document. In this section we will see how to format those inserted pictures.
- Open the document
- Give a Double-click on the picture which you want to format
- Now Format options will open for that picture

You can apply Styles for Picture, you can crop it, rotate it, or even you can reduce/increase the size by changing the height, width. Use those options for formatting pictures.
In Older MS word document:
Note: It is not recommended to use the older version of word. We recommend buying Microsoft 365 for the best features.
3. How to Insert Pictures?
Video Tutorial:
Understand this whole article just in 2 mins with this tutorial video.
You can insert pictures in word by following two methods.
i). Using Insert option:
- Open word document.
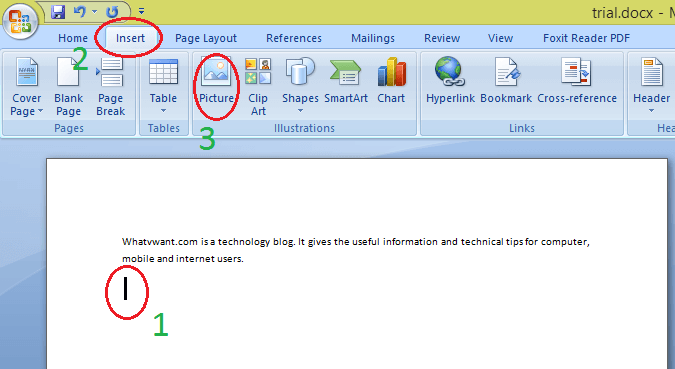
- Place the cursor where you want to insert the image.
- Click “Insert” on the top menu.
- Click “picture”. You will see a window from where you can browse your computer folders.
Select the image. You will see selected picture in word document.
ii). Using Copy, Paste method
- Open the folder where your image is stored.
- Copy image using Ctrl+C or any other method (Give a right-click and then copy option)
- Open word document.
- Place the cursor where you want to insert the image. Paste the image using Ctrl + V or any other method.
Now you have inserted image. Word Document will be like below figure.

You can do modifications to this image. Now let us discuss, how to format pictures in word.
4. How to format Pictures?
- Select picture.
- Click on “Format” in the top menu. Now you can see all the options available to modify the picture.
- In the middle, you will see “Picture styles” options. Place the cursor on any style, you will see a change in the picture.
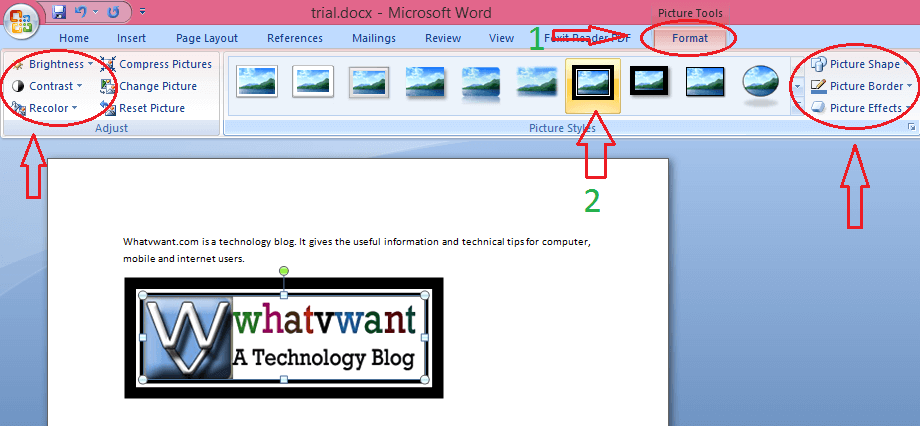
- Left side you will see options to change brightness, contrast, and to refill the color. Click any option to change the property.
- Right side you will see options to change the Picture shape, picture border. Click on any option to change the property.
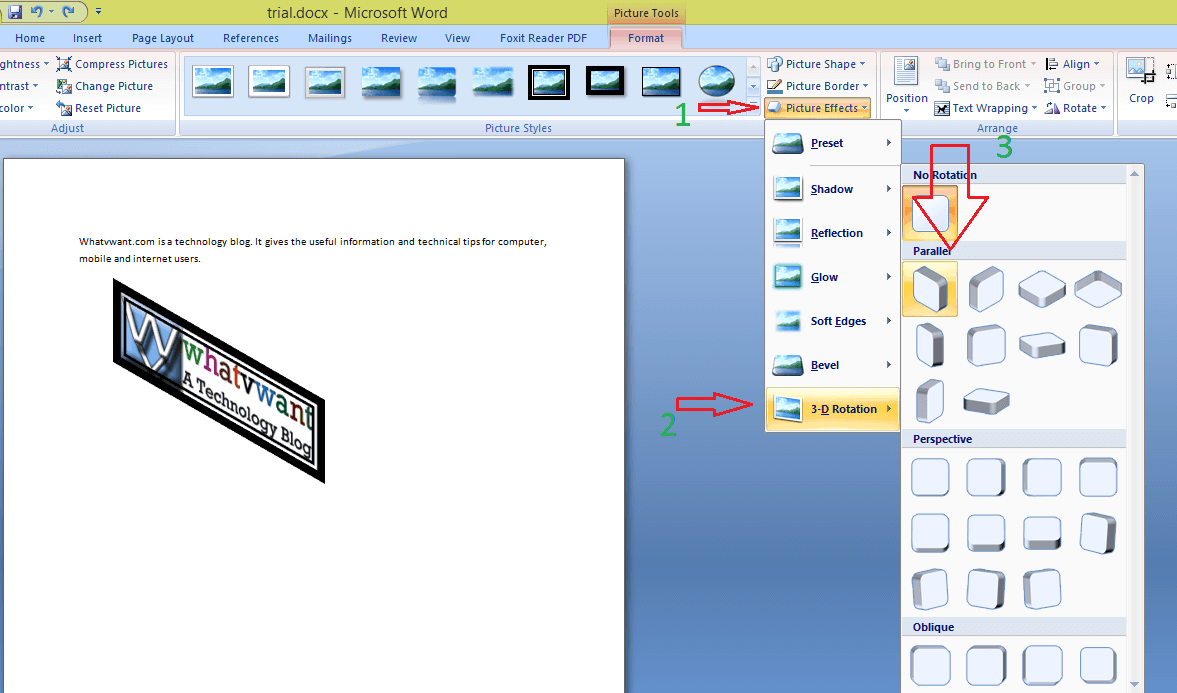
- You can apply effects like 3D, shadow, reflection, bevel, or glow by going into the “Effects” option. For example, I will show you how to apply the 3D effect.
How to apply 3D effects to Pictures in word?
- Click “Picture Effects”. You will see possible options shows that in the below screenshot.
- Go to “3-D Rotation”. You will see all the possible 3D models.
- Place the cursor on any model you will see a change in the picture effect.
Conclusion:
I hope you like this tutorial about how to insert and format pictures in Microsoft 365 Word and Older version MS word document. Once again we recommend to buy Microsoft 365. Because it gives you many features.
If you like it, do me favor by sharing it with your friends and follow WhatVwant on Facebook and Twitter for more tips. Subscribe to whatVwant channel on YouTube for regular updates.
How to Insert and Format pictures in Microsoft 365 Word and MS Word document?- FAQ
Can I insert multiple Pictures at a time into Word document?
Yes, you can insert multiple pictures at a time. While you are selecting pictures for insertion select multiple pictures instead of single picture.
Can I insert pictures directly from my web browser?
Yes, you can insert pictures from web browser into Word document.
Can I replace the picture from one place to another place in document?
Yes, you can replace the picture from one place to another by using cut and paste options. Place the cursor on the picture, give a right click and click on the Cut option from available options or press Ctrl+X. Now place the cursor in a place to which you want to replace and click paste or press Ctrl+V.

I have inserted my picture in the upper left corner of my page. It is within the margins set for the page. I have the picture formatted so that I can type a line of text next to the picture.
Everything looks fine on the screen. But when I print the page, the picture has disappeared.
I have tried to print the picture without any text – the picture prints fine. But as soon as I add the text and try to print the page again, the picture disappears from the printed copy. It looks fine on the screen – it just doesn’t print.
Am I doing something wrong?