
Combining pictures is crucial in many fields, including graphic design, photography, and marketing. There are numerous tools, both free and paid, that may help you merge photographs without any issues. Yet, selecting the tool that best suits your needs might be difficult given the abundance of possibilities available. We’ll examine the best free and paid software for combining pictures in this detailed guide. We’ll go through each tool’s attributes, benefits, and drawbacks as well as offer advice on how to get the most out of it. This article will assist you in selecting the ideal tool to seamlessly integrate your photographs, regardless of your level of experience.
An excellent approach to making collages, combining several photos into one, or adding details to a shot is to merge the images. Fortunately, there are various internet programs available that make merging photographs a quick and clear process. We will talk about some of the common ways to combine photos online, offline, free, and premium in this article.
What is Merging images
A process called picture merging joins two or more images to create a single, seamless image. It is a widely utilized method in various creative industries, including graphic design and photography. In addition to creating composite photos for use in marketing or advertising materials, image merging can be used to combine many images into a panorama.
For merging photographs, there are several solutions available, from inexpensive web software to expensive desktop programs. The user’s needs, financial situation, and the difficulty of the project all factor into the tool selection process. Beginners or those with straightforward merging requirements should consider using free tools, but paid programs offer more extensive capabilities and flexibility.
The various types of picture-merging tools that are accessible, their advantages and disadvantages, and their practical use are all covered in this book. This guide will assist you in selecting the best tool for your needs and merging photographs like an expert, whether you are a professional photographer, graphic designer, or just someone who wants to make great images. Now let’s dive in and discover the fantastic realm of image fusion!
Why do you Merge Images?
Combining photos is a popular technique many individuals, corporations, and organizations use for various purposes. It involves merging several images into one, opening up a variety of creative possibilities. In this post, we’ll talk about why it’s important to merge photos and how doing so can be useful in a variety of situations.
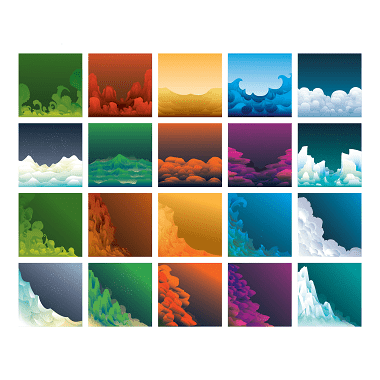
- Creating collages: The creation of collages is one of the main motivations for integrating photos. People can put several photographs together into one composition using collages, a common genre of art. By combining images, people can make a beautiful work of art, demonstrate their photographic abilities, or tell a story visually.
- Enhancing visual storytelling: Moreover, image fusion can be utilized to improve visual storytelling. Sometimes a single image cannot fully express the meaning of a tale. Individuals can build a more thorough visual narrative that more effectively conveys their message by fusing several photos.
- Showcasing product features: Companies can utilize combined photos to highlight the features of their products. Businesses can combine product photographs taken from various perspectives or with various details emphasized to produce an image that offers a thorough view of the product.
- Creating social media posts: Social media posts can benefit from image fusion. Individuals can produce a more aesthetically appealing post that stands out and attracts the attention of their followers by combining many photographs into a single post.
- Creating marketing materials: Creating marketing materials can also take advantage of image fusion. To generate promotional materials like brochures, posters, or flyers, businesses can combine photos of their staff members, services, or products.
- Creating panoramic images: The creation of panoramic images is another application for image fusion. One can produce a single, wide-angle photograph that encompasses the entire scene by combining several pictures taken from the same spot or perspective.
In general, image fusion is a potent tool for increasing visual storytelling, presenting your goods or services, and producing more eye-catching material for social media and advertising. As a comparison to a single image, it enables you to merge many photos into a single frame, adding context, information, and detail.
- Related: 10 Free Ways to Compress & Resize Images Online
- 4 Methods to download images from Word documents quickly
Advantages of Merging Images
There are several advantages of merging images. Let us discuss some of the most essential uses of merging images.
- Enhanced visual impact: Merging images can create a more visually compelling composition. By combining multiple images, you can create a new image that is more engaging and interesting than any of the individual images on their own.
- Increased context: Merging images can provide additional context and information to a viewer. By combining images that relate to a particular theme or subject, you can create a more comprehensive visual representation of that theme or subject.
- Better storytelling: Merging images can help tell a story or convey a message more effectively. By combining images in a particular order or arrangement, you can create a narrative that is more impactful than any individual image on its own.
- Creative expression: Merging images allows for greater creative expression. By combining images in different ways, you can create unique and original works of art.
- Improved efficiency: Merging images can be more efficient than creating multiple separate images. By combining multiple elements into one image, you can save time and effort in the creation process.
How to Merge Images Online For Free
Let us go through some of the essential methods to merge images for free in brief:
1. PineTools
With PineTools, you can quickly and simply combine two photographs into one image. This is the quick and easy-to-use border-adding tool you’ve been looking for.
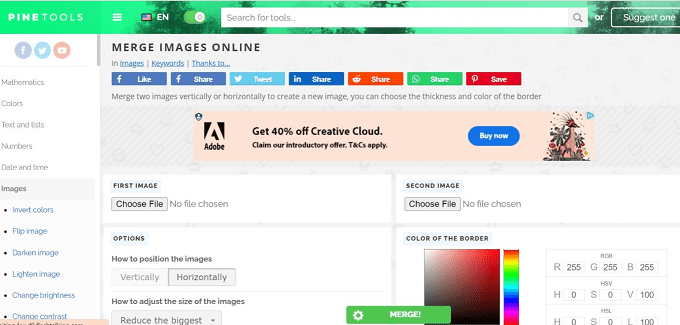
With PineTools, it’s easy to combine two photographs into one frame online. Start by uploading each image, then if desired, utilize the zoom or move tools for each. Next, decide whether to align the photographs vertically or horizontally so that they are adjacent to one another. The photos’ sizes can then be changed. This gives you the option to enlarge the smaller image, crop the larger one, or, if you’d like, restrict the proportions.
The combined image can then have a border added to it. To choose the thickness and the color, use the slider. For color nerds, PineTools offers the ability to choose a precise color using Hexadecimal or RGB values.
After you’re done, click Merge. Your merged image will appear in the page’s Output Image section. The image is then available for download as a PNG, JPG, or WEBP file. Also, PineTools offers a variety of other tools that you may find useful in a variety of circumstances in addition to its online service for combining two photographs.
Features
Let us go through some of the important features of Pine Tools
- Material: Pine tools are made from high-quality pine wood, which is known for its durability and resistance to wear and tear.
- Ergonomic Design: Pine tools are designed to fit comfortably in the hand, with a natural grip that allows for precise control and maximum leverage. The handle is smooth and contoured, reducing hand fatigue and improving accuracy.
- Versatility: Pine tools are available in a wide range of shapes and sizes, making them suitable for various woodworking tasks, including carving, cutting, and shaping.
- Durability: Pine tools are designed to withstand heavy use and are less prone to damage, making them ideal for professional woodworkers and DIY enthusiasts alike.
- Lightweight: Pine tools are relatively lightweight compared to other types of woodworking tools, making them easy to maneuver and control during use.
- Affordability: Pine tools are generally more affordable than other types of woodworking tools, making them an excellent option for those on a budget or just starting in woodworking.
- Maintenance: Pine tools require minimal maintenance, and with proper care and maintenance, they can last for many years without the need for replacement.
Pricing
Pine Tools is accessible to the users for free of cost
How to merge Images using Pine tools
Let us demonstrate the step-by-step procedure of merging images using Pine tools
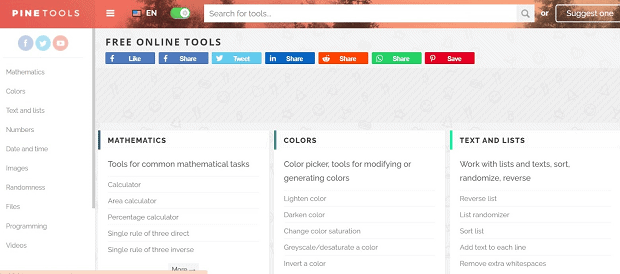
- Open the Pine tools from your browser with the URL “www.Pine tools.com”. The required website will be opened.
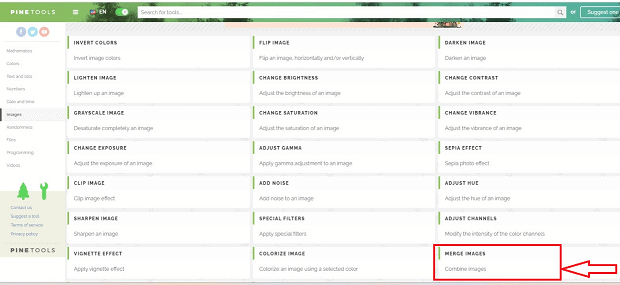
- A list of sections will be displayed on the website, identify the “Image” section from the available sections, and click on the “More” icon in the image section.
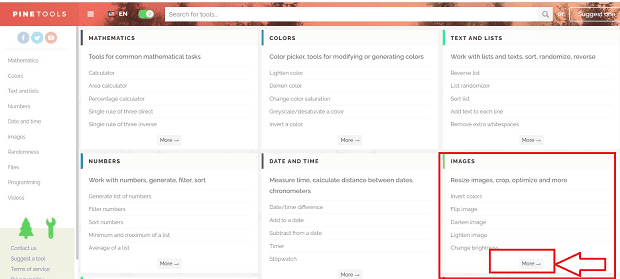
- Images windows will be opened with the set of icons available, click on the “Merge images” icon from the available icons.
- A new “Merge images” window opens with the available icons, choose the images by clicking on the “Choose File” option to be merged the initial image in the first image and the latter in the second image section.
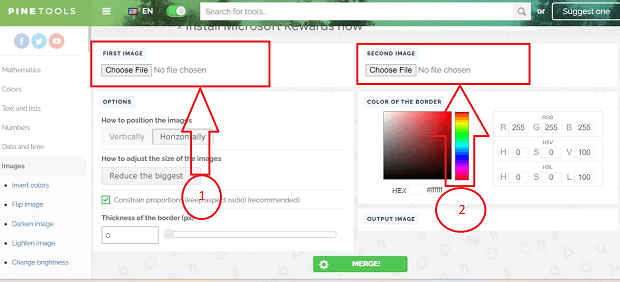
- After choosing the images we have other options to adjust the positions, size, and color of the border.
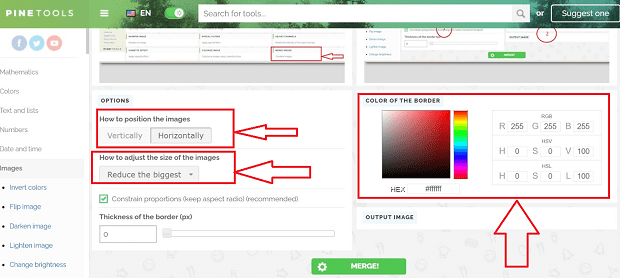
- Once the necessary changes are made, click on the “Merge” icon, and you can identify the merged output image and select the required format and download the merged image.
- By following the above procedure we can successfully merge the images using the Pine Tools website.
2. IMG Online
IMG Online is another excellent website that enables you to merge two images into one with many settings to create the ideal picture.
Upload each photo first, then choose whether to place it vertically or horizontally. proceed to the user settings next. You can program an automatic size adjustment so that the photos adjust to one another. For instance, the larger of the two could learn to fit in with the smaller. You can also leave your photographs at their current sizes.
The images can also be rotated if necessary, cropped using values for each edge, and given a mirror reflection for a unique effect using IMGonline.
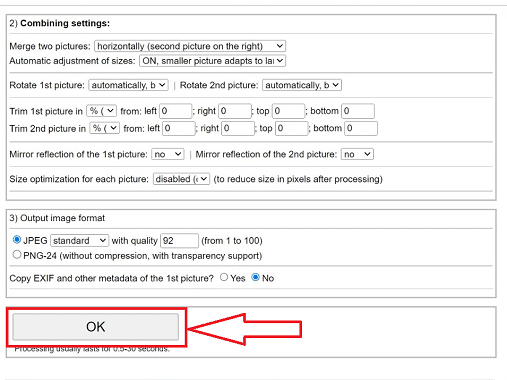
Choose the JPEG or PNG-24 file type and indicate if you want to copy the metadata from the first image. After that, click OK to get the combined image. Normally, processing an image takes no longer than 30 seconds.
It offers additional picture editing options in addition to the ability to combine photographs online. For instance, you can combine more than two photographs with its photo collage creation tool. You won’t find as many editing options here as on PineTools, though.
Features
Let us go through some of the important features of IMG Online
- Image Editing: Imgonline provides a wide range of tools for image editing, such as crop, rotate, resize, flip, and adjust brightness and contrast. These tools help users to make changes to their images quickly and easily.
- Image Conversion: Imgonline can convert images into various formats, including JPEG, PNG, BMP, GIF, and TIFF. The conversion process is fast and straightforward, and users can convert multiple images at once.
- Image Compression: Imgonline can compress images without losing quality, reducing the file size for easy sharing and faster uploading.
- Batch Processing: Imgonline supports batch processing, allowing users to edit or convert multiple images simultaneously.
- Image Effects: Imgonline provides a range of effects, such as blur, sharpening, sepia, grayscale, and more. These effects can enhance the look of images and give them a unique style.
- User-Friendly Interface: Imgonline has a simple and intuitive interface that is easy to use, even for those who have no experience with image editing.
- Cloud-based Service: Imgonline is a cloud-based service, which means that users can access it from anywhere with an internet connection. They can upload and edit their images without having to download any software or plugins.
Pricing
IMG Online is accessible to the users for free of cost
How to Merge the Images using IMG Online
Let us understand the step-by-step procedure of merging images using the IMG Online website
- Go to the IMG Online website using (https://www.imgonline.com.ua/eng/) Url, from your web browser, the required IMGOnline website will be opened.
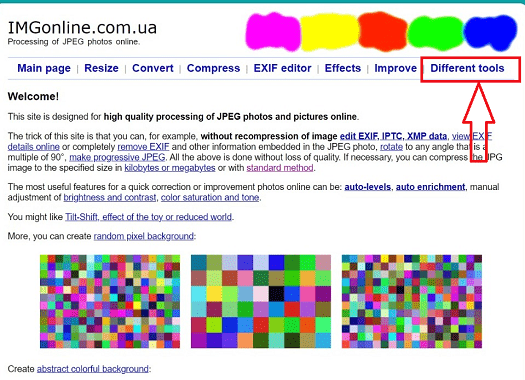
- At the top of the website, a menu bar is available with different icons. Click on the “Different tools” icon from the available icons.
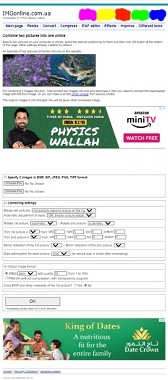
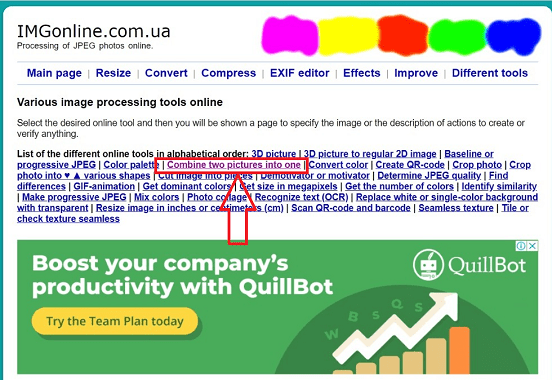
- After selecting the “Different tools” option a new interface opens with a different set of options, choose the “Combine two pictures into one” option.
- A new “Combine images” window opens with the available icons, choose the images by clicking on the “Choose File” option to be merged the initial image in the first image and the latter in the second image section.

- Once you’ve selected your images, you can arrange them in the order you want them to appear in the merged image by dragging and dropping them in the “Images order” section and also we can choose the desired output format for the merged image from the drop-down menu.
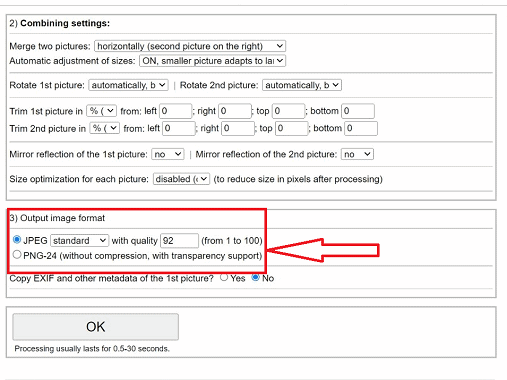
- Select the desired options from the “combining settings” section for the output image, such as image quality and size, if applicable.
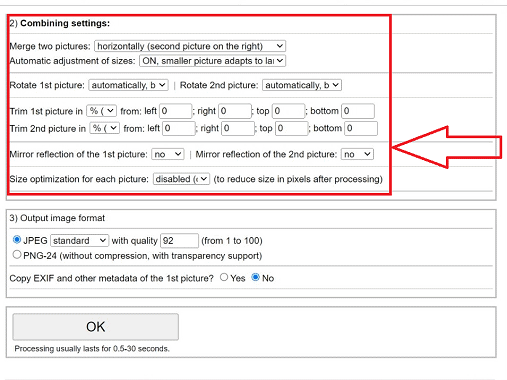
- Click on the “OK” button to merge the image after applying the desired changes to merge the images.
- Once the merged image is generated, you can download it to your computer by clicking on the “Download processed image” button.
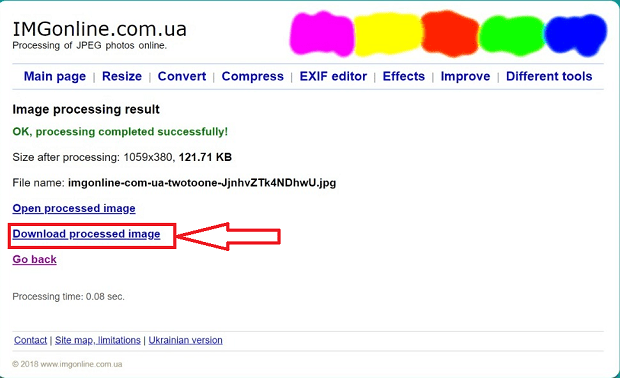
- By following the above procedure we can successfully merge the images using the Img Online website.
3. OnlineConvertFree
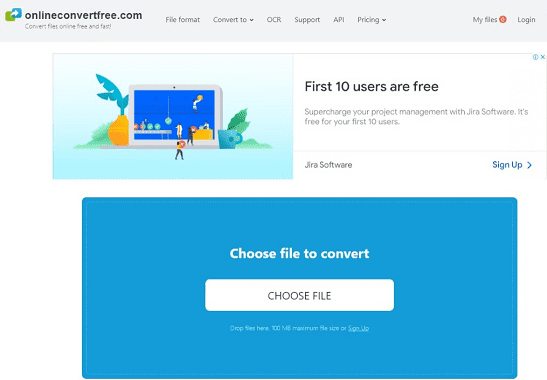
With OnlineConvertFree, merging two photos is as simple as it gets. This website offers you the fundamental option to combine two photographs, much like the other tools mentioned thus far. Each photo is simply uploaded, with options for vertical or horizontal positioning, size adjustment, and border thickness. Click the Save and Download Image button after selecting the image format you want. It’s that simple!
The drawback of this simplicity is that there aren’t many alternatives available when mixing photos. OnlineConvertFree includes other capabilities including file conversions along with more picture tools like a resizer, cropper, and rotator, as you would have guessed from the name. So make sure to look into that as well.
Features
Let us go through some of the important features of OnlineConvertFree
- File Format Support: OnlineConvertFree supports a wide range of file formats for conversion, including audio, video, document, image, archive, ebook, and presentation formats.
- Easy-to-Use Interface: The platform has a simple and user-friendly interface that allows users to easily select and upload their files, choose the desired output format, and initiate the conversion process.
- Fast and Efficient: OnlineConvertFree is designed to convert files quickly and efficiently, without compromising the quality of the output files.
- No Software Installation Required: Online ConvertFree is entirely web-based, which means that users do not need to install any software or plugins to use the service.
- Multiple Output Options: The platform allows users to choose from multiple output options, including file type, quality, and size.
- Free of Charge: Online ConvertFree is completely free to use, with no hidden fees or subscriptions.
- Security and Privacy: The platform ensures the security and privacy of user data, with files being automatically deleted from the server after the conversion process is complete.
Pricing
OnlineConvertFree is accessible to the users for free of cost
How to Merge the Images using OnlineConvertFree
Let us demonstrate the step-by-step procedure of merging images using OnlineConvertFree
- Go to the Online Convertfree website using (https://onlineconvertfree.com/) Url, from your web browser, the required OnlineConvertFree website will be opened.
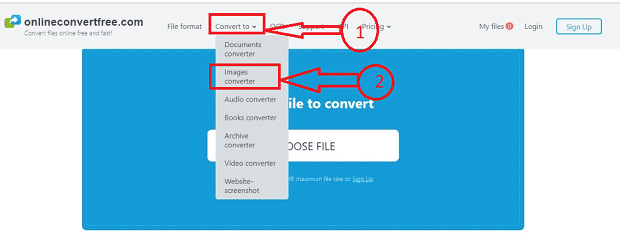
- A set of icons will be displayed in the menu bar at the top of the web page, choose the option of “Convert to” from the displayed icons, and a drop-down menu appears with a set of icons choose “Image converter” from the icons.
- After clicking on “Image converter” a new interface opens with a set of icons in the menu bar click on the “Merge” icon from the available icons.
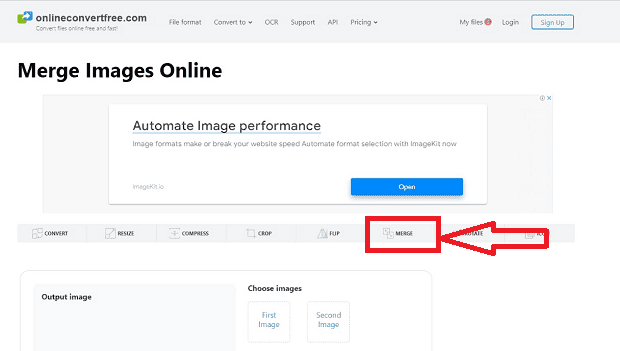
- A new “Merge image” window opens with the available icons, choose the images by clicking on the “First image and second image” option to be merged the initial image in the first image and the latter in the second image section.

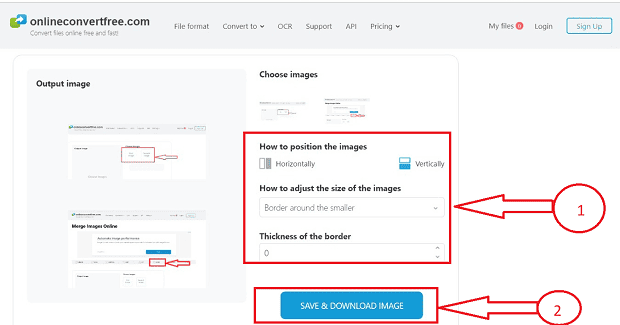
- Once you’ve selected your images, you can make the required changes by adjusting the size and thickness of the border icons and then choosing the “SAVE & DOWNLOAD IMAGE” button download the required output image.
- By following the above procedure we can successfully merge the images using the OnlineConvertFree website
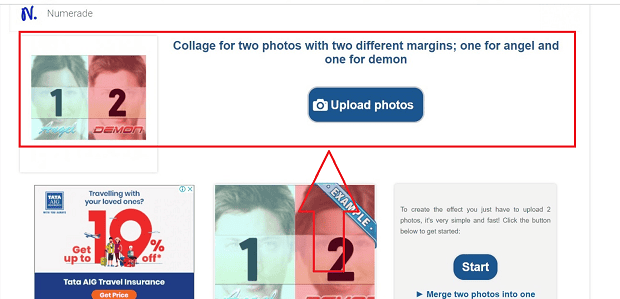
4. Photo Funny
Check out PhotoFunny if you want to add a little extra to the two photographs you wish to merge. You can select a template for your combined image on this website. There is a fun theme for you if you’re looking for rainbows and hearts, wedding rings, or even Pokémon.
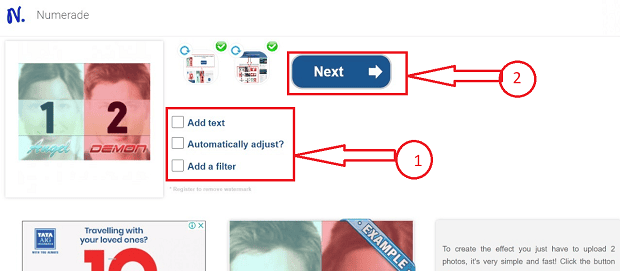
When uploading your images, choose a theme from among the dozens that are offered. You can choose whether to add text, edit the photos, or add a filter by checking the appropriate boxes. Depending on the theme and options you choose, click Next to complete your merged photo.
When done, press Download. The image can then be downloaded or shared on social media. PhotoFunny offers a wide range of alternatives if you want a distinctive image.
Features
Let us go through some of the important features of PhotoFunny
- User-Friendly Interface: Photo Funny has a simple and user-friendly interface that allows users to easily upload their photos and apply various effects and filters.
- Wide Range of Editing Tools: The platform offers a variety of editing tools, including cropping, resizing, rotating, and adjusting brightness, contrast, and saturation levels.
- Text and Sticker Addition: Users can add text and stickers to their photos, with a range of fonts and designs to choose from.
- Filters and Effects: Photo Funny provides a range of filters and effects, such as vintage, sepia, and black and white, to enhance the visual appeal of images.
- Customizable Templates: The platform also offers customizable templates that users can use to create unique photo collages, frames, and other designs.
- Social Media Integration: Photo Funny allows users to share their edited photos on various social media platforms, such as Facebook, Twitter, and Instagram.
- Free of Charge: Photo Funny is completely free to use, with no hidden fees or subscriptions.
- No Registration Required: Users can use Photo Funny without registering an account, although creating an account allows for saving and sharing edited photos.
- Mobile Compatibility: Photo Funny is also available as a mobile app for iOS and Android devices, allowing users to edit their photos on the go.
Pricing
PhotoFunny is accessible to users free of cost.
How to merge images with the PhotoFunny website
Let us demonstrate the step-by-step procedure of merging images using the PhotoFunny website
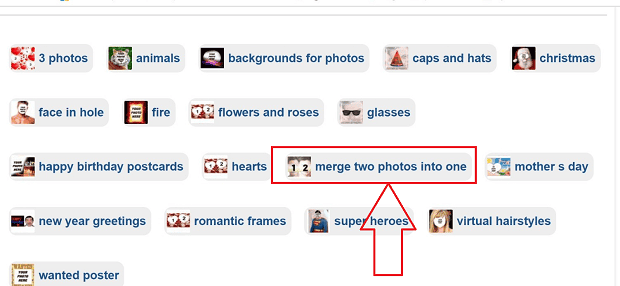
- Open the PhotoFunny website by typing the Url “https://www.photofunny.net/” in your browser. The required website will open.
- A list of icons will be displayed when you scroll down your window, and choose the “merge two photos into one” option from the displayed icons.
- A new window opens with multiple templates to merge the images, Choose the template that you want to use to merge your images from the available templates.
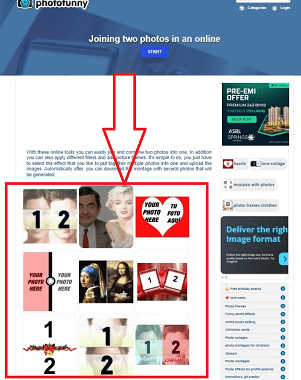
- After selecting the required template by clicking on it, choose the images from your system to be merged by clicking on the “Upload Photos” option.
- After selecting the required images we have the option to adjust and add text and options to add a filter, make the necessary changes and click on the “Next” button.
- After clicking on the “Next” button a new interface opens with the merged image, click on the “Finish” button after making all the final changes.

- After clicking on the “Finish” button a new interface window opens with a set of icons, click on the “Download image” option to download the merged image.
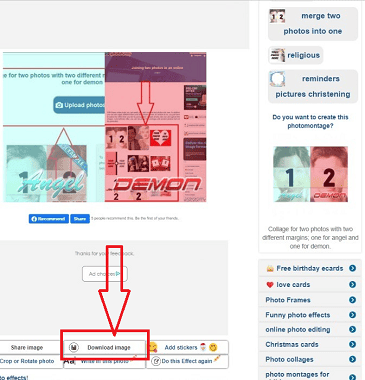
- That’s it, by following the above steps we can successfully merge images using the PhotoFunny website.
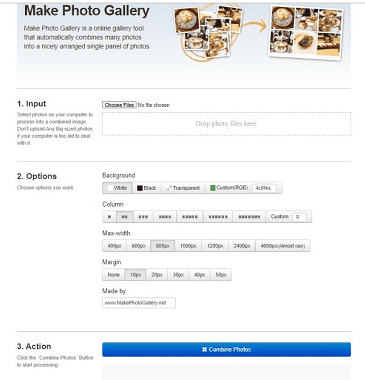
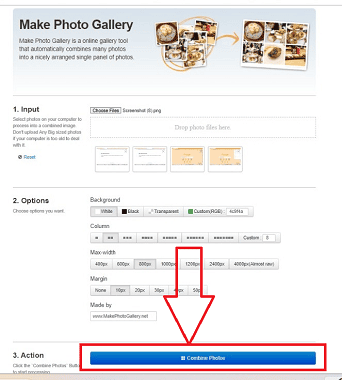
5. Make a Photo Gallery
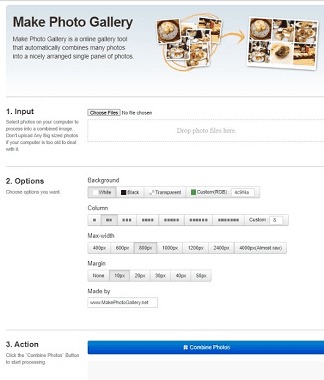
Check out Make Photo Gallery to mix more than two photos. This website allows you to make images that are more like column collages, which may be exactly what you need.
You can drag your photographs onto the website or choose them from your computer to upload. Once they’ve appeared, you can reorder them however you like.
Choose your background color, the number of columns, the maximum width, and the margin size in step two of the procedure. Moreover, you can enter your name in the Created By area. This will appear within the finished photo’s border in the bottom-right corner.
When you click the Merge Pictures button, your new image will appear nearly immediately. You may download your JPG file from Create Photo Gallery by clicking the Download button.
Features
Let us go through some of the important features of Make a Photo Gallery
- Multiple images: The photo gallery should be able to display multiple images in a single location.
- Sorting options: The gallery should allow users to sort images by date, title, or other categories.
- Navigation: Users should be able to easily navigate between different images within the gallery.
- Thumbnails: Thumbnails can be used to provide a preview of the images in the gallery.
- Slideshow: Some photo galleries allow users to view a slideshow of the images, automatically moving from one to the next.
- Zoom: Users should be able to zoom in on images to see them in greater detail.
- Sharing: The gallery should have the option to allow users to share images with others through social media or other means.
- Customization: Users should be able to customize the appearance of the gallery to fit their preferences.
- Mobile responsiveness: The gallery should be optimized for mobile devices to ensure that it displays properly on different screen sizes.
- Security: The gallery should have appropriate security measures in place to protect the images from unauthorized access or theft.
Pricing
Make a Photo Gallery is accessible to users free of cost.
How to merge images using Make a Photo Gallery
Let us understand step by step procedure for merging images using the “Make a Photo Gallery”. website in brief.
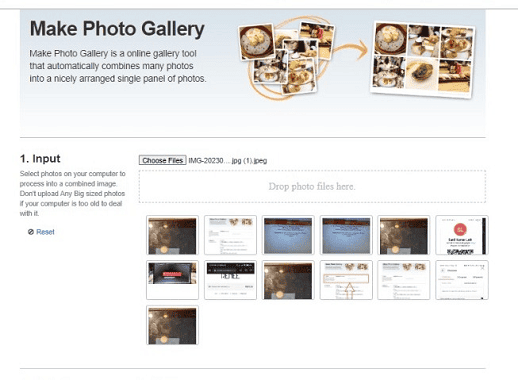
- Open the PhotoFunny website by typing the Url “https://makephotogallery.net/” in your browser. The required website will open.
- The website will have multiple icons for various operations, identify the “Choose Files” section to select the images that need to be merged.
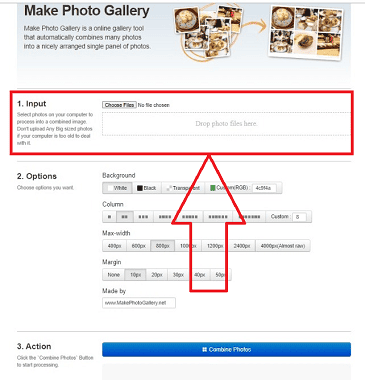
- We can select multiple images using Choose Files option to merge in a “Make a Photo Gallery” website, unlike the other websites which allow you to merge only two or a few images.
- After selecting the images, you can make the required changes with the aid of the “Options” section, desired changes can be of background, column, max-width, and margin.
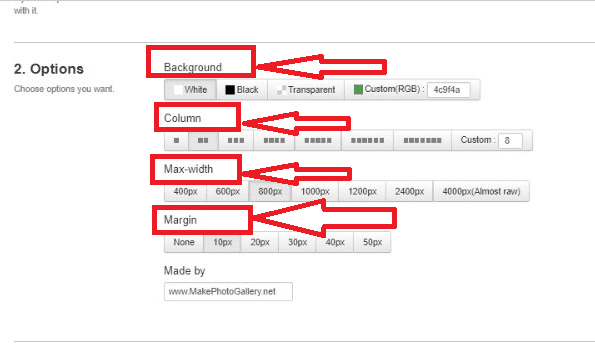
- After making the required changes, we can download the merged image by clicking on the “Combine photos” button available at the bottom of the page.
- That’s it! Following the above steps we can successfully merge images using the “Make a Photo Gallery” website without any hurdles.
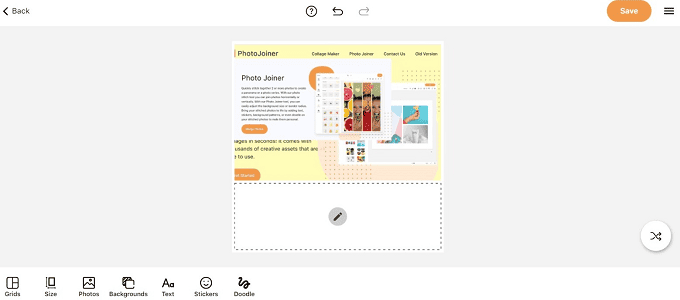
6.PhotoJoiner
Photo Joiner is a different free service that enables you to combine more than two photographs. You may preview your finished creation while making settings adjustments on our website because it has an editing screen.
Choose your photographs by clicking the Add Photos icon in the top right corner. You can drag them onto the canvas from where they will appear on the right side. You can now arrange them however you want. Choose the image on the canvas and then click the Eye symbol to rotate, flip, or zoom in on it.
You can use the options on the left side of the canvas after your photographs are ready. If you’d like, you may also begin with the settings. Select the finished image’s size, the number of columns or rows, and, if you want a border, its color and thickness. To add text, switch from vertical to horizontal, or make a Facebook cover, utilize the settings on the far left.
Click Save just above the canvas when you’re done. Then, using the Picture Joiner website, you can either choose to post your photo immediately to a social network or download it as a JPG.
Features
Let us go through some of the important features of PhotoJoiner
- Collage Creation: With PhotoJoiner, users can easily create photo collages by selecting from a variety of collage templates and adding their images.
- Photo Editing: The platform also provides basic photo editing tools, such as resizing, rotating, cropping, and adjusting the brightness, contrast, and saturation of images.
- Background Removal: Users can remove the background of an image to create a transparent background for their collages.
- Text and Stickers: PhotoJoiner allows users to add text and stickers to their collages to enhance the overall visual appeal.
- Sharing and Saving: Users can save their collages in various formats, including JPEG and PNG, and share them on social media platforms like Facebook, Instagram, and Twitter.
- Free and Easy to Use: PhotoJoiner is a free, user-friendly platform that does not require any prior design experience. Users can simply upload their images and start creating collages within minutes.
Pricing
PhotoJoiner is accessible to users free of cost.
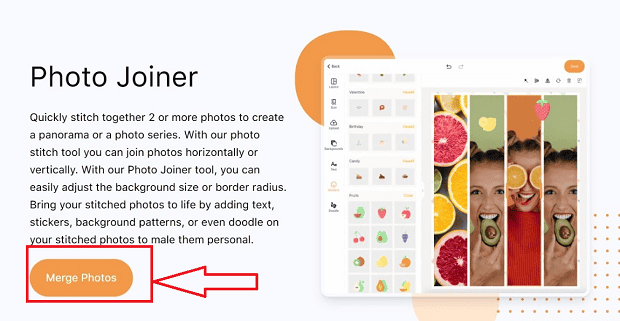
How to merge images using Photo Joiner
Let us understand the step-by-step procedure for merging the images with the aid of the Photo Joiner website
- Open your web browser and go to the Photo Joiner website (https://www.photojoiner.com/), the required website opens.
- Scroll down the home page to identify the “Photo Joiner” section with the “Merge Photos” option available in the section, click on the Merge Photos option.
- The merge photos option allows you to choose the initial image from the system and a new interface will be opened after selecting an initial image.
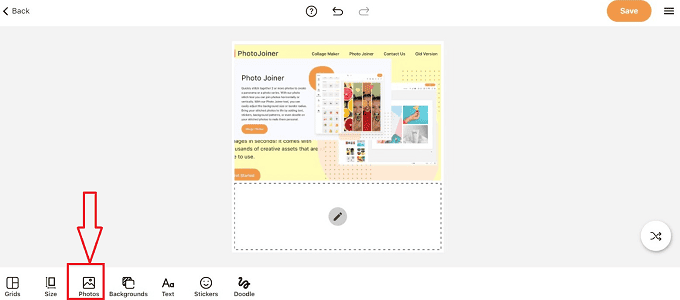
- Identify the “Photos” option available at the bottom of the window which redirects you to add images to merge with the initial image.
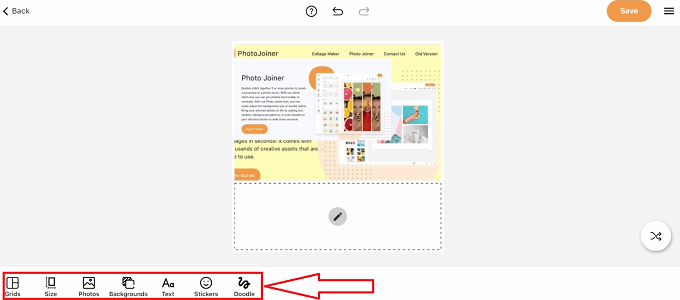
- We also have other features to apply to the merged images such as Grids, Size, Backgrounds, Stickers, and Doodle which allows you to make the necessary changes to the images.
- Once the required changes are done, click on the save button available at the top of the window to save the required changes.
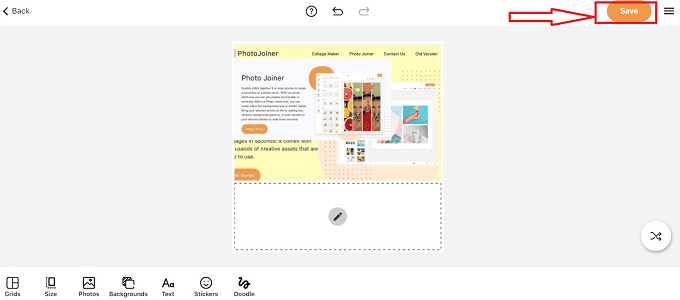
- After clicking on the save button a new interface opens, identify the download button and click on it to download the required output image.
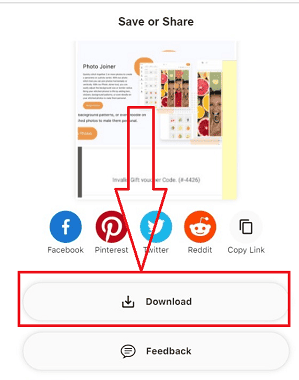
- That’s it! By following the above steps we can merge images using photo joiner successfully without any hurdles.
Premium Methods to Merge Images Online
Numerous websites let you combine photographs online. It’s critical to select the website that best meets your demands because each one has a range of features and pricing alternatives. In this article, we’ll examine the features and costs of some of the best websites for online picture merging.
1. Adobe Express
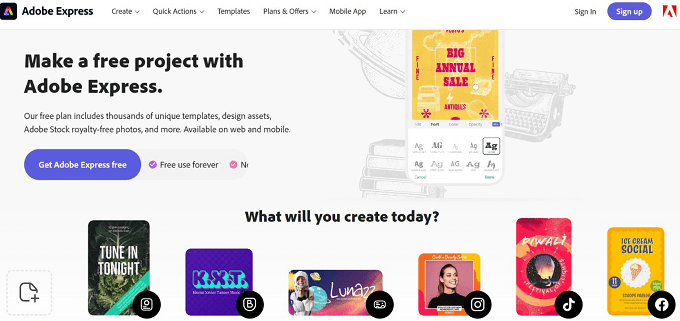
Adobe Express can combine photographs and add text, graphics, and other design components. It makes it simple for beginners to generate photographs with a professional appearance thanks to the variety of pre-designed templates and layouts available. A selection of editing options, including crop, rotate, and brightness and contrast adjustments, are also available in Adobe Spark.
Features
Let us understand some of the key features of Adobe Express
- Templates: Adobe Express offers a wide variety of templates for users to choose from, including templates for social media graphics, posters, flyers, web pages, and videos.
- Customization: Users can customize their designs with a range of fonts, colors, images, and other design elements to create a unique look and feel.
- Collaboration: Adobe Express allows users to collaborate on projects with others in real time, making it easy to work on projects together, share feedback, and make changes in real time.
- Integration: Adobe Express integrates seamlessly with other Adobe Creative Cloud applications, as well as with other popular tools like Google Drive and Dropbox.
- Animated Videos: Adobe Express allows users to create animated videos with text and graphics, making it easy to create engaging social media videos, explainer videos, and more.
- Branding: Adobe Express’s branding tools allow users to create consistent, branded designs across all their marketing materials, including logos, colors, and fonts.
- Mobile App: Adobe Express has a mobile app for both iOS and Android, allowing users to create and edit designs on the go.
- Analytics: Adobe Express provides users with analytics on their designs, including how many views and shares they have received, making it easy to measure the success of their designs.
Pricing
Adobe Express‘s price starts at $9.99 per month, with a free plan available.
How to merge images with Abode Express
Let us understand the step-by-step procedure of merging images with the help of the Abode Spark web page
- Open your web browser and go to the Adobe Express website.
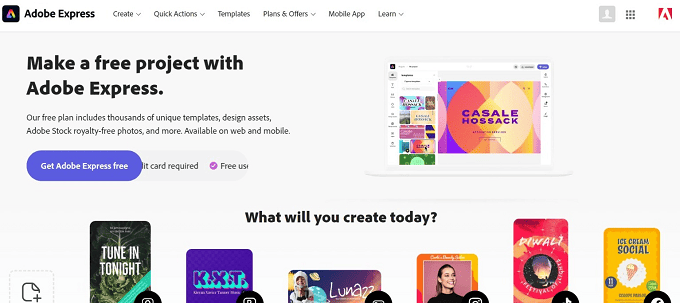
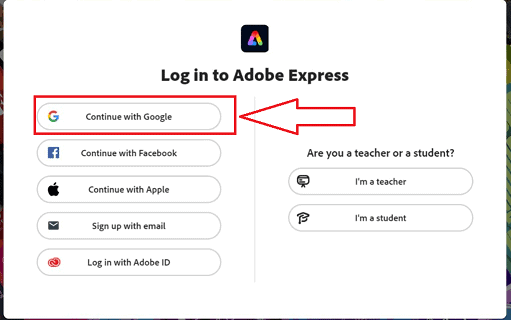
- Log in to your Adobe Express web page with the help of your Gmail account with your mail id by tapping on the “Sign in” and “Sign up with Google” buttons available at the top right corner of the website.
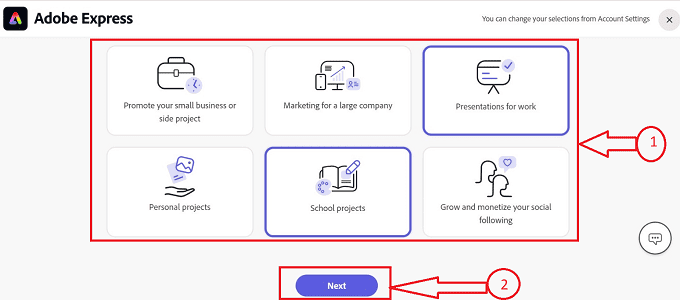
- Once you complete the “Sign in” activity to Adobe Express you will be redirected to a new window with a set of sections that allows you to choose the nature of your tasks and click on the “Next” icon.
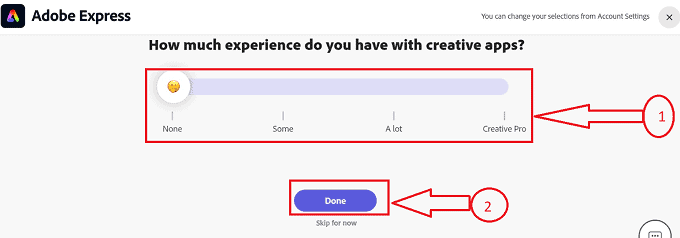
- Abode Express also allows you to work with the interface based on your skills in photo merging and its related activities by selecting the experience scale and clicking on the “Done” button.
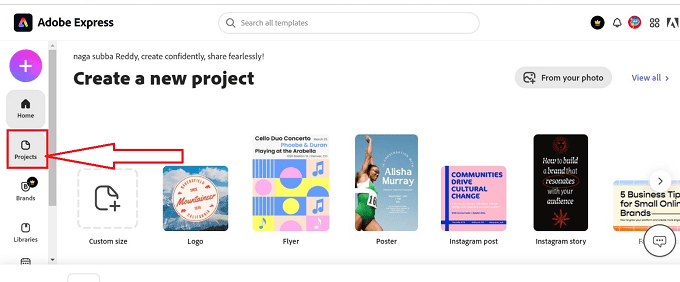
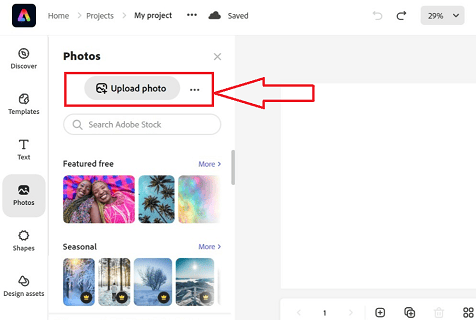
- After completing the above step a new interface window opens with a set of icons available at the left corner section of the window, click on the “Projects” icon from the available icons.
- After clicking on the “projects” icon a new interface opens, identify the “My project” icon in the interface and click on it.
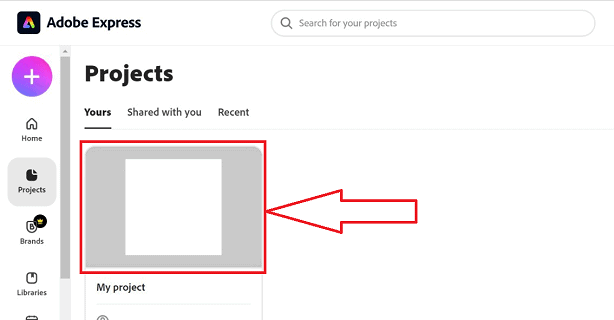
- After clicking on the “My project” icons a new interface window opens at the left section of the window click on the “Upload” button to upload the images from your system.
- After uploading the images from your system we can merge and arrange the images by Drag and Drop format and make necessary changes using the options available at the right corner of the webpage.

- By following the above steps we can successfully merge the images by using the Abode Spark webpage and tools.
Above are some of the essential websites/methods to be used to merge images online. The aforementioned websites can be used to assist you in merging photos online, regardless of whether you are a graphic designer, photographer, or just someone who wants to make a fun and original image
2. Canva
Canva makes it simple for beginners to generate photographs with a professional appearance by providing a large selection of templates and pre-designed layouts to choose from. Moreover, Canva has a drag-and-drop interface that makes it simple to resize and rearrange photos. Canva also provides a variety of editing tools, including filters, text overlays, and others.
The well-known graphic design site Canva has several tools for editing and combining images. Canva provides both cost-free and premium options. With Canva, you can either create a unique design from scratch or select from several templates and styles. Moreover, Canva provides a selection of editing tools, such as cropping, text overlay, and filters.
Features
Let us go through some of the important features of Canva
- Templates: Canva provides a vast collection of professionally designed templates for various design projects, which can be easily customized according to users’ needs.
- Drag-and-Drop Interface: Canva’s user interface is easy to use and intuitive, allowing users to drag and drop elements onto their designs.
- Customizable Elements: Users can customize various elements in their designs, including text, fonts, colors, backgrounds, and images.
- Stock Images and Videos: Canva provides a huge library of stock images and videos that users can use in their designs, eliminating the need for external resources.
- Collaboration: Canva allows multiple users to collaborate on a design project in real-time, making it easy for teams to work together.
- Branding: Canva’s brand kit feature allows users to upload their company logos, fonts, and colors, ensuring consistency across all their designs.
- Print and Export Options: Users can easily print their designs or export them in various file formats, including JPEG, PNG, and PDF.
- Mobile App: Canva has a mobile app that allows users to create and edit designs on the go.
Pricing
Canva pricing starts at $12.95 per month for the Pro plan, which includes access to premium features, such as the ability to upload your own fonts and custom branding.
How to merge images using Canva tools
Let us understand the step-by-step procedure for merging the images using Canva tools
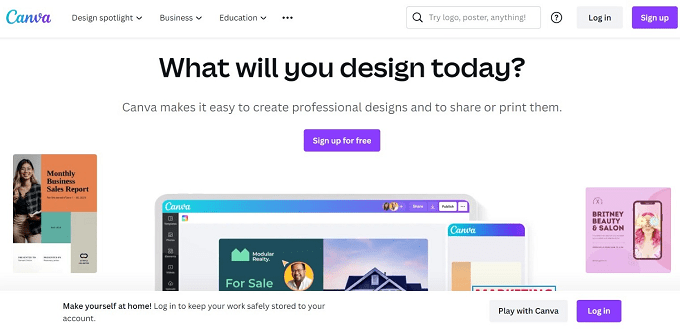
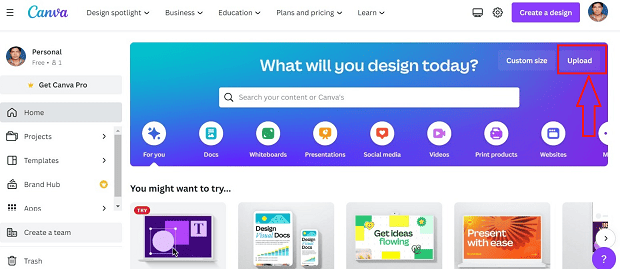
- Open your web browser and go to the Canva website using the “URL” (https://www.canva.com/), the required website opens.
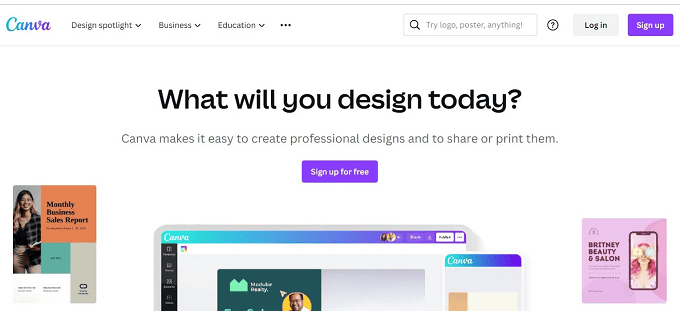
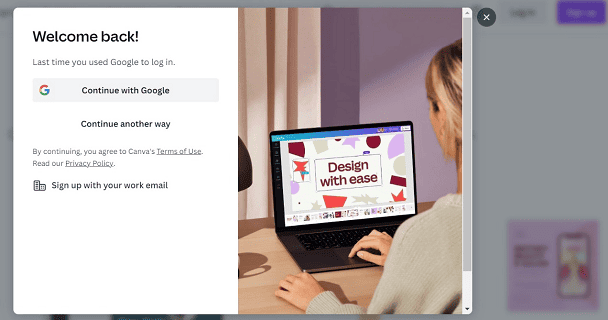
- Log in to your Canva account with your mail id by tapping on the “Log in” button available at the top of the website.
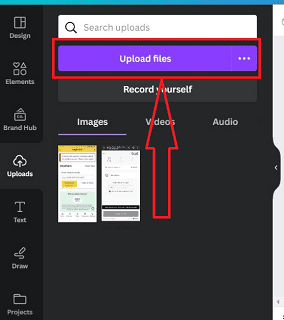
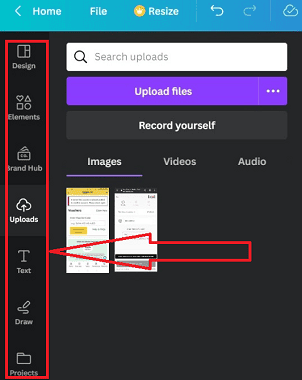
- Click on the “Uploads” tab on the left-hand side of the screen which allows you to select the images from the device you want to merge.
- After clicking on the initial image a new interface opens with a set of icons we have an upload button to select the further images from the system.
- we can merge the images with the help of keyboard and mouse pointers by dragging and dropping the images onto your canvas, which makes canvas unique and easy to use for merging images the output image will be shown and can be edited at the right side of the webpage.
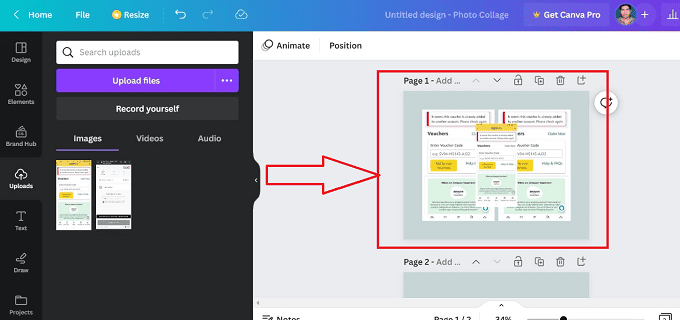
- The images will now be merged into a single image. You can further customize the merged image by adding text, shapes, or other design elements using Canva’s tools, available at the top left side of the webpage.
- Once the desired changes are made, click on the “Save” icon denoted with the cloud symbol at the top left section of the web page.
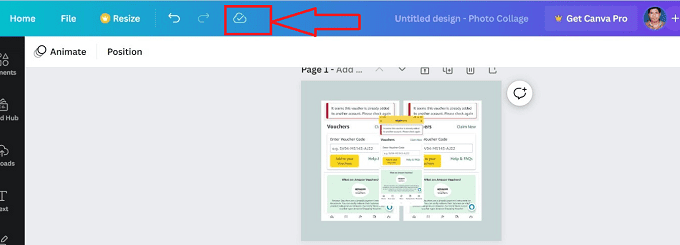
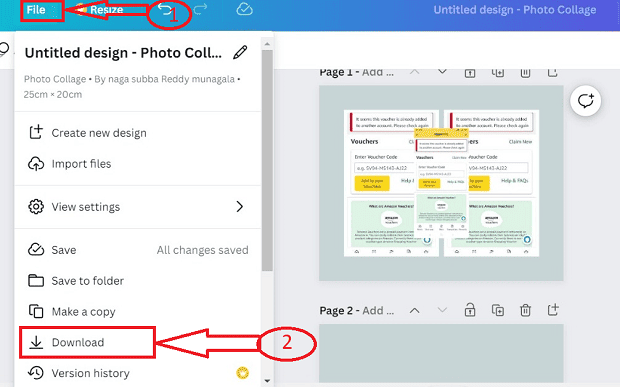
- Once you’re satisfied with your design, open the “File” icon a menu bar opens with a set of icons, click on the “Download” icon to download the merged image.
- By following the above steps we can successfully merge the images using the canvas website without any hurdles.
3. Fotor
Fotor is a tool for editing and designing photos. The website provides several templates for marketing materials, social media postings, and collages. You can alter the size, number, and layout of the photographs, as well as the background and layout. You can use various editing tools from Fotor to improve your combined image, including filters, effects, and text.
With the help of the online photo editor Fotor, you may combine photographs and add filters, text, and other design elements. It makes it simple for beginners to generate photographs with a professional appearance thanks to the variety of pre-designed templates and layouts available. Moreover, Fotor provides a variety of photo editing features like cropping, rotating, and adjusting brightness and contrast.
Features
Let us understand some of the major Features of Fotor
- Basic editing tools: Fotor allows users to adjust basic elements of their photos such as brightness, contrast, saturation, and sharpness.
- Advanced editing tools: In addition to basic editing tools, Fotor also offers a range of advanced editing tools such as curves, tone adjustments, and selective adjustments.
- Filters and effects: Fotor offers a variety of filters and effects that users can apply to their photos, including vintage, black and white, and artistic filters.
- Collage maker: Fotor’s collage maker allows users to create collages by selecting from a range of templates and customizing the layout, background, and spacing of their photos.
- Design templates: Fotor also offers a range of design templates for users to create posters, flyers, social media posts, and other graphic designs.
- Text editing tools: Fotor allows users to add text to their designs, choosing from a range of fonts, sizes, and styles.
- Beauty features: Fotor also includes features for portrait editing, including skin smoothing, teeth whitening, and eye enhancement.
- Batch processing: Fotor allows users to apply edits or filters to multiple photos at once, which can save a lot of time when working with large numbers of images.
- Cloud storage: Fotor offers cloud storage for users to save their photos and designs, making it easy to access and edit them from anywhere.
Pricing
The Pro plan, which grants access to premium features like more editing tools, higher resolution downloads, and the capacity to erase watermarks, is available for Fotor starting at $3.33 per month.
How to merge images with Fotor tools
Let us understand the step-by-step procedure of merging images with the help of the Fotor web page
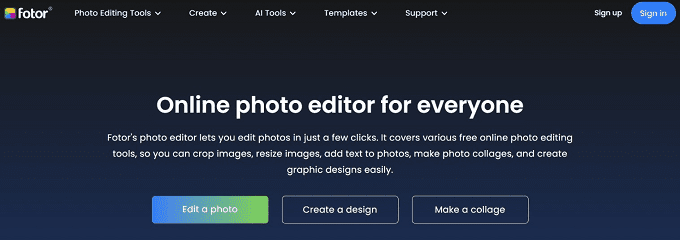
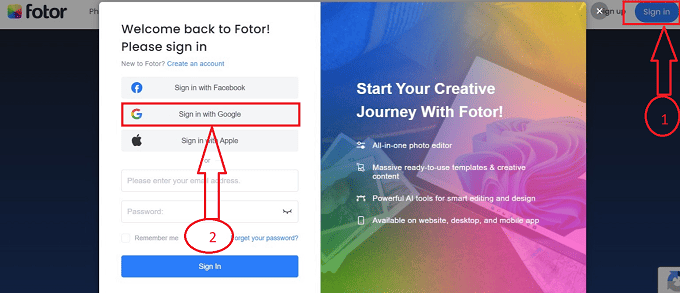
- Open your web browser and go to the Canva website using the “URL” (https://www.fotor.com/), the required website opens.
- Log in to your Fotor account with your mail id by tapping on the “Sign in” button available at the top right corner of the website.
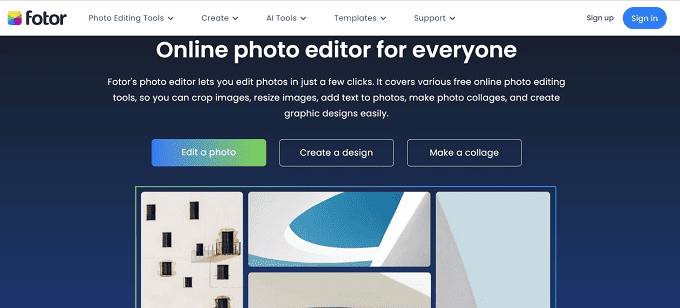
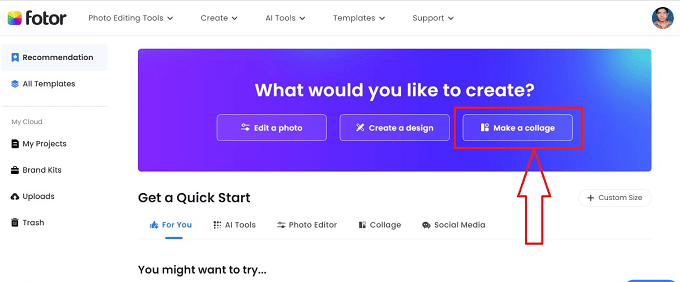
- After signing into the Fotor webpage, a new window opens with a set of icons. Click on “Make a collage” to create a custom collage.
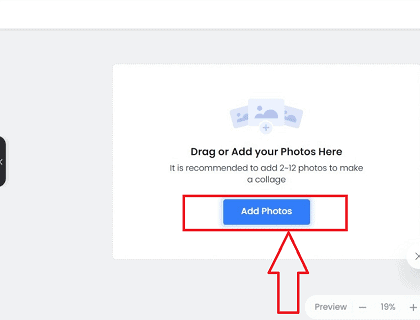
- Once you click on the make a collage button a new window opens. Click on the “Add Photos” button on the left-hand side of the screen and select the images you want to merge.
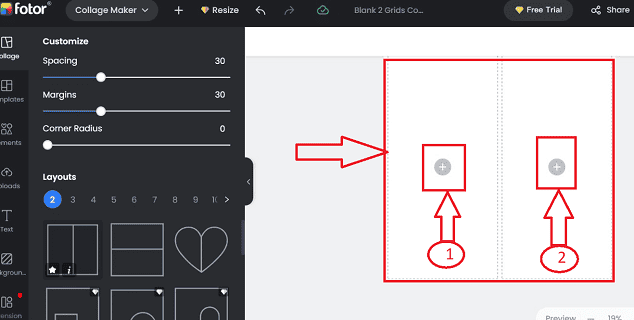
- Before adding images to merge you have an option named “Layouts” which allows you to select the layout of the images to be merged and layouts differ from the number of images to be merged.
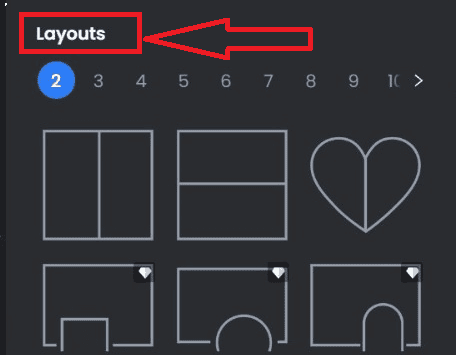
- After selecting the required layout to merge the images, an outline of the layout is displayed at the right section of the webpage. Click on the “+” symbol to add the images from your system to the layout.
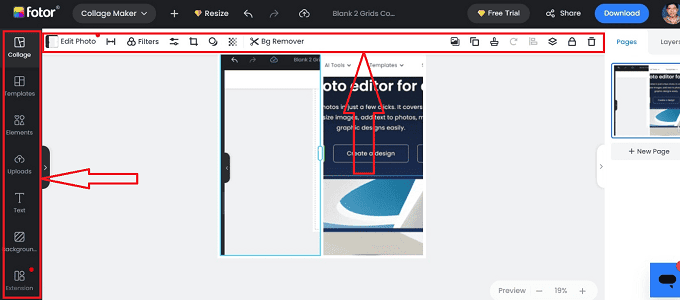
- Once you add the images to the layout, we can make necessary changes using the icons available at the top section of the website and also at the left corner of the window with the other set of icons.
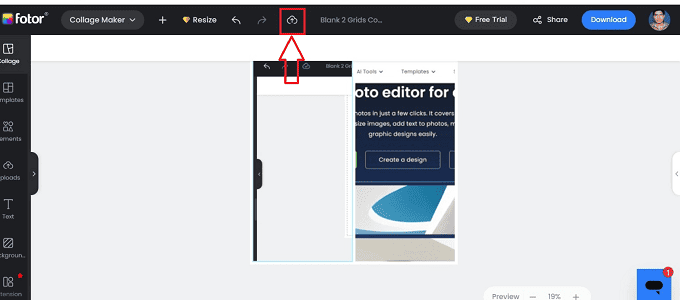
- Once the desired changes are made, click on the “Save” icon denoted with the cloud symbol at the top menu bar section of the web page.
- After saving the merged image with the required changes, click on the “Download” button at the top right side of the screen to download the merged image.
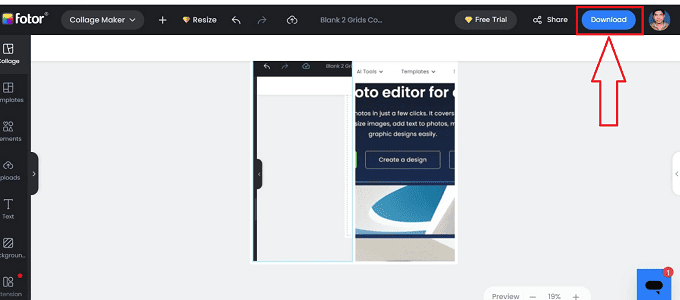
- Following the above steps we can successfully merge the images using the Fotor website without any hurdles.
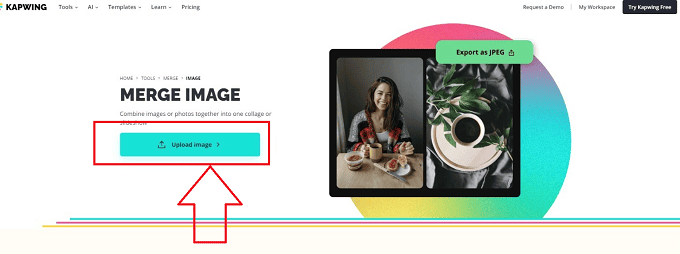
4. Kapwing

With the help of the free web tool Kapwing, you may combine photographs, movies, and GIFs into a single file. The website provides several collage, meme, and social media post templates. You can alter the size, number, and layout of the photographs, as well as the background and layout. You can use various editing tools from Kapwing to improve your merged image, including filters, effects, and text.
By using the video editor Kapwing, you can combine photographs with videos and add text, graphics, and other design components. It makes it simple for beginners to make professional-looking films by offering a variety of pre-designed templates and layouts to select from. Moreover, Kapwing provides various picture editing options, including crop, rotate, and brightness and contrast adjustments.
Features
There are many features in Kapwing, Some of the key features of Kapwing include
- Video editing: Kapwing allows users to upload their videos and edit them with tools such as trim, crop, resize, and add subtitles or captions.
- Image editing: Kapwing provides a range of image editing tools, such as resizing, cropping, adding filters, and applying text overlays.
- Collage maker: Kapwing allows users to create collages by selecting from a range of templates and customizing the layout, background, and spacing of their photos.
- Meme Generator: Kapwing includes a meme generator that allows users to add text to images or videos and create custom memes.
- Subtitle and captioning: Kapwing allows users to add subtitles or captions to their videos or images easily, using a range of styles, colors, and fonts.
- Video montage: Kapwing allows users to create video montages by combining multiple videos or images into a single video file.
- Audio editing: Kapwing includes tools to trim, crop, and adjust audio levels in videos.
- GIF creation: Kapwing allows users to create animated GIFs by uploading videos or images and selecting the sections to animate.
- Social media optimization: Kapwing provides templates and tools to optimize content for specific social media platforms, such as Instagram or TikTok.
- Cloud storage: Kapwing allows users to save their projects in the cloud, making it easy to access and edit them from anywhere.
Pricing
The Pro package, which gives users access to premium features including no watermark, unlimited storage, and priority support, costs $20 per month.
How to merge the images with the help of Kapwing tools
Let us understand the step-by-step procedure of merging images using Kapwing tools
- Open your web browser and go to the Kapwing website using the “URL” (https://www.Kapwing.com/), the required website opens.
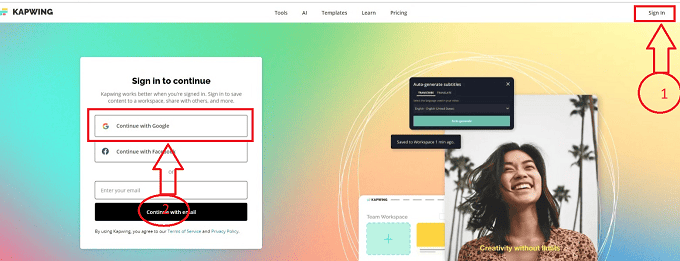
- Log in to your Kapwing web page with the help of your Gmail account with your mail id by tapping on the “Sign in” and “Continue with Google” buttons available at the top right corner of the website.
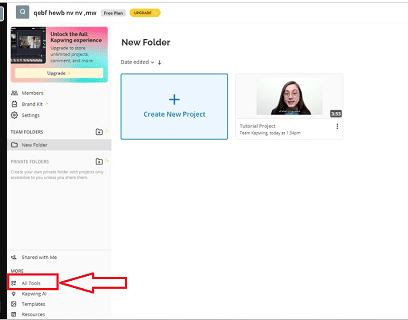
- Once the Kapwing web page opens, there will be a set of icons available icons. click on the “All Tools” icon available at the bottom left side in the menu bar of the Kapwing webpage.
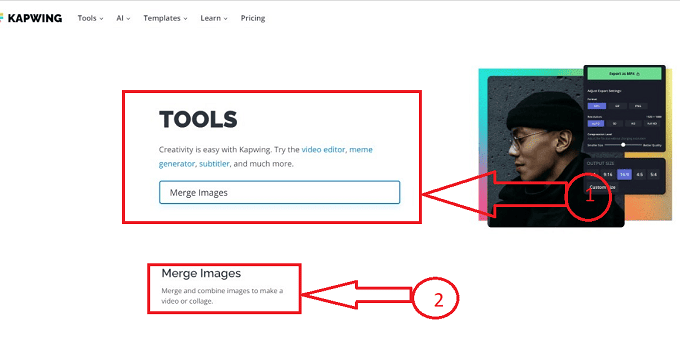
- After clicking on the “All Tools” icon a new interface opens with a different set of tools as a “Tools” interface window of the Kapwing webpage.

- After opening the “Tools” interface, a search box will be displayed at the top section of the windows, search for the “Merge Images” tool in the search box, and click on it.
- After clicking on the merge image option a new sub-window opens with a set of icons, click on the “Upload image” button in the sub-window to upload the initial image from your system.
- After clicking on the initial image a new interface opens with a set of icons we have a “Click to upload” button to select the further images from the system.
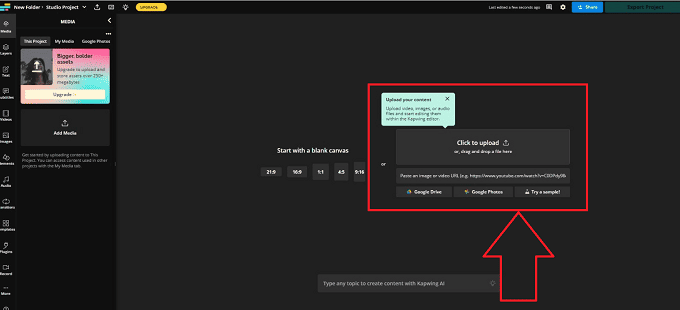
- we can arrange and merge the images with the help of keyboard and mouse pointers by dragging and dropping the images on the Kapwing webpage.
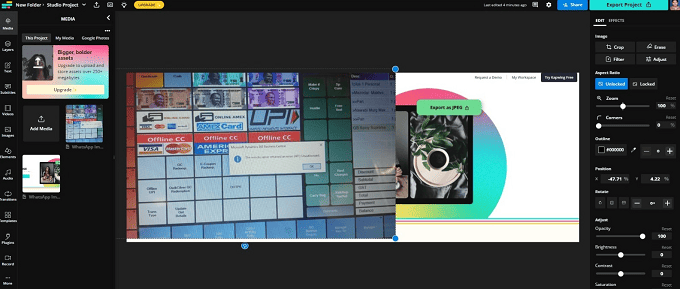
- Once the arrangement and merging of images are made, we can make the required changes to the output image with the help of the available tools on the Kapwing webpage.
- Once you’re satisfied with your collage, click on the “Export Project” button at the top of the screen and select the resolution of the image and click on the “Export as JPEG” button at the bottom of the webpage.
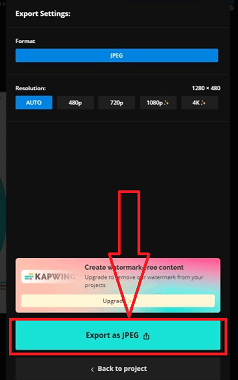
- Once we “Export” the image a new interface window opens with the “Download File” button available at the top right section of the webpage, click on it to download the merged output image.

- By following the above steps we can successfully merge the images using the Kapwing webpage without any hurdles.
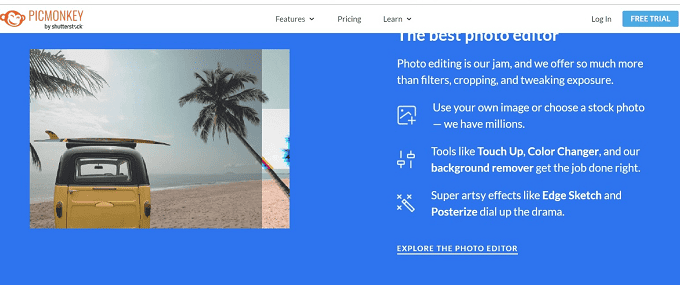
5.PicMonkey
PicMonkey is a tool for editing and designing photos. The website provides several templates for marketing materials, social media postings, and collages. You can alter the size, number, and layout of the photographs, as well as the background and layout. You can use various editing tools from PicMonkey to improve your combined image, including filters, effects, and text.
Features
Let us understand some of the key features of PicMonkey
- Basic editing tools: PicMonkey allows users to adjust basic elements of their photos such as brightness, contrast, saturation, and sharpness.
- Advanced editing tools: In addition to basic editing tools, PicMonkey also offers a range of advanced editing tools such as curves, levels, and selective adjustments.
- Filters and effects: PicMonkey offers a variety of filters and effects that users can apply to their photos, including vintage, black and white, and artistic filters.
- Touch-up tools: PicMonkey includes touch-up tools that allow users to smooth skin, remove blemishes, and brighten teeth in portraits.
- Text editing tools: PicMonkey allows users to add text to their designs, choosing from a range of fonts, sizes, and styles.
- Design templates: PicMonkey also offers a range of design templates for users to create social media posts, posters, flyers, and other graphic designs.
- Collage maker: PicMonkey’s collage maker allows users to create collages by selecting from a range of templates and customizing the layout, background, and spacing of their photos.
- Branding tools: PicMonkey allows users to add logos and watermarks to their designs, helping to establish their brand identity.
- Cloud storage: PicMonkey offers cloud storage for users to save their photos and designs, making it easy to access and edit them from anywhere.
- Video editing: PicMonkey also allows users to edit videos, adding effects, text overlays, and trimming clips.
Pricing
Pricing for PicMonkey’s Basic plan, which gives users access to basic editing capabilities, storage, and sharing, starts at $7.99 per month. The Pro plan, which has a monthly starting price of $12.99, gives users access to premium features like higher-resolution downloads, additional editing tools and graphics, and the opportunity to get rid of watermarks.
How to merge images using Pic Monkey webpage
Let us understand the step-by-step procedure of merging images using Pic monkey website
- Open your web browser and go to the Kapwing website using the “URL” (https://www.PicMonkey.com/), the required website opens.
- Log in to your PicMonkey web page with the help of your Gmail account with your mail id by tapping on the “Log in” and “Sign up with Google” buttons available at the top right corner of the website.
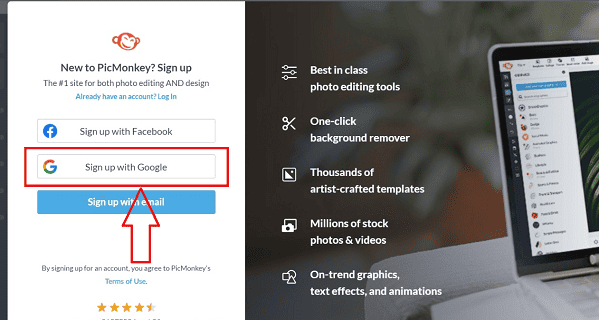
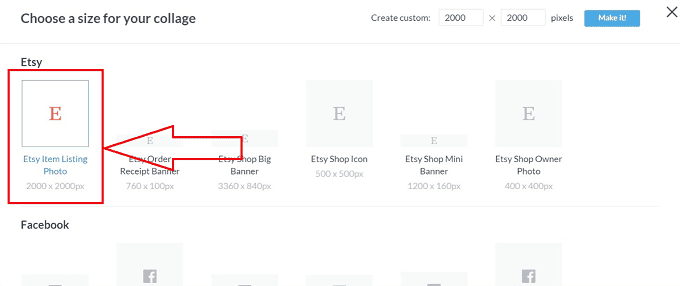
- After signing up, a new sub-window opens with multiple icons in it, choose the “Create a collage” option from the available icons on the PicMonkey webpage.
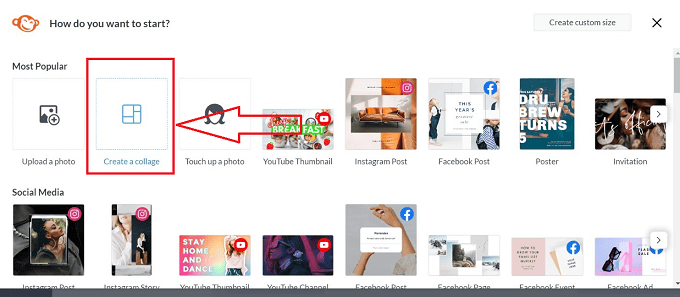
- After selecting the “Create a collage” option a new sub-window interface opens with multiple collage models, choose the required collage for merging the images and click on it.
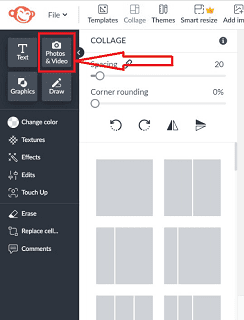
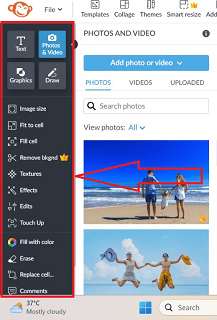
- After selecting the required collage for merging images a new interface opens in a sub-window with multiple icons, choose the “photos & videos” icon and click on it.
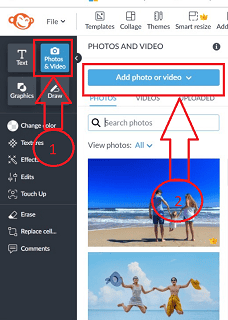
- After clicking on the “Photos & Videos” option a new sub-menu opens with a different set of icons, choose the “Add Photo or Video” option and click on it to upload the images from your computer.
- Once the images to be merged are selected from the system, arrange the two images as desired by dragging and dropping them on the canvas.
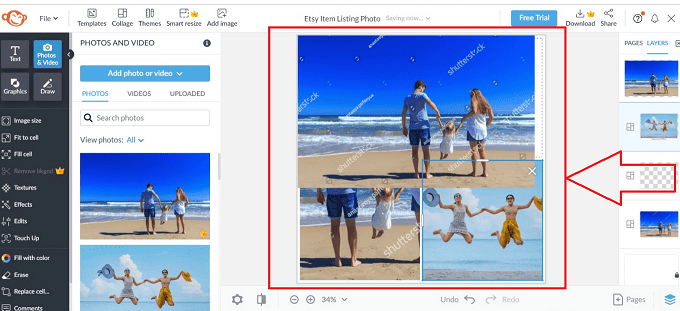
- Once the images got merged, we can make the necessary changes to the merged images using the icons available at the left corner of the webpage.
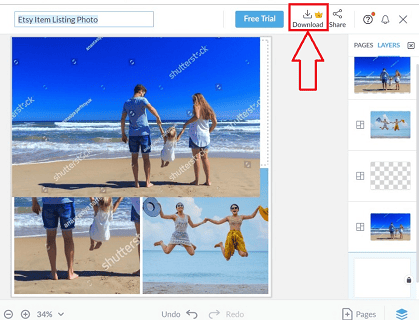
- Once the required changes are made, click on the download button available at the top right corner of the PicMonkey webpage, and the merged output image will be downloaded.
- By following the above steps we can successfully download the images using the PicMonkey website without any hurdles.
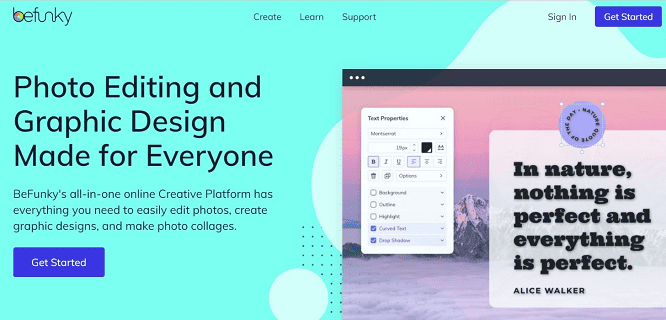
6.BeFunky
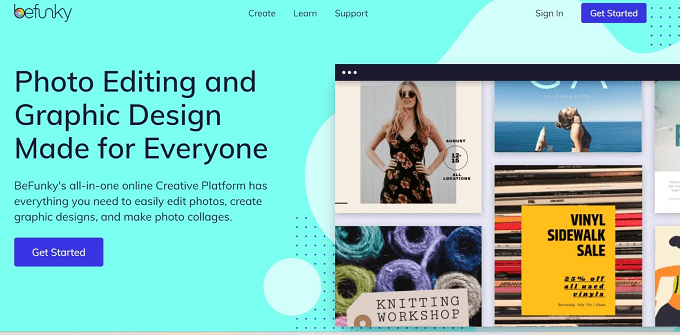
A variety of functions are available in the online photo editor and design tool BeFunky, which includes the capacity to combine photographs online. The website provides several templates for marketing materials, social media postings, and collages. You can alter the size, number, and layout of the photographs, as well as the background and layout. You can use various editing tools from BeFunky to improve your blended image, including filters, effects, and text.
Features
Let us understand some key features of BeFunky
- Photo Editing: BeFunky offers a range of editing tools to help users enhance their photos. These include tools like crop, rotate, resize, and adjust exposure, color, brightness, and contrast.
- Graphic Design: BeFunky also offers a range of graphic design tools for users to create their designs. These include templates, text and font tools, graphics, and a variety of filters and effects.
- Collage Maker: The Collage Maker feature in BeFunky allows users to create beautiful photo collages with ease. There are a variety of layouts and templates to choose from, and users can customize the background, add text, and adjust the size and spacing of their images.
- Batch Processing: BeFunky offers batch processing, which allows users to edit multiple photos at once. This is a great feature for users who need to make the same edits to a large number of photos.
- Mobile App: BeFunky has a mobile app for both iOS and Android, which allows users to edit photos and create designs on the go.
- Integration: BeFunky can be integrated with a range of other apps and platforms, including social media sites like Facebook and Instagram, as well as Dropbox and Google Drive.
Pricing
BeFunky’s pricing starts at $4.99 per month for the Basic plan.
How to merge images using the BeFunky website
Let us understand the step-by-step procedure of merging images with the help of the BeFunky website
- Open your web browser and go to the BeFunky website using the “URL” (https://www.beFunky.com/), the required website opens.
- Log in to your BeFunky web page with the help of your Gmail account with your mail id by tapping on the “Sign in” and “Sign up with Google” buttons available at the top right corner of the website.

- After signing into the BeFunky webpage you will be redirected to the new interface window with the set of icons available at the left section of the webpage.
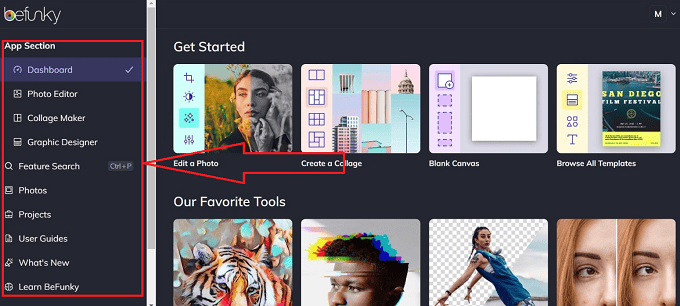
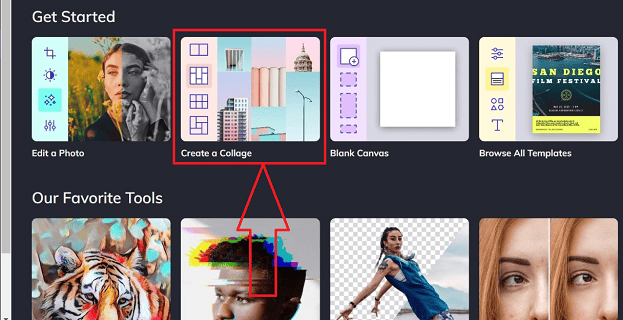
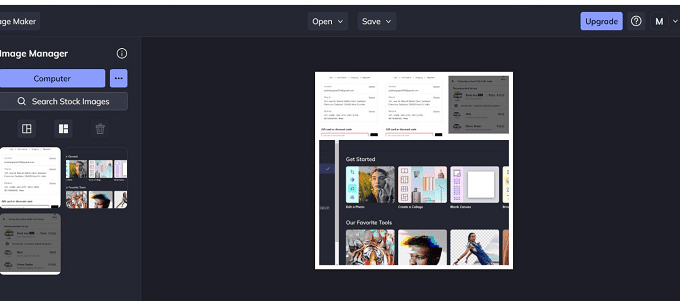
- Click on the “Create a collage” section available from the available sections on the be funky webpage.
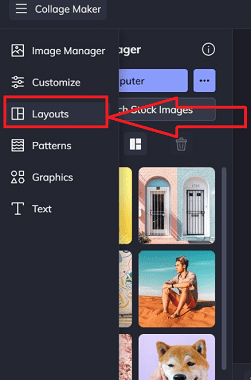
- After clicking on the “Create a Collage” option a new interface opens with a Coallage sub-window with a new set of icons at the left corner of the window select the “Layout” option and click on it.
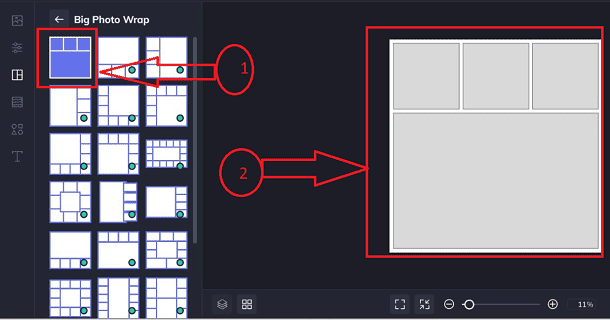
- After clicking on layout options, a list of sample layouts will be displayed in a sub-menu, choose the required layout from the available layout options, selected layout outline will be displayed on the right section of the webpage.
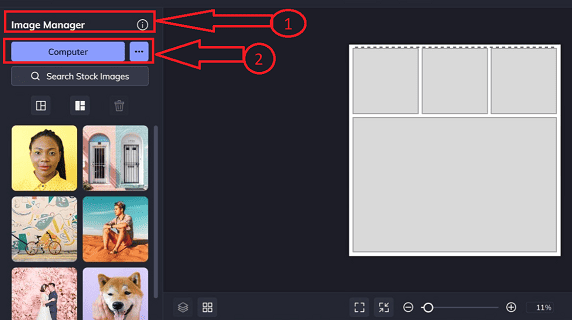
- Once the required layout is selected for merging the images, select the “Image Manager” icon representing the “image” symbol and click on the “Computer” button to select the images from your device.
- After selecting the required images to be merged from your device, arrange the selected images as desired by dragging and dropping them on the selected layout.
- After arranging the images in the required format, there are icons available on the Befunky webpage to make the desired changes in the output image.
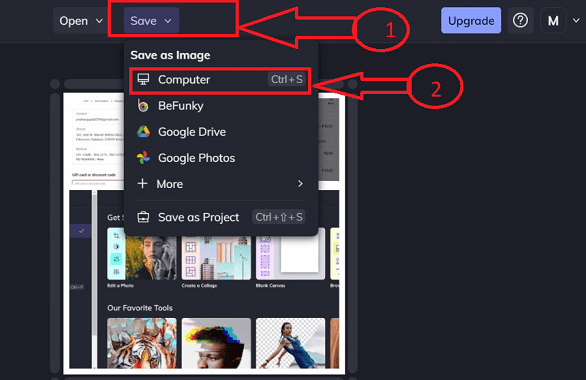
- Once the required changes are made to the output image, click on the “Save” button a drop-down menu bar opens with a set of icons, and click on the “Computer” icon from the available icons.
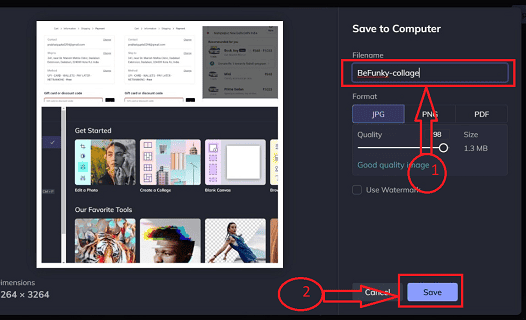
- After clicking on the “Computer” icon a new interface opens for downloading the output image, type the required file name and click on the “Save” icon.
- That’s it! You have successfully merged images using BeFunky webpage.
- Related: How to Add and edit images in PDF – 18 Amazing Ways
- How to Convert Image to PDF- 16 Amazing Ways (online and Offline)
How to Merge Images Offline
Although there are many online tools for merging photographs, there are occasions when it is more practical or necessary to merge images without an internet connection. In this essay, we will cover some popular approaches to merging photos offline and their features.
1. Adobe Photoshop
Adobe Photoshop has several capabilities, including the capacity to combine photographs. Photographers, graphic designers, and other creatives frequently utilize Adobe Photoshop, a well-known image-editing program. It provides a vast array of cutting-edge tools and functions for editing pictures and making digital art.
Users of Photoshop can edit and improve photos using a variety of tools, including the brush tool, healing brush, clone stamp, and more. Moreover, it offers sophisticated tools like layers, masks, and filters that let users make in-depth alterations to their photographs.
Users of Photoshop can open and edit existing photos or produce brand-new ones from scratch. JPEG, PNG, RAW, and many other file types are among the many that it supports. A versatile tool for creative professionals, Photoshop also interfaces with other Adobe products like Lightroom and Illustrator.
For users who want to produce, modify, and enhance digital photos, Adobe Photoshop is a strong and all-encompassing image editing application that offers a variety of advanced functions.
Features
Let us go through some of the major features of Abode Photoshop
- Layers: Photoshop allows users to work with multiple layers, enabling them to create complex designs and make changes easily.
- Selection Tools: Photoshop offers a variety of selection tools, including the Magic Wand, Lasso, and Quick Selection tools, which allow users to select and edit specific parts of an image.
- Image Editing: Photoshop provides a range of editing tools for manipulating images, including crop, resize, rotate, and flip, as well as tools for adjusting color, brightness, contrast, and more.
- Brushes: Photoshop offers a range of brushes for painting, drawing, and retouching images, as well as the ability to create custom brushes.
- Filters and Effects: Photoshop offers a wide variety of filters and effects that can be applied to images, including blurs, distortions, lighting effects, and more.
- Text and Typography: Photoshop includes tools for adding and formatting text, including the ability to create and edit text layers, as well as a range of typographic controls.
- 3D Design: Photoshop allows users to create and manipulate 3D models, including the ability to add lighting and textures to 3D objects.
- Integration: Photoshop integrates with other Adobe Creative Cloud applications, making it easy to work with files from other applications, such as Illustrator and InDesign.
- Automation: Photoshop includes a range of automation tools, including batch processing, actions, and scripts, which can help users streamline their workflow and save time.
- Mobile App: Photoshop has a mobile app for both iOS and Android, allowing users to edit and manipulate images on the go.
Pricing
Let us discuss the detailed pricing details of Abode Photoshop in each section
- Individuals:
- Photography plan (includes Photoshop and Lightroom): $9.99/month
- Single App plan (includes Photoshop only): $20.99/month
- All Apps plan (includes Photoshop and all Adobe Creative Cloud apps): $52.99/month
- Students and teachers:
- All Apps plan: $19.99/month
- Photography plan: $9.99/month
- Businesses:
- All Apps plan: Starts at $33.99/month per user
- Photography plan: Starts at $19.99/month per user
How to merge photos using Adobe Photoshop tools
Let us understand step by step procedure of merging tools using Adobe Photoshop tools
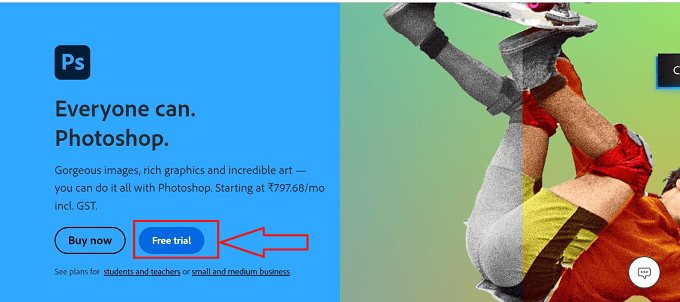
- Download and install Adobe Photoshop on your device by clicking on the “Free Trial” option and the abode interface home page opens
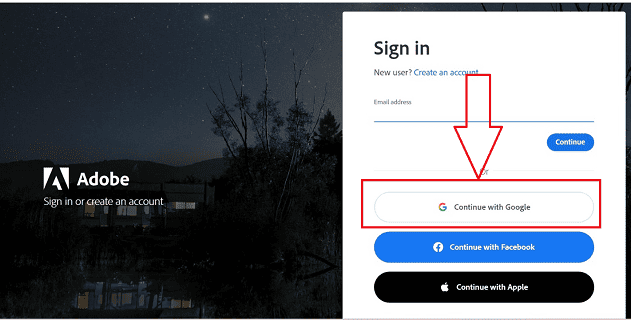
- Log in to your Adobe Spark web page with the help of your Gmail account with your mail id by tapping on the “Sign in” and “Sign up with Google” buttons available at the top right corner of the website.
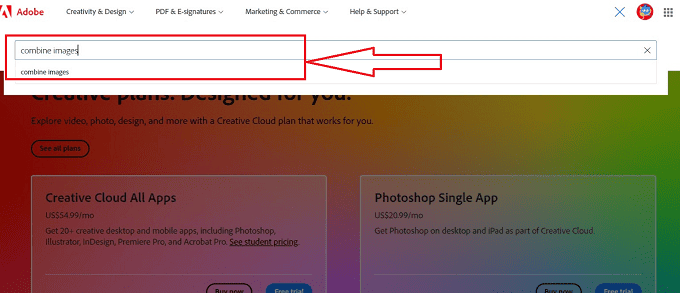
- Once you complete the “Sign in” activity to adobe spark you will be redirected to a new window with multiple sets of icons in the search box, type and search for “Combine images” and click on it.
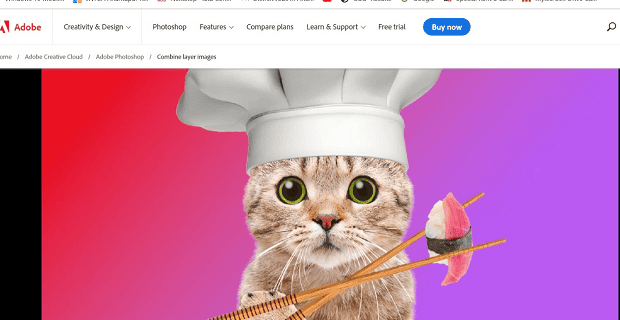
- After clicking on combine images a new window interface opens with a different set of icons, Scroll down and click on the “Add layers” option.
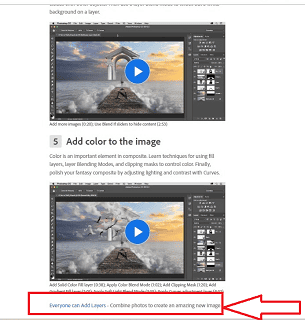
- A new interface opens after clicking on the “Add Layers” option, where we can select the images from your system, Click on the “+” button to add an image to the layout.
- Choose the first image you want to merge from your computer or Adobe Creative Cloud library. we also have icons to resize and reposition the image as desired within the layout.
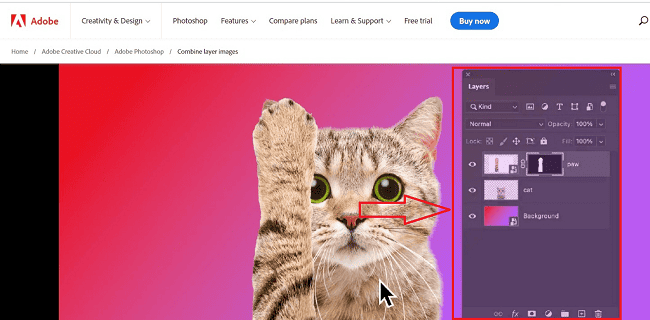
- Click on the “+” button again to add the second image, Choose the second image you want to merge and position it as desired on top of the first image.
- Click on “Download” to save your merged image to your computer.
- By following the above steps we can successfully merge the images by using the Abode Photoshop tools.
2. GIMP
GIMP is a free and open-source image editing program with capabilities comparable to those of Photoshop. You can import the photographs you want to combine into various layers in a new image file. For Windows, Mac, and Linux users, GIMP (GNU Image Manipulation Program) is a free and open-source image editing program. It is intended to provide many of the same functionality as expensive commercial image editing software like Adobe Photoshop.
GIMP has a large selection of sophisticated tools, such as a brush tool, pencil tool, clone stamp tool, and others, for editing images and producing digital art. It is a strong tool for performing intricate picture alterations and adjustments because it also supports layers, masks, and filters.
GIMP provides sophisticated capabilities like color correction, perspective correction, and text editing in addition to conventional image editing tools. It is compatible with several different file types, including JPEG, PNG, and TIFF.
GIMP is a highly-liked application among casual users who want to edit their digital photographs as well as graphic designers, photographers, and other creative pros. GIMP is a flexible and dependable alternative for image editing since it is open-source software that is continually being updated and developed by a community of developers across the world.
Features
Let us understand some of the major features of GIMP
- Customizable interface: The interface of GIMP is customizable, and users can customize the layout, colors, and themes to suit their preferences.
- Photo editing: GIMP provides a range of photo editing tools, including color correction, retouching, cropping, resizing, and layer masks.
- Drawing and painting tools: GIMP provides a range of drawing and painting tools, including brushes, pencils, airbrushes, and cloning tools.
- Graphic design: GIMP provides tools for creating graphic designs, including logos, icons, and other visual elements.
- Digital image manipulation: GIMP offers a wide range of image manipulation tools such as transformations, filters, layers, and blending modes to manipulate images.
- Extensibility: GIMP is highly extensible, allowing users to install plugins, scripts, and extensions to add new functionality.
- Cross-platform compatibility: GIMP works on multiple operating systems, including Windows, macOS, and Linux.
- Support for a wide range of file formats: GIMP supports a wide range of file formats, including JPEG, PNG, GIF, TIFF, PSD, and many more.
- Batch processing: GIMP provides batch processing options to automate repetitive tasks for editing large numbers of images.
Pricing
GIMP is free to download, use, and modify, and there are no fixed costs associated with it.
How to merge images using GIMP
Let us understand the step-by-step procedure of merging images using GIMP
- Open your web browser and go to the GIMP website using the “URL” (https://www.gimp.org/), the required homepage opens.
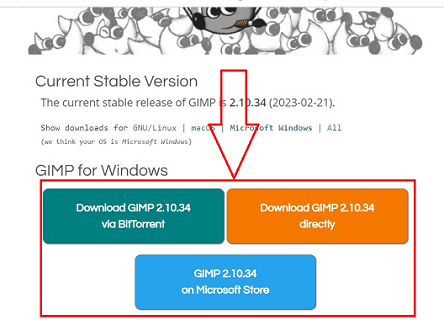
- Click on the “Download” button in the menu bar of the GIMP webpage and a new interface opens with different versions of GIMP tools to download, choose the required version and click on the “Download button”.
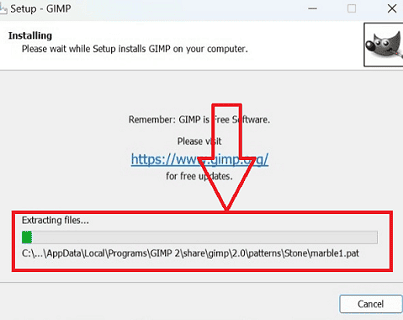
- Once the GIMP software is downloaded, a sub-window opens, to install the software into your device, click on “Install” from the subwindow.
- Once the required installation of all the tools and packages is completed in your system a sub-window opens with the “Finish” button, click on it.
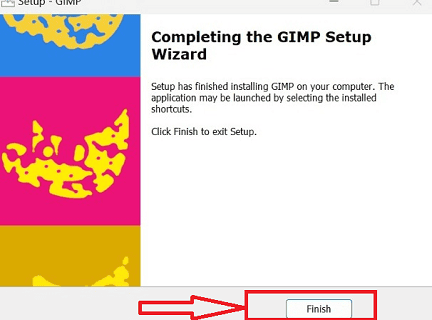
- After finishing the installation process and adding the required packages to the system by clicking on the “Finish” button, the required GIMP interface opens.
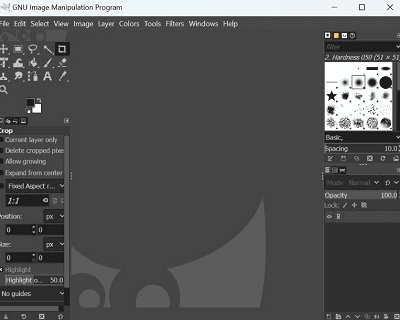
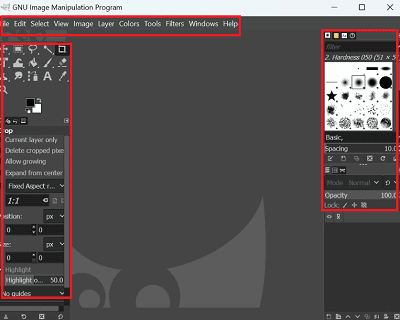
- After opening the GIMP home page identify the menu bar at the top of the homepage and also we can find different sets of icons to process image operations available at both the left and right corners of the GIMP tools homepage.
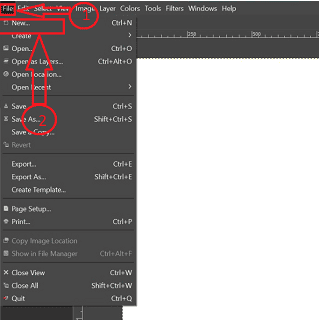
- Click on the “File” icon from the menu bar a sub-window opens with a set of icons. Open your backdrop image in GIMP or create a new image file.
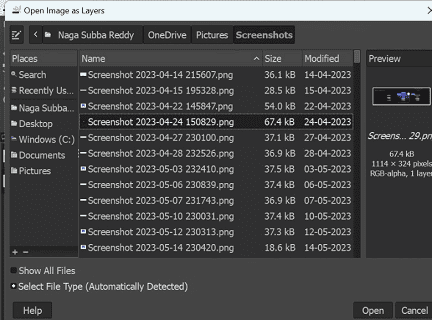
- To open your second image, select Open As Layers from the File menu.
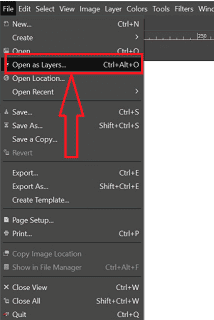
- After clicking on the “Open as Layer” icon it will redirect you to choose the images to be merged from your system with the aid of GIMP tools.
- After selecting the required images to be merged from the system, click on the “Move” icon represented with the “+” symbol to adjust the positions of the combined images.
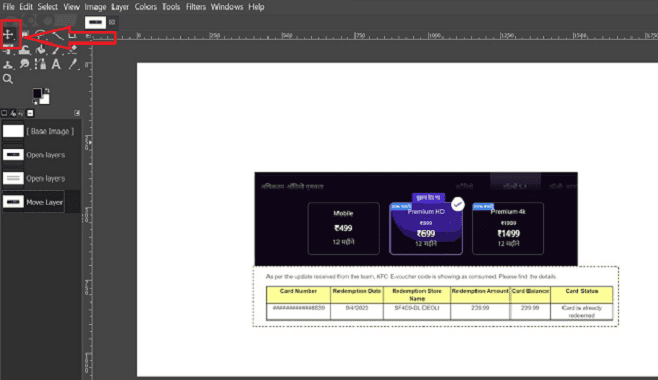
- After positioning bot the images in the merged state make the necessary changes using the icons available at the corners of the GIMP tool.
- After making the necessary changes click on the “File” icon from the menu bar and choose the option of the “Save as copy” icon to store the image in your system for further use.

- By following the above steps we can successfully merge the images using the GIMP tool without any hurdles.
3. Paint
A free image editing program called Paint has an easy-to-use user interface. You can import the photographs you want to combine into various layers in a new image file. The layers can then be combined into a single layer after being arranged, and the file can then be saved. There are other choices in Paint to change the distance between the images, use filters, and more.
Since Windows 1.0 in 1985, Paint, a straightforward graphics editing program, has been a part of every version of Microsoft Windows. With the help of simple drawing and painting tools including brushes, shapes, and text, users may create and edit images.
Users of Paint can make straightforward designs, tweak pre-existing images, or do freehand drawings. Users can also change the cropping, scaling, and rotation of photographs. BMP, JPG, and PNG are just a few of the file formats that Paint supports. Although being a simple program, Paint is still widely used for quick and easy image-altering tasks like cropping a picture or making a simple graphic for a presentation.
Features
Let us understand some of the important features of paint
- Essential drawing tools: Paint provides basic drawing tools such as a pencil, brush, eraser, and color picker.
- Shape tools: Paint offers tools to create shapes such as lines, rectangles, ovals, and polygons.
- Text tools: Paint has a text tool that allows you to add text to an image in various fonts, sizes, and colors.
- Image resizing: Paint allows you to resize your image to a specific size or percentage.
- Image cropping: Paint allows you to crop your image to remove unwanted parts or to focus on a specific area.
- Image flipping and rotating: Paint allows you to flip and rotate your image to different angles.
- Color selection: Paint allows you to select and change colors in your image using a color palette.
Pricing
Paint is a basic image editing software that is pre-installed on most Windows computers. As such, it does not have a price tag as it is included with the Windows operating system.
How to Merge images using paint
Let us understand the step-by-step procedure of merging images using paint tools.
- Open your web browser and go to the Paint website using the “URL” (https://apps.microsoft.com/store/detail/paint/9PCFS5B6T72H), and the required homepage opens.
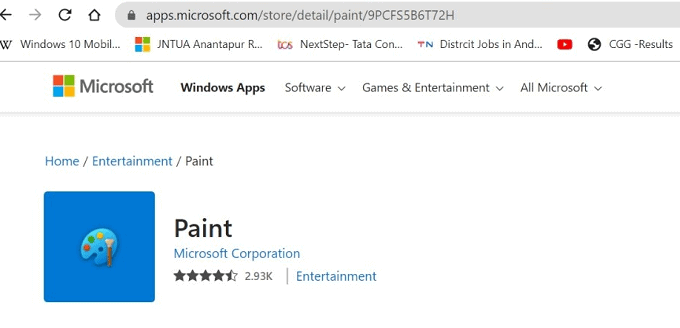
- On the webpage identify the “Get in Store app” button available at the right section of the web page and click on it.

- Once you click on “Get in Store app” Paint will be installed into your system app store with all the required packages and tools in the Microsoft app store and click on the “Open” button.
- After clicking on the “Open” icon, the required Paint application homepage will be opened in your system.
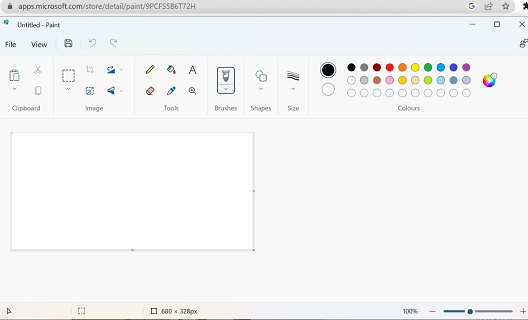
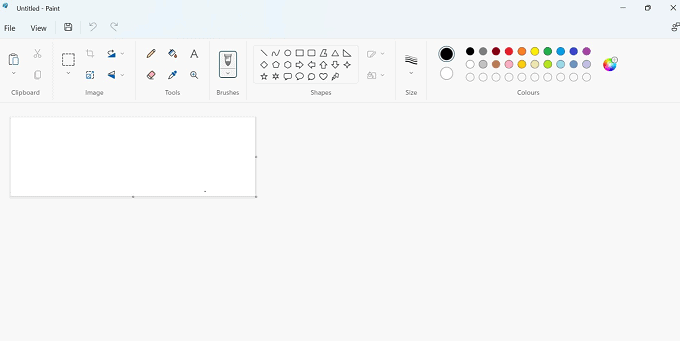
- We can identify the menu bar at the top of the Paint application homepage, click on the “File” icon from the menu bar a sub-menu opens with multiple icons click on the “New” icon.
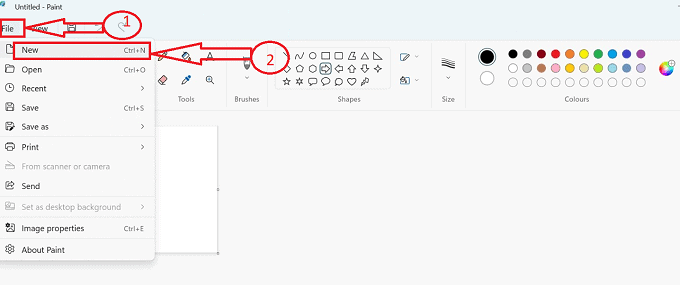
- A new layer will be opened on the paint homepage, to upload the images click on the “Open” icon from the “File” menu available in the menu bar.
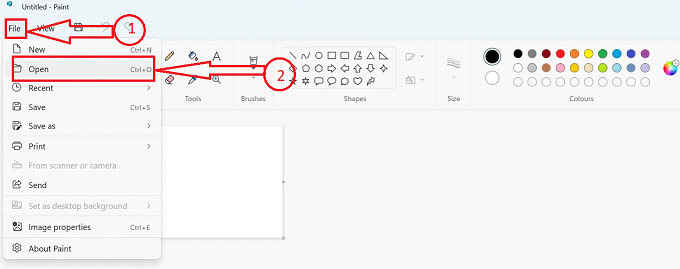
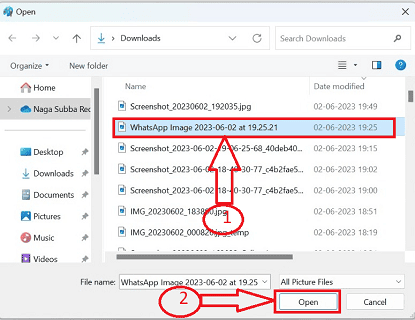
- After clicking on the “Open” icon, it redirects you to upload the images to be merged from the stored images in the system, choose the images to be merged, and click on the “Open” button.
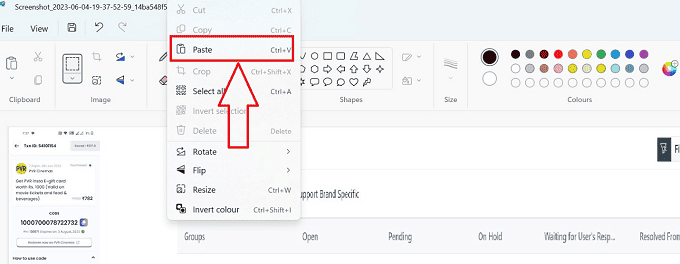
- After selecting the initial image in the layer of the paint application to be merged, copy and paste the second image to be combined.
- After choosing the second image to be merged place the position of the image with the help of the mouse and make the required changes by using the icons available at the top section of the paint application.

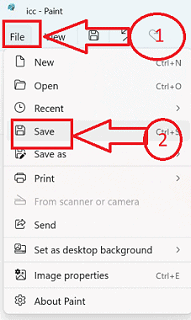
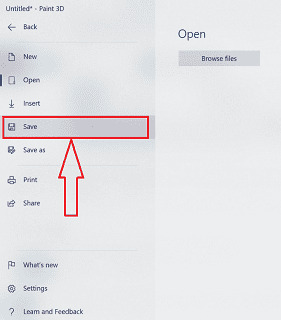
- Once the required changes are made, click on the “File” icon from the menu bar and click on the “Save” icon from the list of icons available to save the merged image for further use.
- By following the above steps we can successfully merge images with the help of Paint without any hurdles.
4. Paint 3d
Users may create, edit, and share 2D and 3D creations with Paint 3D, a free program that comes with Windows 10. With new capabilities including 3D design tools, the capacity to work with layers, and support for importing and exporting a wide variety of file types, the app is an improved version of Microsoft’s vintage Paint software.
Users of Paint 3D have the option of building 3D objects from scratch or selecting pre-made models from the app’s library. Users can add colors, textures, and patterns to their drawings using the app’s different painting and sketching tools.
Moreover, Paint 3D supports mixed reality, giving users the option to view their 3D creations in a virtual setting with the use of a headset. Those who want to build 3D designs for gaming, animation, or augmented reality applications may find this functionality to be especially helpful.
Features
- 2D and 3D drawing tools: Paint 3D provides both 2D and 3D drawing tools, including brushes, pens, and shapes for 2D, and 3D models, stamps, and stickers for 3D.
- Magic Select: Paint 3D allows you to automatically select and remove the background of an image.
- 3D object creation: Paint 3D provides tools to create 3D objects from scratch or from pre-made models.
- Image editing tools: Paint 3D allows you to add textures, adjust lighting and shadow, and apply various effects to your images.
- 3D text: Paint 3D provides tools to create 3D text and apply 3D effects to it.
- Remix 3D: Paint 3D has a built-in online community where you can share and download 3D models and other creative works.
- Integration with Windows 10: Paint 3D is integrated with Windows 10, allowing you to easily share your creations and save them to your OneDrive cloud storage.
Pricing
Paint 3D is a more advanced version of Paint that is also available for free to Windows users. It can be downloaded from the Microsoft Store at no cost.
How to merge images using Paint 3D
Let us understand the step-by-step procedure of merging images with the help of Paint 3D tools.
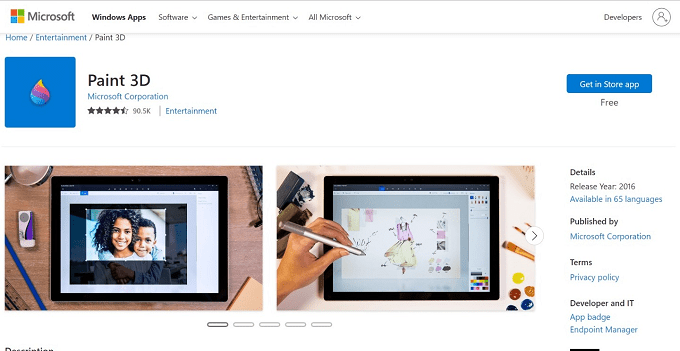
- Open your web browser and go to the Paint 3D website using the “URL” (https://apps.microsoft.com/store/detail/paint-3d/9NBLGGH5FV99), and the required homepage opens.
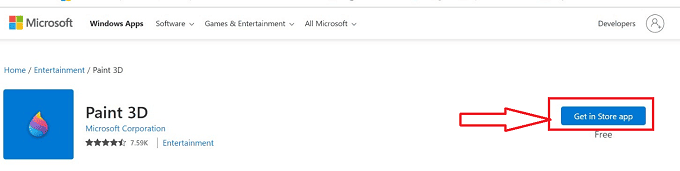
- On the webpage identify the “Get in Store app” button available at the right section of the web page and click on it.
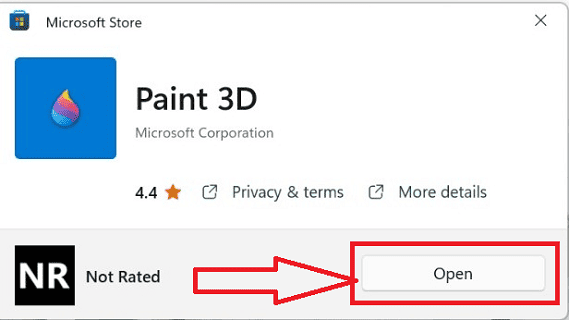
- Once you click on “Get in Store app” the Paint 3D application will be installed into your system app store with all the required packages and tools in the Microsoft app store and click on the “Open” button.
- Once the “Open” button is clicked, you will be redirected to the Paint 3d home page, home page will be opened with two icons “New” and “Open”. Click on the “New” icon to enter the paint homepage.
- After selecting the “New” icon, the Paint 3d application home page interface opens with the menu bar and set of tools at the top section of the interface.
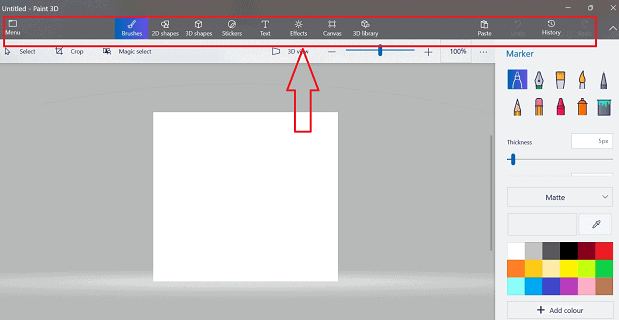
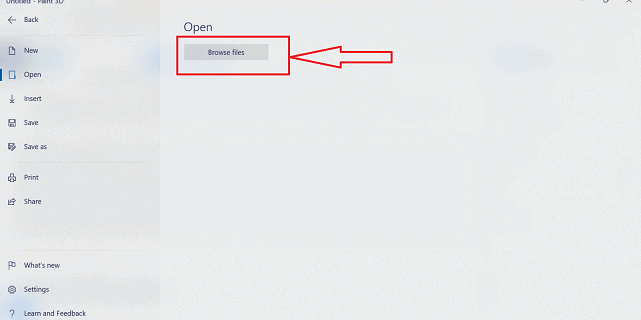
- We can identify the menu bar at the top of the Paint 3d application homepage, click on it, and you will be redirected to a new sub-menu that opens with a set of icons, choose the “Open” icon and click on “Browse Files” icon.
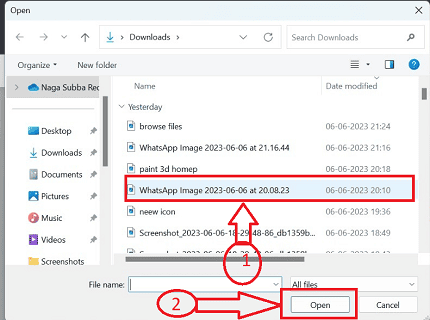
- After clicking on the “Browse Files” icon you will be redirected to the stored images in your system, identify the initial image to be merged and click on the “Open” button
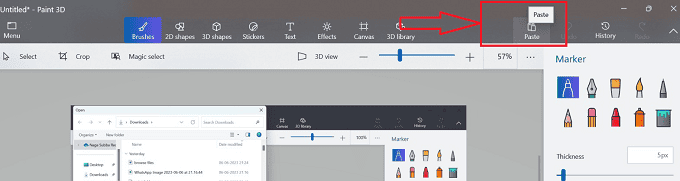
- Once the initial image is selected, copy the later image to be merged and click on the “Paste” icon at the top left section of the Paint 3d tools.
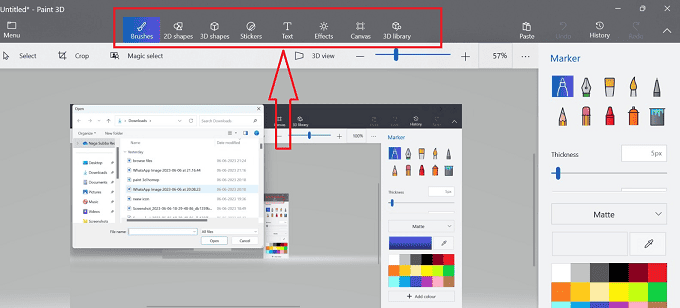
- After choosing the second image to be merged place the position of the image with the help of the mouse and make the required changes by using the icons available at the top section of the Paint 3d application.
- Once the required changes are made, click on the “Menu” icon from the menu bar and click on the “Save” icon from the list of icons available to save the merged image for further use.
- By following the above steps we can successfully merge images with the help of Paint 3d without any hurdles.
5. Microsoft PowerPoint
A presentation program called Microsoft PowerPoint was created by Microsoft and is a component of the Microsoft Office program family. For making polished presentations for work, school, or personal usage, it is a widely utilized tool.
Users of PowerPoint can make slide shows with text, graphics, videos, and other multimedia components. To personalize the style and feel of their presentation, users can select from a range of templates and themes. Also, the program offers a variety of tools and features, such as slide transitions, animations, and multimedia effects, for making interactive and entertaining presentations.
PowerPoint offers options for making speaker notes, outlines, and handouts to go along with the presentation in addition to creating slides. With online tools like OneDrive and SharePoint, users may also work together in real time on presentations.
In general, Microsoft PowerPoint is a strong and adaptable tool for producing interesting and polished presentations for a variety of objectives. It is extensively utilized in areas including business, education, and others where good communication is essential.
Features
Let us understand some of the major features of Microsoft PowerPoint
- Slide Layouts: PowerPoint offers a wide range of pre-designed slide layouts that users can choose from. These layouts provide a framework for organizing content on a slide and can save time in the design process.
- Customizable Themes: Users can choose from a variety of pre-designed themes to apply to their presentation or create their own custom themes with colors, fonts, and background images.
- Multimedia Support: PowerPoint supports a range of multimedia files such as images, videos, and audio files, which can be easily embedded into a presentation.
- Animation and Transitions: PowerPoint offers a variety of animation and transition effects that can be applied to individual slides or elements on a slide to add visual interest and keep the audience engaged.
- Collaboration: PowerPoint allows multiple users to collaborate on a presentation simultaneously, making it easy to work together on a project with colleagues.
- Presenter View: Presenter View allows presenters to view their slides, notes, and upcoming slides on their own screen while presenting on a separate screen. This feature can help presenters stay organized and on track during their presentations.
- Integration with other Microsoft products: PowerPoint can be easily integrated with other Microsoft products such as Excel, Word, and OneNote, allowing users to insert tables, charts, and other data from these programs directly into their presentations.
- Accessibility features: PowerPoint includes a range of accessibility features, such as the ability to add alt text to images, which can help ensure that presentations are accessible to people with disabilities.
- Export options: PowerPoint allows users to export their presentations to a range of formats, including PDF, video, and HTML, making it easy to share their work with others.
Pricing
Microsoft PowerPoint is not sold as a standalone product. It is part of the Microsoft Office suite of applications which includes other popular productivity tools such as Microsoft Word, Excel, and Outlook. Microsoft Office is available for both Windows and Mac operating systems and is offered under several pricing options:
- Microsoft 365 Personal: This plan includes Microsoft PowerPoint, Word, Excel, Outlook, and OneNote, and is designed for one person. It is available for $6.99 per month or $69.99 per year.
- Microsoft 365 Family: This plan includes Microsoft PowerPoint, Word, Excel, Outlook, and OneNote, and is designed for up to six people. It is available for $9.99 per month or $99.99 per year.
- Microsoft Office Home & Student: This is a one-time purchase option that includes Microsoft PowerPoint, Word, and Excel, and is designed for non-commercial use. It is available for a one-time fee of $149.99.
- Microsoft Office Home & Business: This is a one-time purchase option that includes Microsoft PowerPoint, Word, Excel, Outlook, and OneNote, and is designed for small businesses or home use. It is available for a one-time fee of $249.99.
How to merge images using Microsoft PowerPoint
Let us understand the step-by-step procedure of merging images with the help of Microsoft PowerPoint
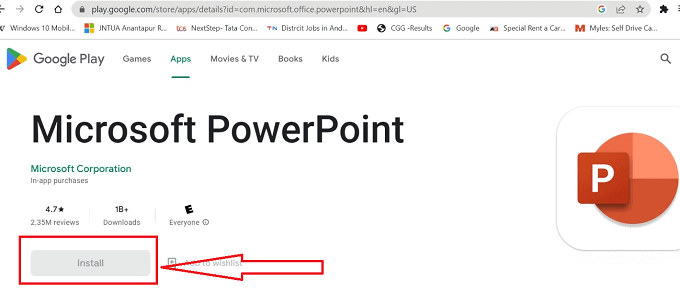
- Open your web browser and go to the Microsoft PowerPoint interface using the “URL” (https://play.google.com/store/apps/details?id=com.microsoft.office.powerpoint&hl=en&gl=US) and the required homepage open in the play store.
- After opening Microsoft PowerPoint click on the “Install” button to install the Microsoft PowerPoint into your system.
- Once you click on the “Install” icon, you will be redirected to the required home page of the PowerPoint application will be opened.

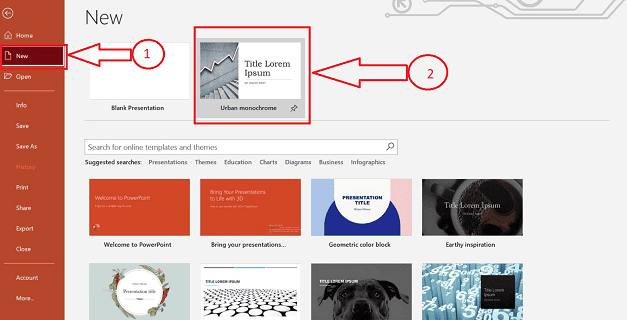
- Click on the “New” icon available at the top right section and choose the required template to merge the images from the set of available templates.
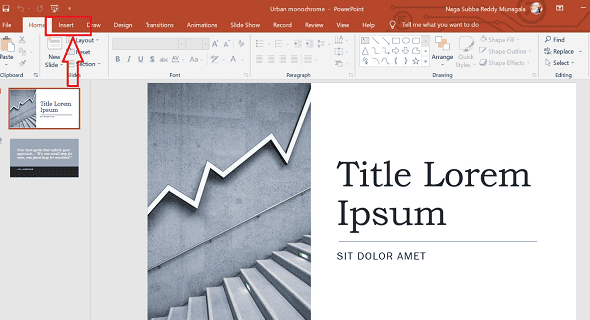
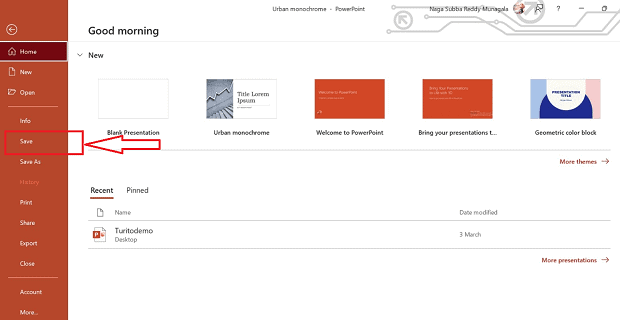
- Once the required template is selected, the template will be opened with all the icons to merge the images, click on the “Insert” icon from the menu bar, available at the top section of the template.
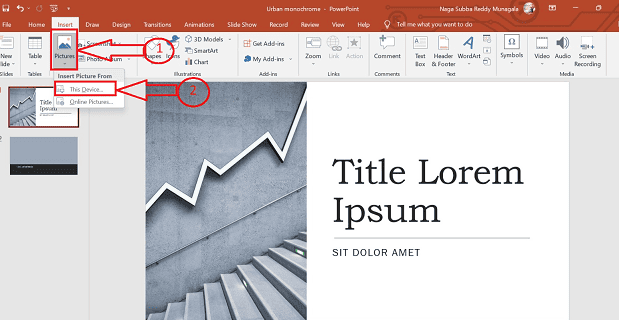
- After selecting the “Insert” icon, a set of icons to be inserted into the slide will be displayed choose the “Pictures” icon and a sub-menu opens, click on the “This Device” icon.
- After clicking on the “This Device” icon you will be redirected to the stored images in your system, identify the initial image to be merged, and click the “Insert” button.
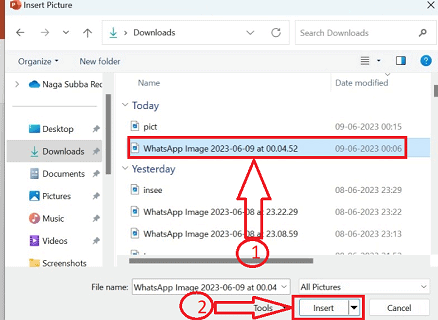
- Repeat the above step to select the latter image to merge, after choosing the second image to be merged place the position of the image with the help of the mouse and make the required changes by using the icons available at the top section of the PowerPoint application.

- Once the required changes are made, click on the “File” icon from the menu bar and click on the “Save” icon from the list of icons available to save the merged image for further use.
- By following the above steps we can successfully merge the images with the aid of the Microsoft PowerPoint application without any hurdles.
6.ImageMagick
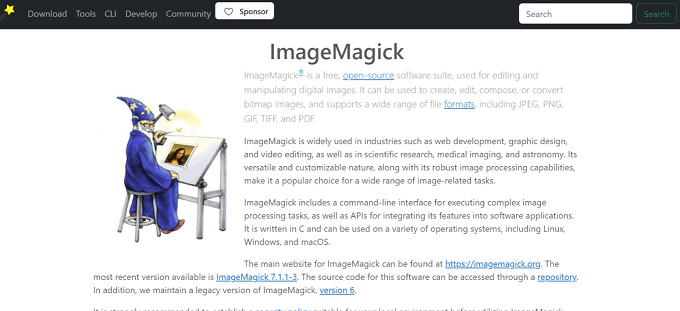
Users can produce, edit, and transform digital photographs using the free, open-source software package called ImageMagick. It is made to function on a variety of operating systems, including Windows, Mac, and Linux.
Images can be cropped, resized, and rotated, as well as have color levels adjusted, text added, and a variety of effects and filters applied, all with the help of ImageMagick’s extensive set of tools and functions. Moreover, it offers batch editing, which enables users to make identical adjustments to several photographs at once.
ImageMagick can convert images between several file formats, including well-known ones like JPEG, PNG, and GIF, in addition to performing basic image editing. Additionally, it enables sophisticated functions like picture transparency, animation, and image web optimization.
ImageMagick can be used as a library for application integration or as a command-line tool. For picture processing and conversion operations, it is frequently used by web developers, graphic designers, and other creative professionals.
Features
Let us go through some of the major features of the Image Magick
- Image conversion: ImageMagick can convert images from one format to another, such as from JPEG to PNG or from GIF to TIFF.
- Image editing: ImageMagick provides a range of tools for editing images, including cropping, resizing, rotating, and adding text or other elements.
- Image enhancement: ImageMagick has a variety of tools for enhancing images, such as adjusting brightness, contrast, and color levels.
- Image manipulation: ImageMagick can be used to manipulate images in various ways, such as applying filters, blurring or sharpening images, and removing noise.
- Batch processing: ImageMagick can process multiple images at once, allowing users to automate image processing tasks.
- Command-line interface: ImageMagick can be accessed via a command-line interface, making it easy to integrate into scripts and automated workflows.
- Programming language support: ImageMagick is compatible with a variety of programming languages, including C, C++, Perl, Python, and Ruby, making it easy to incorporate image processing into software applications.
- Cross-platform compatibility: ImageMagick is compatible with a range of operating systems, including Windows, macOS, and Linux, making it accessible to a wide range of users.
Pricing
ImageMagick is an open-source software suite that is available for free under the Apache 2.0 license, which means that you can download and use it without paying any license fees.
How to merge images using the ImageMagick application
Let us go through step by step procedure of merging images using the ImageMagick application
- Open your web browser and go to the ImageMagick interface using the “URL” (https://imagemagick.org/index.php) and the required homepage opens.
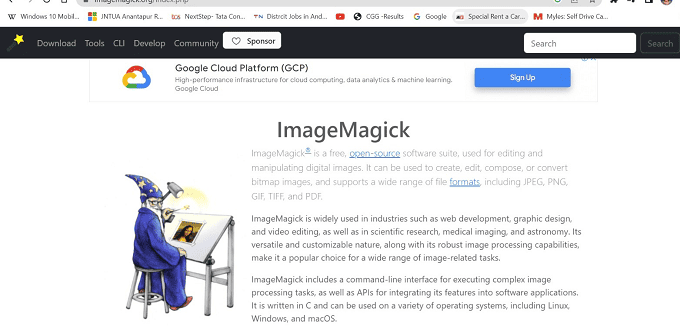
- Click on the “Download” button available at the top left section of the ImageMagick webpage by selecting the required version of ImageMagick.
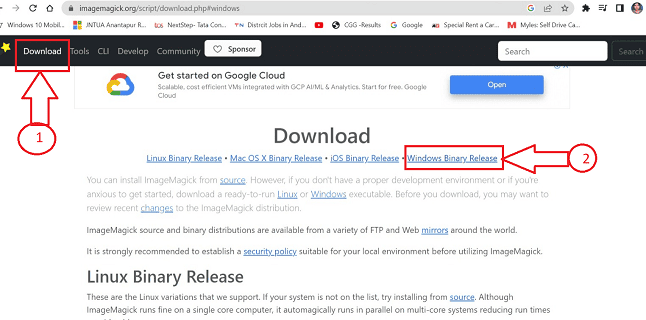
- After clicking on the download button the required version of ImageMagick will be installed into your device with all the required packages and tools, click on the “Finish” icon after installation is completed.

- After clicking on the “Finish” icon the required “Image Magick” homepage opens with the required icons to merge the image.
- Click on the “File” icon available at the menu bar at the top section of the ImageMagick application, a sub-menu opens with a set of icons, click on the “Open” icon to upload the initial image to be merged.
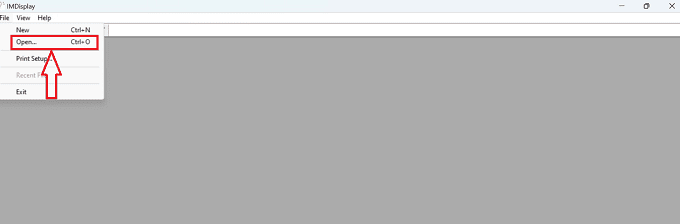
- After clicking on the “Open” icon, it redirects you to upload the images to be merged from the stored images in the system, choose the images to be merged, and click the “Open” button.
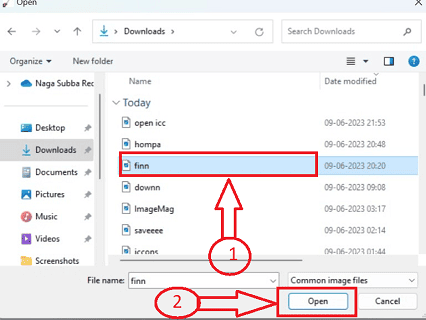
- After clicking on the open button the selected initial image will be opened in the ImageMagick application, repeat the same step to select the later image to be merged, both images will be imported into the application.
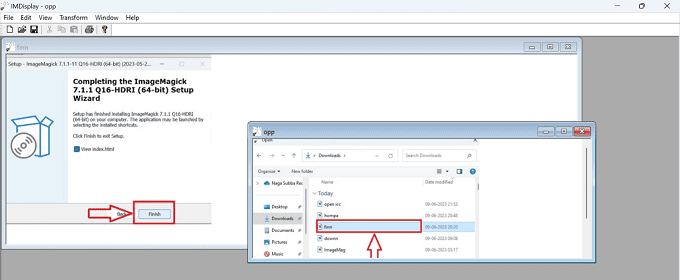
- After choosing the second image to be merged place the position of the image with the help of the mouse and make the required changes click on the “Transform” icon from the menu bar available at the top section of the ImageMagick application a submenu opens with the required icons to make the necessary changes.

- Once the required changes are made, click on the “File” icon from the menu bar and click on the “Save” icon from the list of icons available to save the merged image for further use.
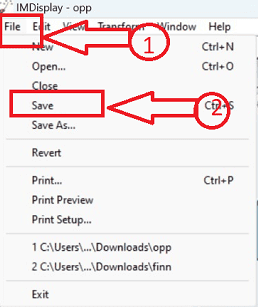
- By following the above steps we can successfully merge the images using the ImageMagick application without any hurdles.
Conclusion
In your hunt for the ideal tool to merge your photographs, we hope that our Ultimate Guide to Combining Images will be helpful. We wanted to give you a thorough comparison of both free and paid tools because we know the world of image editing tools can be complex and daunting. We hope that this advice has assisted you in locating the ideal tool, whether you are a skilled photographer or simply enjoy editing pictures. Glad editing!
I hope this tutorial helped you with Methods to Merge images(Online, Offline, Free, and Premium). If you want to say anything, let us know through the comment sections. If you like this article, please share it and follow WhatVwant on Facebook, Twitter, and YouTube for more Technical tips.
Methods to Merge images(Online, Offline, Free, Premium)-FAQs
How can I create a single image from many images?
Locate the folder containing the photographs you wish to merge by opening the Photo Gallery. Click the Create tab of the Picture Gallery after holding down the CTRL key to pick numerous pictures. Choose the Photo Fuse function, then choose the portion of the image you want to alter.
What free photo-blending program is available?
With the help of the straightforward program Photo Blender, you can simply combine two or more photos in any direction by either blending or touching them at the boundaries. The picture editor allows for the preparation of images and blended output.
How can I merge 3 JPG files into 1 PDF?
Simply submit the files you want to combine using the Acrobat online page. Click Merge files after rearranging the files however you like. Simply download the combined PDF after that. This will merge every JPG that has been converted to a PDF into a single PDF that is simple to share or view.
How can I create a PDF document with every image?
To choose a file, use the button above, or simply drag the files into the drop zone. Choose the image file that you wish to turn into a PDF. Acrobat automatically converts the file from an image format to a PDF when it has been uploaded. Download a fresh PDF document or register to share one.