Want to upgrade Windows 11 to New HDD / SSD without any trouble? Then stop searching, you have reached the right place. In this article, you find the complete guide about how to install a new disk, initialize and upgrade Windows 11 to New disk.
If you want to do all these operations effortlessly, then the best way is to use the easy-to-do third-party application. With this, you can avoid data loss, file corruption, and many others due to wrong commands using in command prompt, and misoperation in disk management.
EaseUS Partition Master is the best third-party application. It is available free of cost for personal use. It allows you to partition the drive, Migration process, partition Recovery, Clone the devices, and many more. It completes any difficult task in a few simple clicks. A few more disk management solutions are:
- Create, delete, Merge, and format the partitions without data loss.
- Resize or move partitions to optimize the disk.
- convert MBR to GPT and vice versa, logical partition to primary partition.
- Wipe all the data on the hard disk.
Here is the complete guide to know how to install a new disk, initialize the disk, migrate the OS, and set the boot drive.
How to upgrade Windows 11 to New HDD / SSD
Video Tutorial:
We provided this article in the form of a video tutorial for our reader’s convenience. If you are more interested in reading, then watch it after the completion of reading.
Step 1. Install a new disk
It is a simple task to install a new disk on your Laptop. The new generation laptops support adding two or more hard drives. While the old and slim laptops allow only one hard drive. If you are using the new generation laptop, then you easily insert the new disk in it and make it useful.
If you using the old generation or slip laptop, then there are two ways to install a new disk in your laptop.
- One is by replacing the DVD or Blu-ray Drive with the new HDD or SSD.
- Replace old drive with New Drive.
For Desktop:
- Shut down the device and take the new drive from the drive box.
- Prepare the new drive. If it is already prepared, then remove the screws on both sides of this disk.
- Slide the drive bays into the screw holes on both sides of the new drive.
- If it is an SSD, then you will need to add a special mounting slot or a drive adapter.
- Remove the computer case.
- Slide the new drive into the computer case next to the old drive.
- Now connect the new drive to your computer motherboard with the SATA cable.
- Plug in a power cable to power on the drive.
- Clouse the computer case and reboot the device. That’s it….
After the completion of installing the new drive on to PC or laptop, move the next step to initialize the hard drive as GPT. For that purpose, we would like to recommend a stunning Partition Master tool is the EaseUS partition Master.
Step 2.How to initialize the disk as GPT
In this section, you can find the solution for how to initialize the disk as GPT using the free partition tool known as EaseUS Partition Master. It enables you to initialize the drive as GPT with a click. Let’s see how to initialize the disk as GPT using the free EaseUS Partition Master.
Step 1: Download and install the EaseUS Partition Master from its official site. You get it without paying a single penny. Launch the EaseUS Partition Master application. Connect the hard drive or SSD to your device.
Step 2: Give a right-click on the target drive or SSD and select the “Initialize to GPT” option from the drop-down menu.
Step 3: Now click on the Execute operation option at the top. A pop-up window will appear on the screen. Click on “Apply”. That’s it… The disk has initialized the disk as GPT.
After the completion of initialization, all the disk space remains unallocated. So still, it is impossible to be used to install any programs and OS or file storage. You can turn the unallocated to usable space using the EaseUS free Partition Master to create partitions and set the file system.
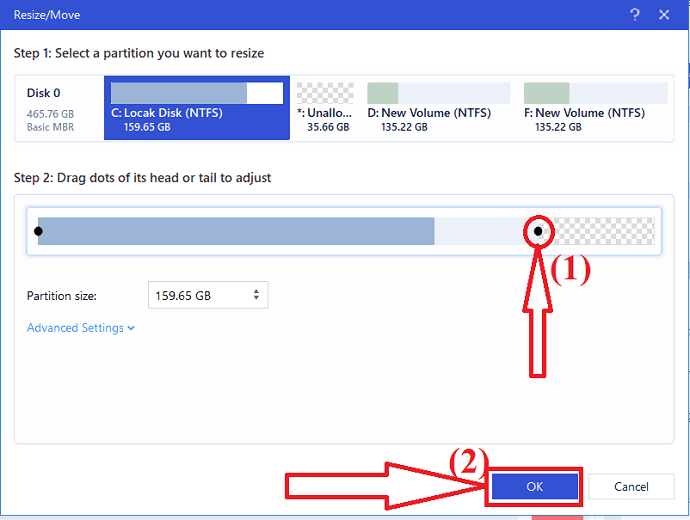
Step 4: To turn the unallocated space into usable space. Give a right-click and select the create option.

Adjust the partition by moving the dots to right or left, change the file system option as NTFS, choose the drive letter, partition label, and many more. Click on OK.
Now click on the Execute operation button at the top. A prompt will appear on the screen. Finally, click on “Apply”
- Related: EaseUS Data Recovery Review: Test, Pros & Cons
- 30% (Special) OFF – EaseUS Discount Coupon Code
Step 3.Migrate Windows 11 to the new disk using EaseUS Partition Master
EaseUS Partition Master is the stunning application to migrate Windows 11 to New disk. You can easily migrate the c drive data or OS drive to another drive without any data loss. And also, you don’t need to reinstall the Windows OS and other programs after the migration. It just completes the process in three simple steps. Let’s see the migration process of Windows 11 using EaseUS Partition Master.
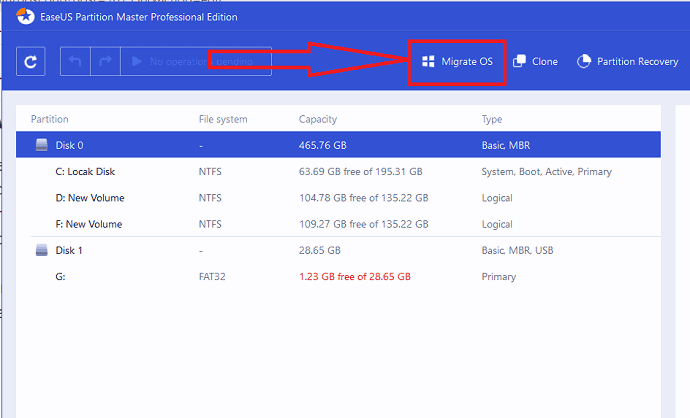
Step 1: Download and install the EaseUS Partition Master from its official site or just click on the link. Launch the EaseUS Partition Master application. Click on the “Migrate OS” option at the top.
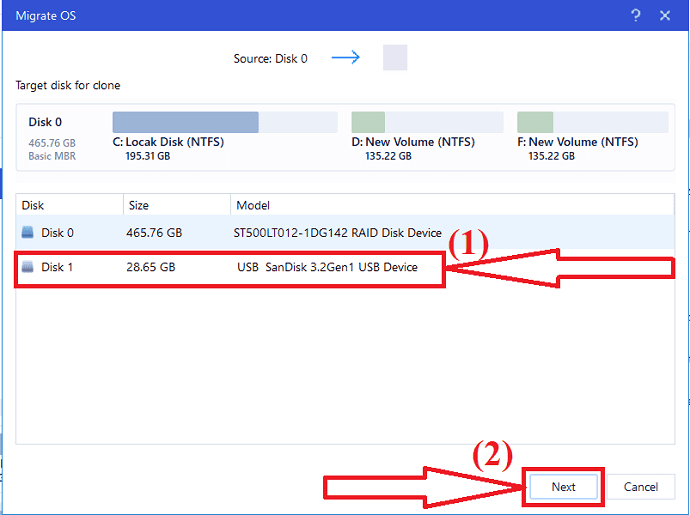
Step 2: The Migrate OS Window will appear on the screen. Select the destination SSD or HDD and click on “Next”.
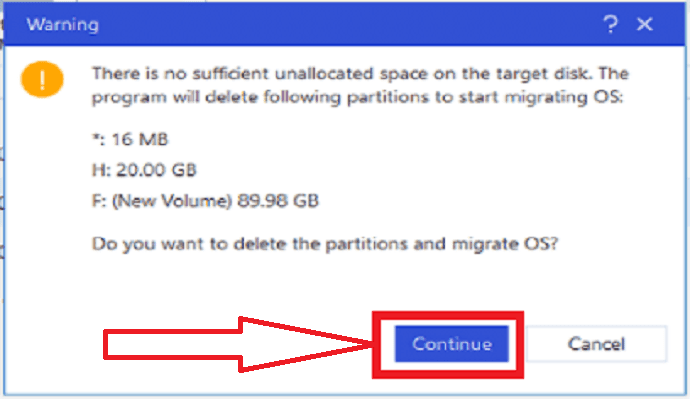
Step 3: A warning message will be displayed on the screen. Check it once and click on “Continue” to move to the next step. The data and partitions on the target disk will be deleted. Make sure that you have backed-up all the important data in advance.
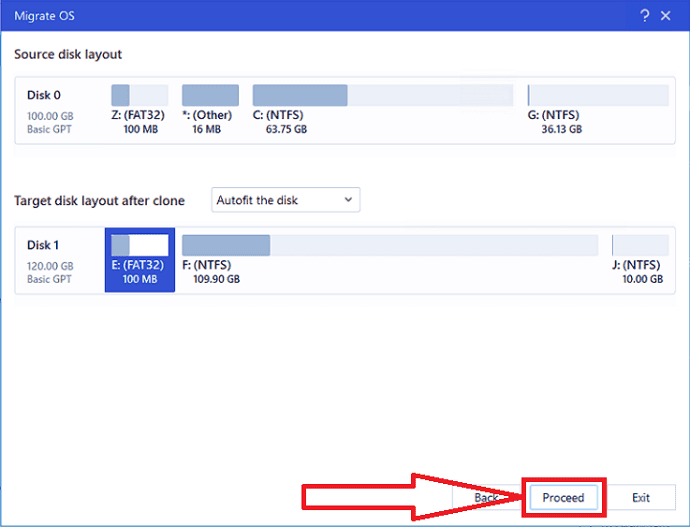
Step 4: Check the layout of the targeted disk. You can also change the disk layout options as your wish and click on “Proceed” to start the migrating process.
After the completion of Migrating Windows 11 to a new disk, you can move to the next section to set the new disk as a boot drive.
Note: The operation of migrating OS to SSD or HDD will delete and remove existing partitions and data on your target disk when there is not enough unallocated space on the target disk. If you saved your important data there, backup them to an external hard drive in advance.
Step 4. Set the new disk as a boot drive and reboot windows11
After the completion of migrating Windows 11 to a new disk, you need to set the device to boot Windows 11 from the new hard drive. If you didn’t boot the drive, then the device will continue booting up from the old system disk. Let’s see how to set the new disk as a book drive.
- Restart PC and press F2/F12/Del keys to enter into BIOS mode.
- Go to the boot option, change the boot order, setting OS to boot from the new disk.
- Click on “Save and Exit” option at the bottom to save the changes and exit the BIOS mode.
- Finally, restart the device. That’s it…
Once the completion of the process, log in to your account and use the device on the new hard drive successfully.
Closing Words:
This is the complete guide on upgrading Windows 11 to New HDD/ SSD. The main tool that helps you to complete all these tasks is EaseUS Partition Master. It completes each and every task in a few clicks without any data loss and file corruption. If you want to initialize the new disk, make partitions and migrate OS, then I would recommend you to download the EaseUS Partition Master. It offers both premium and free versions. You can download and use the free Partition Master for basic use.
Offer: Our readers get a special 30% discount on all EaseUS products. Visit our EaseUS discount coupon page for the promo code.
I hope this tutorial helped you to know about the Upgrade Windows 11 to New HDD/SSD. If you want to say anything, let us know through the comment sections. If you like this article, please share it and follow WhatVwant on Facebook, Twitter, and YouTube for more Technical tips.
Upgrade Windows 11 to New HDD/ SSD – FAQ
How do I initialize a disk as GPT?
Open the EaseUS Partition Master >Right-click on the drive and select initialize to GPT >click on execute the operation. > click on Apply.
Is it possible to migrate Windows 11 to the new drive?
Yes. It is possible to migrate Windows 11 to the new drive.
Which is the best tool to upgrade windows 11 to the new drive?
Always I recommend you to take the EaseUS Partition Master for better Migration, drive partitions, initialize, and many more operations.
How to create the unallocated space to be useful?
Just use the EaseUS Partition Master. Open the application. Right-click on the unallocated space. Select the create option. Click on execute operation and tap on the Apply button.