
Want to remove hidden attributes to Un hide files or folders on Mac? Here we will show you the methods to show hidden files on Mac.
How to show hidden files on Mac
Video Tutorial
We Provided this article in the form of a Video Tutorial for Our reader’s convenience. If you are interested in reading, skip the video for now and watch it after the completion of reading this article.
Below are some of the methods that will help you to view hidden files on a Mac machine, clearly explained with steps.
1. How to view hidden files on a Mac using Finder
- STEP-1: Open the finder and go to the location where you want to view the hidden files.
- STEP-2: Hold “cmd and Shift, and press dot(.)”. Then the hidden files will be seen in low opacity as shown in the screenshot.
- STEP-3: If you want to hide them again, press the same command “Cmd+Shift+.”.
2. Funter

Funter is a free application available for Mac users to hide and unhide files easily. It has a minimal interface and makes the application usage very handy. This is Apple notarized, safe, and approved by Apple. It provides regular updates and is compatible with the latest macOS version.
Features of Funter
- Easy-to-use
- Free Application
- It allows to find files that Spotlight never finds
- Provides Mac Memory usage
How to view hidden files on Mac using Funter
- STEP-1: Open any Browser and visit the Official site of Funter. Download and install the application.
- STEP-2: Launch the application and provide the required permissions and access.
- STEP-3: On the top-right of the interface, you will find the icon of funter. Click on it to open the pop-up. Toggle the bar to show/hide the hidden files.

- That’s it, this is how you can easily hide and unhide files on Mac using the Funter application.
- RELATED – 8 Best Ways to Improve Mac Performance and Speed
- How do I create playlist in iTunes on Mac
- How to Encrypt Files on Mac with Password Protection
3. Using Terminal
- Go to All Applications and move into the Utilities folder, there you will find the Terminal Application. Click on it to open.
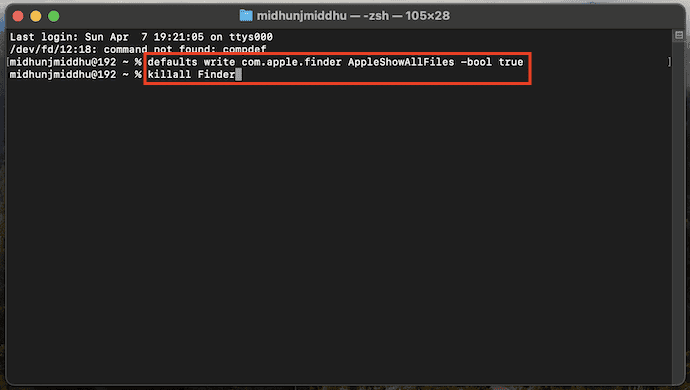
- Enter the command displayed in the screenshot or copy from below.
- Type “defaults write com.apple.finder AppleShowAllFiles -bool true” and hit enter.
- Later, type “Killall Finder” and hit enter.
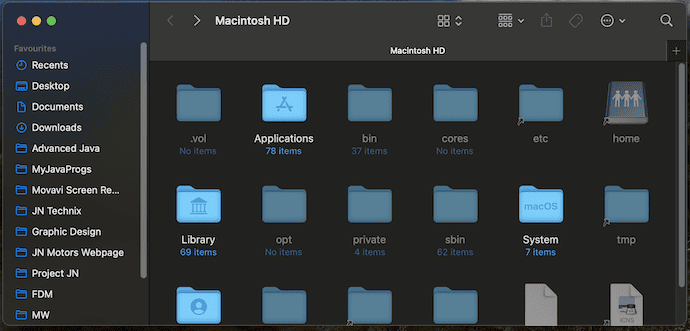
- Now, open Finder, and from now it displays the hidden files too, but in light grey icons.
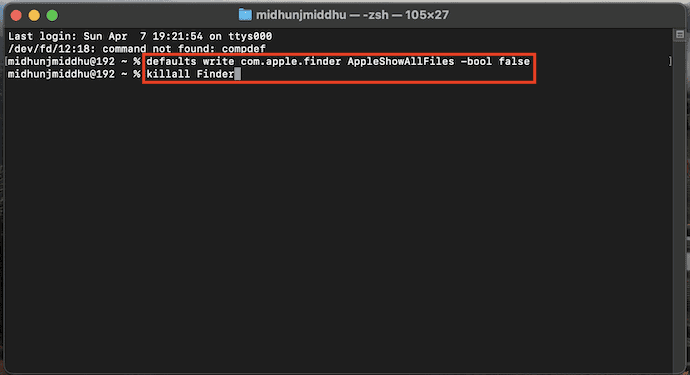
- To hide back the files, again go to Terminal and Enter the commands displayed in the screenshot or copy from below.
- Type “defaults write com.apple.finder AppleShowAllFiles -bool false” and hit enter.
- Later, type “Killall Finder” and hit enter.
Conclusion:
Now you have the information that you can display hidden files on your Mac using the Funter app, a Terminal command, or a keyboard shortcut.
Suppose you are looking for the easiest solution to manage your hidden files, then it is the best way to use the free Funter tool.
Funter tool will give you access to hidden files and folders but also will help you search for hidden files by their names. More importantly, to say for you, it can make essential data invisible to prevent its accidental removal and it is safe to use for you.
- RELATED – How to convert Word, Excel, and Image to PDF with free software
- How to watermark PDF with Image
I hope this tutorial helped you to know about “3 Easy Ways to Show Hidden Files on Mac”. If you want to say anything, let us know through the comment sections. If you like this article, please share it and follow WhatVwant on Facebook, Twitter, and YouTube for more Technical tips.
3 Easy Ways to Show Hidden Files on Mac – FAQs
What is the shortcut to show the hidden files on Mac?
Command+Shift+dot(.) is the shortcut to show the hidden files on Mac.
What is a Funter?
Funter is a menu bar app that allows you to find and see hidden files. You can also hide files, copy, move, or remove them.
Why is the Library hidden on Mac?
The Library folder is hidden by default. Just like other system folders, it is to avoid tampering or accidentally deleting important files.
Is the Funter app free?
Yes, the Funter application is completely free to download and use.