Want to delete a table in Google Docs? In this article, We will demonstrate how to insert and delete a table in Google Docs on PC and Mobile.
Google Docs is an excellent tool for keeping track of and organizing your work. Google Docs is a cloud-based program, you can access it from any computer or mobile device with an internet connection. But occasionally you might need to get rid of a table.
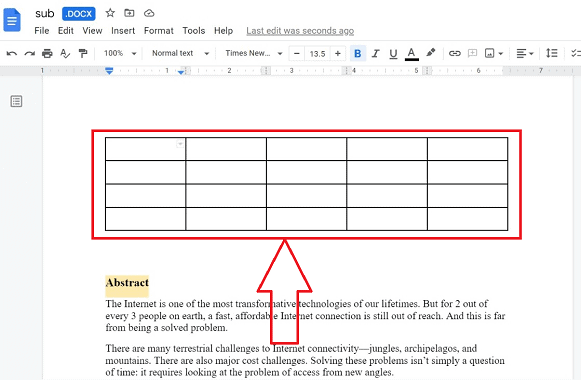
Table and its uses in Google docs
Cells on a grid are arranged into rows and columns to form a table. Tables can be adjusted and are helpful for a variety of activities, including showing text and numerical data. Let us get to know about the uses of tables in Google Docs.
- Tables are used to organize the data in a structured pattern.
- It allows the reader to quickly access the data.
- It makes data simple and easy to use.
- Tables can be used to highlight trends or patterns in the data.
- Tables will help make a manuscript easier to read by removing numerical information from the text.
Let us now understand, how to Delete a table in Google Docs in both Desktop and mobile versions.
How to Insert a Table In Google docs on PC
Video Tutorial
We Provided this Article in the form of a Video Tutorial for Our reader’s convenience. If you are interested in reading, skip the video for now and watch it after the completion of reading this article.
Before understanding the Procedure for deleting Tables in Google docs, let us walk through the process of inserting Google docs in brief.
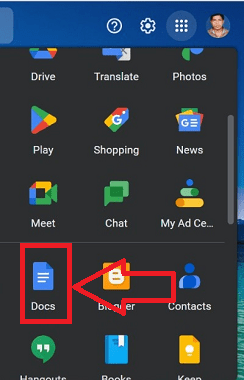
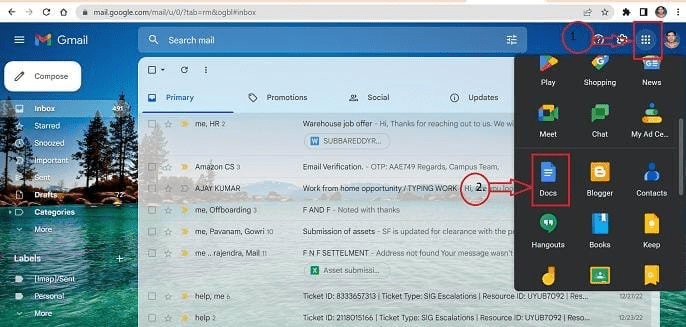
- Open your Gmail account in any browser and click on the “Apps” icon at the top right denoted with a “9 Square dotted icon”.
- Select the “Google Docs” application in the available and stored applications from your Gmail account.
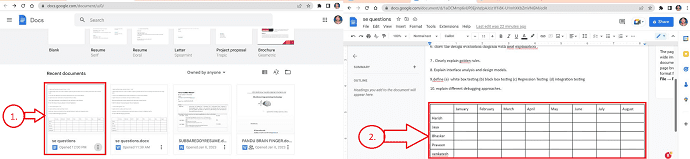
- A list of stored documents will be displayed, select the document in which the table needs to be inserted and open the document.

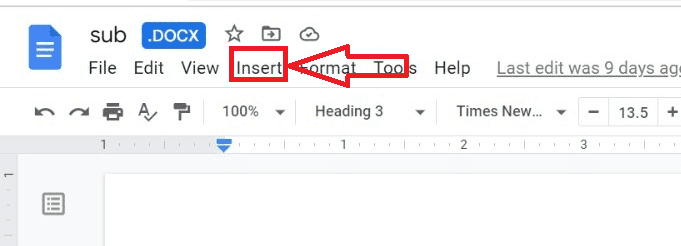
- Select the “Insert” icon in the required document, a shortcut menu will appear with multiple options.
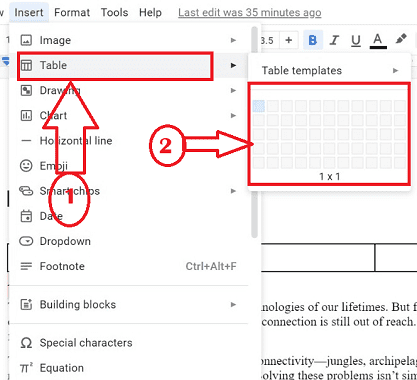
- Select the “Table” icon another pop-up menu will appear, with options to select the type, version, and format of the table by choosing the required options.
- That’s it! the table will be inserted into the document successfully.
How to delete a Table in Google docs on a PC?
Google Docs is an online word processor that lets you create and format documents and work with other people. Working with Google Docs is more useful in the office for Documentation purposes. Let us Understand the step-by-step procedure for the deletion of a table in Google docs in the desktop version.
In this Section, we will show you the step-by-step procedure to delete a table from Google docs.
Total Time: 4 minutes
STEP-1: Access Google Docs
Log into your Gmail account in any browser you choose to use on your computer. A list appears when you click the all apps icon in the top right corner. From the options, pick the Google Docs app.
STEP-2: Find the table
In Google Docs, you can view every document that has been saved. Open the necessary document which contains the table that has to be deleted.
STEP-3: Process of Deletion

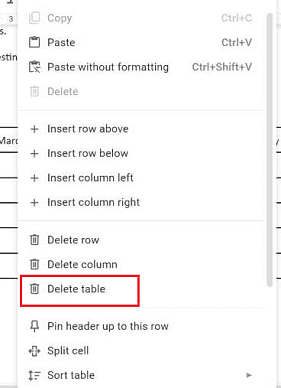
Select the table which needs to be deleted and give Right-click on any cell inside the table.
STEP-4: Pop-up
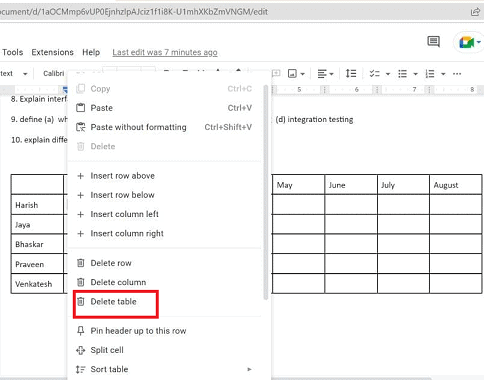
A Pop-up will appear with multiple icons in it. Select the Delete table icon.
STEP-5: Deletion
That’s it! Deletion of the table is successfully completed.
How to insert a Table in Google docs on a mobile
Before the deletion of a table In Google docs let us go through the process of inserting a table in Google docs on a mobile
- Open the Google Docs app from your Android or iOS phone after downloading it from the Play Store/app store respectively.

- Select the document into which the table has to be added from a list of stored documents, then open that document.
- Select the “Edit” option in the document represented symbolically with a pencil symbol present at the “Bottom-left” side of the document.
- Click on the insert icon in the document represented with the “+” symbol on the top-left of the document.

- A set of icons is displayed in a shortcut menu, select the “Table” option it redirects you to the new window, choose the required specifications, and click on the “Insert table” button.

- That’s it by following the above procedure insertion of the table will be done successfully in the document on mobile.
How to delete a Table from Google docs on a mobile?
The following provides step-by-step steps for eliminating tables of a document from Google Docs on mobile:
- STEP-1: Install the Google docs app from the play store of your phone and open the Google Docs app from your Android/iOS phone.

- STEP-2: Select the table that is required to be deleted in the document by tapping on any cell inside it.
- STEP-3: A “Shortcut Menu” will appear with multiple icons.
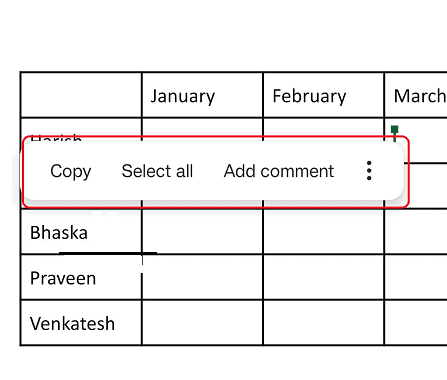
- STEP-4: Click on the “More” option which is symbolically represented as “3 vertical dots” on the “shortcut Menu”.
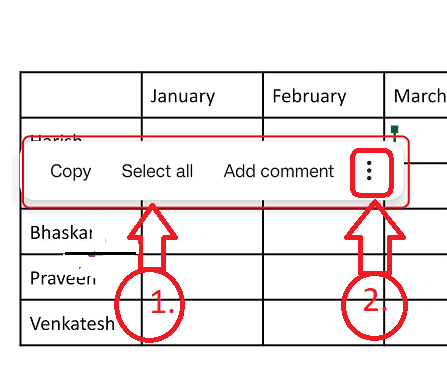
- STEP-5: New Pop-up will appear with a different set of icons click on the “DELETE TABLE” icon.
There you are by following the above simple steps you can delete the table from Google Docs on a mobile.
Deleting cells and columns in Table:
By following the above procedures you can delete an entire table from the document in Google Docs. You also have the option of deleting just a row or a column rather than the entire table if you choose. Let us go through the procedure of Deleting cells and columns in brief.
- Select the table in which the row and column are to be deleted by giving a “Right-Click” inside the cell.
- A shortcut menu will appear with multiple options.
- Click on the “Delete Column” or “Delete Row” option in the menu.
- The required row or column will be deleted successfully.
Deleting Multiple cells and columns in Table:
You can also delete multiple cells and columns at a time from Table in Google Docs. Let us go through the procedure of the same below:
- Choose the table in which the required range of rows and columns are to be deleted by giving a “Right-Click” inside the cell.
- You will get a shortcut menu will appear with multiple options.
- Select the “Delete Columns” or “Delete Rows” option in the menu.
- The required range of multiple rows or columns will be deleted successfully
Conclusion:
By following the above post you can easily delete a table in Google Docs without any hurdles in any device such as a PC or mobile and the Procedure for deletion hardly consume any time.
I hope this tutorial helped you to How to Delete A Table In Google Docs. Please let us know through the comment sections if you want to say anything. If you like this article, please share it and follow WhatVwant on Facebook, Twitter, and YouTube for more Technical tips.
- RELATED: 2 Ways to Delete A Page In Google Docs
- How to Insert Watermark in Google Doc
- How to Send Large Files Through Gmail Using Google Drive.
- 19 Best Free Word Processing Software.
How to Delete a table in Google Docs -FAQs
How can I remove a Google Docs table?
Click the right mouse button on any table cell to delete it. Choose the “Delete table” option from the dropdown menu. The table will vanish from the document when you do that.
How do I remove a table without getting rid of the text?
Choose the table.
Navigate to the Ribbon’s Tables Tools / Layout tab.
To convert to text, click.
How do I make a table normal again?
The quickest way to convert the table into a typical range is to right-click any cell in the table, select Table and then convert to Range, and then click OK. The ribbon can also be used to carry out the same action: To open the Table Design tab, choose any cell in the table.
How can I remove a table while maintaining formatting?
Go to the Design tab Tools group and select Convert to Range to get rid of a table while keeping the data and formatting. Alternatively, you can choose Table and then Convert to Range by right-clicking anywhere in the table.
How do I alter the settings on my table?
Right-click a table and select table Properties from the context menu to configure or modify table parameters in Word or Outlook. Note: Before making changes in the Table Properties dialogue box, click on the row, column, or cell for which you wish to set the properties.