
Are you using Autofill while filling out forms or details on your MacOS? Do you feel that the Autofill feature is getting you into trouble? Looking for the best way to Clear Autofill on MacOS X? Then this article is the perfect place for you.
Autofill is the feature that offers you to store frequently used information while filling out forms and logging into your accounts. It reduces the time and effort in filling out the forms. So, read this article till the end and know the process to clear Autofill on MacOS X.
- RELATED – 5 Best Ways to Clear Log Files on Mac
- How To Uninstall Apps On Mac Completely (Manually And Automatically)
How to Clear Autofill on Mac OS X
Video Tutorial
We provided this Article in the form of a Video Tutorial for our reader’s convenience. If you are interested in reading, skip the video for now and watch it after the completion of reading this article.
1. CleanMyMac X
CleanMyMac X is one of the best and most powerful cleaning software to clean your Mac. It comes with a huge number of useful features to Optimize your Mac. This allows you to clear caches, cookies, and other unnecessary data in a single click. It is available in Free and premium versions.
Highlights of CleanMyMac X
- Most Powerful Tool to Clean Your Mac
- Clean and Intuitive User Interface
- Works efficiently
- In-depth check-up for your Mac
- Compatible with the latest MacOS Versions
Pricing
CleanMyMac X is available in Free and Premium versions. The Premium version can be purchased in a One-Year Subscription and a One-Time Subscription. The Prices of both subscriptions are listed below.
- One-Year Subscription
- Plan for 1 Mac – $34.95
- Plan for 2 Macs – $ 54.95
- Plan for 5 Macs – $79.95
- One-Time Subscription
- Plan for 1 Mac – $89.95
- Plan for 2 Macs – $134.95
- Plan for 5 Macs – $199.95
How to Clear Autofill on MacOS X using CleanMyMac X
- Open any browser on your Mac and Visit the Official site of CleanMyMac X. Purchase and download the latest version of the application onto your Mac.
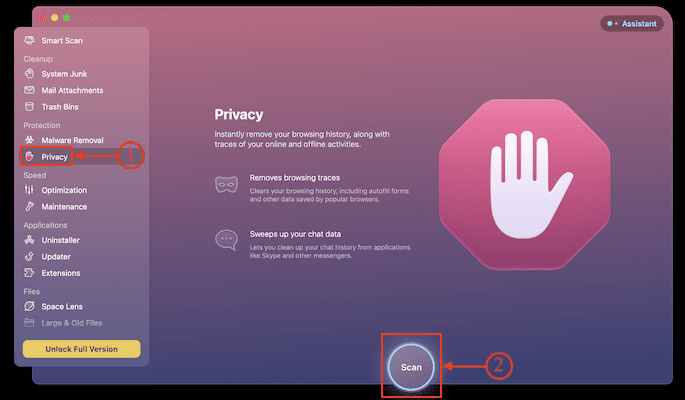
- Launch the application after the successful installation. Then you will find the interface as shown in the screenshot. Move to the “Privacy” section available on the left menu bar and Click on “Scan”.
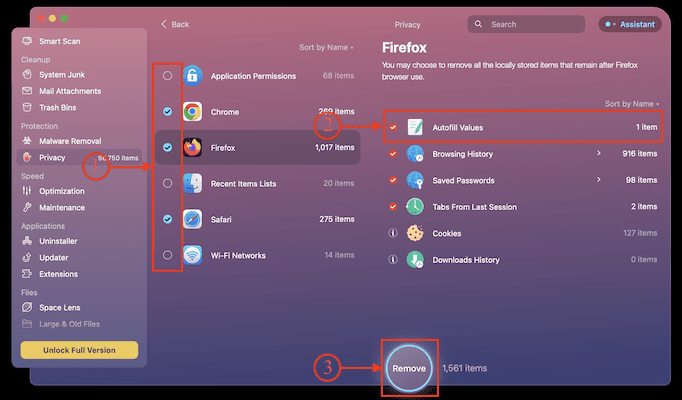
- Then starts to scan for the data and provides the results. Choose the web browsers to select and it shows the categories to clear. Make sure that the “Autofill Values” are selected. Later, Click on “Remove”.
- That’s it, Autofill is cleared on Mac using CleanMyMac X.
2. How to Clear Autofill in Safari on Mac OS X?
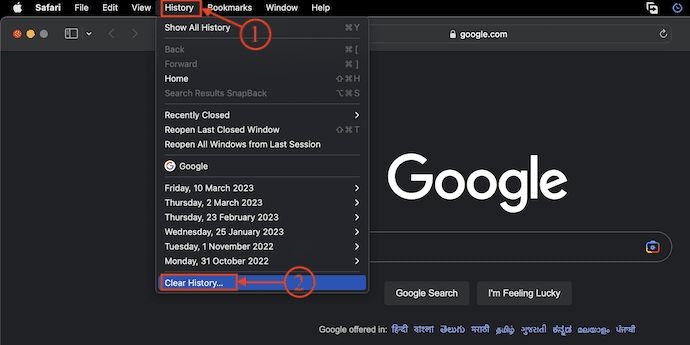
- Launch the Safari Web Browser on your Mac and Click on the “History” option available on the top menu. An options list will open. Choose the “Clear History” option.
- Then a small window will pop up. Click on the Drop-down option and choose the clear range. later, click on “Clear History”.
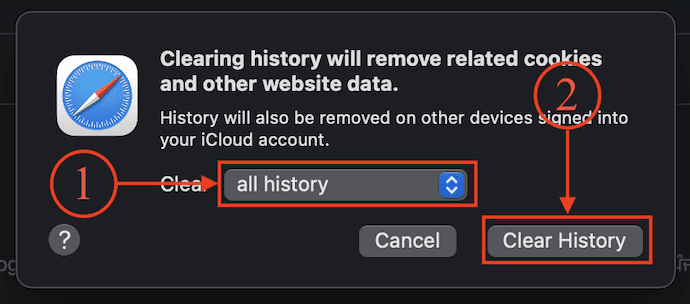
- That’s it, Autofill is cleared in the Safari browser.
How to Disable AutoFill in Safari Browser
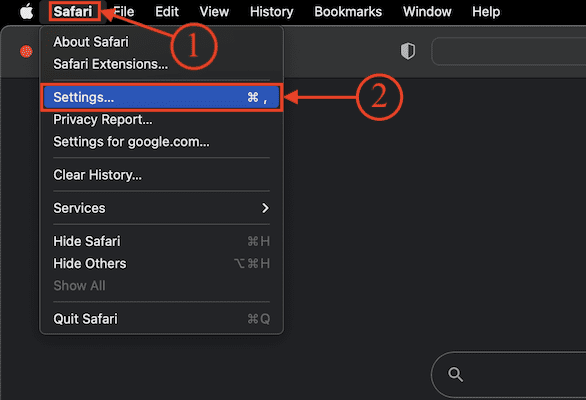
- Launch the Safari browser on your Mac and Click on the “Safari” option available in the top menu bar. An options list will open. Choose the “Settings” option from that list.
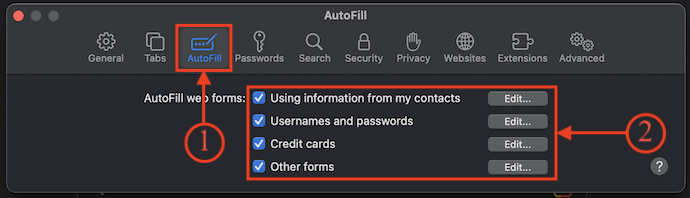
- Then the settings window will pop up. Move to the “AutoFill” section and there it shows you the list of categories. Uncheck all of them to disable AutoFill in the upcoming cases.
3. How to Clear Autofill in Chrome on Mac OS X?
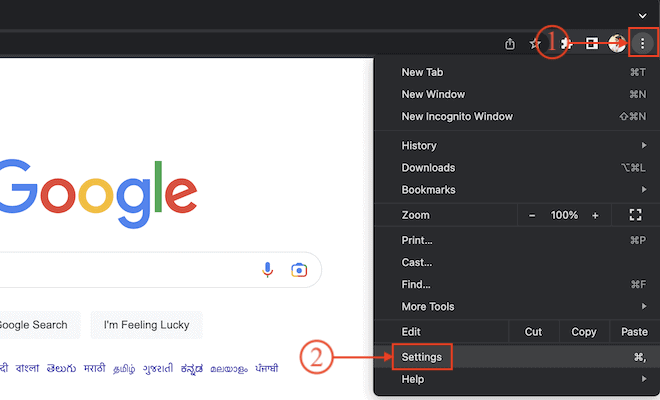
- Launch the Google Chrome application on your Mac and Click on the “Three Dots” option available in the top right corner. An options list will open. Choose the “Settings” option from that list.
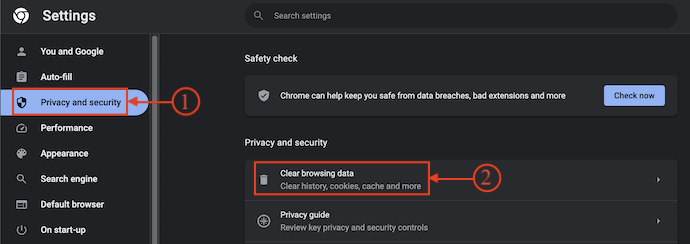
- Then you are redirected to a new tab. Move to the “Privacy and Security” section and click on the “Clear Browsing Data” option.
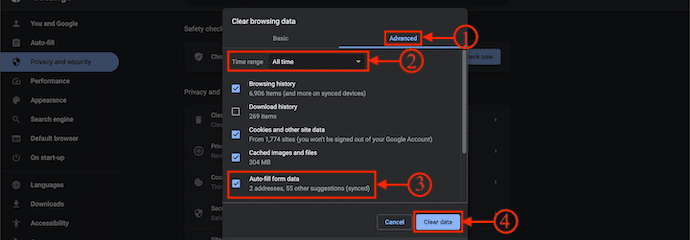
- A window will pop up with two sections, such as Basic and Advanced. Move to the Advanced section and choose the Time range by clicking on the Drop-down option. Select the “AutoFill Forms” option from the categories list. Later, Click on “Clear Data” to Clear AutoFill on MacOS X.
4. How to Clear Autofill in Firefox on Mac OS X?
- Launch the Mozilla Firefox browser on your Mac. If the web browser is not installed on your Mac, Click here to move to the Official download page of Mozilla Firefox.

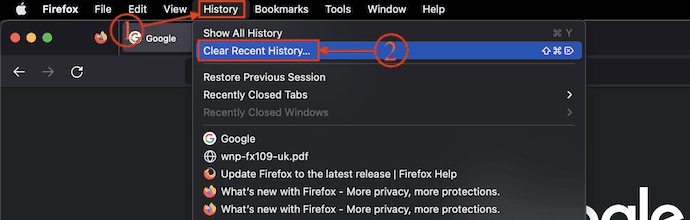
- Click on the “History” option available in the top menu bar. An options list will open and shows you the browsing history. Choose the “Clear Recent History” option from that list.
- A small window will pop up with History Categories. Set the time range to Everything and make sure to select “Forms & Search History” and later, click on “OK”.

- That’s it, this is how you can clear AutoFill in Firefox on MacOS X.
5. How to Clear AutoFill in Microsoft Edge on MacOS X
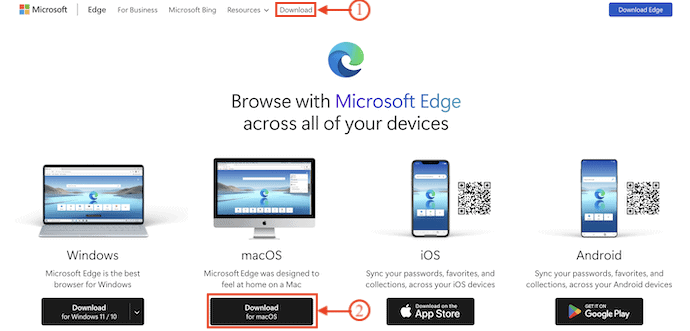
- Visit the Official site of Microsoft Edge and Download the latest version of Microsoft Edge Browser onto your Mac.
- Launch the browser after the successful installation. Click on the “Three Lines” icon available in the top right corner of the window. An options list will open. Choose the “Settings” option from that list.
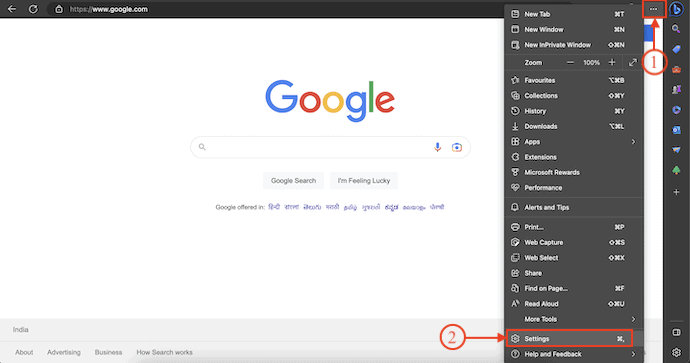
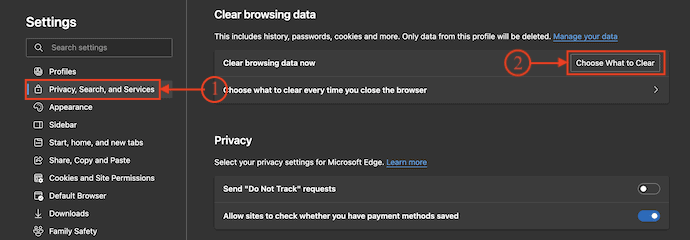
- Then you are redirected to a new settings tab. Choose the “Privacy, Search, and Services” section from the left side menu bar. There, you will find the Clear browsing data section with the “Choose What to Clear” option. Click on it.
- Then a window will pop up with the Time Range and other options. Set the Time range to “All Time” and Select the “AutoFill Form Data” from the options list. Later, Click on the “Clear Now” option.
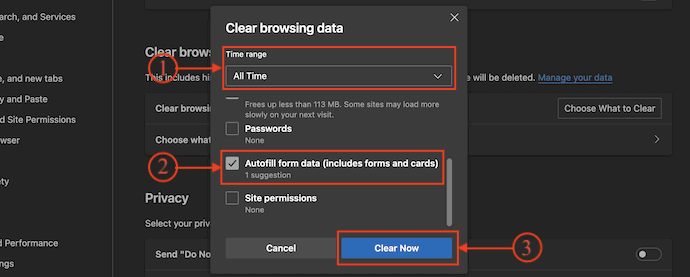
- This is how you can clear AutoFill on MacOS X.
- RELATED – 8 Best Ways to Improve Mac Performance and Speed
- How do I create playlist in iTunes on Mac
- How to Encrypt Files on Mac with Password Protection
Conclusion
Autofill is the feature that reduces the time of filling the information in the forms and login pages. Sometimes this might make others steal the details very easily. So, clearing them is a good idea. Follow the processes discussed in this article to clear Autofill on MacOS X. You can also use CleanMyMac X to clear Autofill on MacOS X automatically from all browsers.
I hope this tutorial helped you to know How to Clear Autofill on MacOS X. If you want to say anything, let us know through the comment sections. If you like this article, please share it and follow WhatVwant on Facebook, Twitter, and YouTube for more Technical tips.
How to Clear Autofill on MacOS X – FAQs
What is the disadvantage of autofill?
This lets people with bad intentions hide invisible boxes on their web pages so they get more of your information than you wanted.
Should I use Autofill?
Auto-fill is very convenient and can save users time and effort. Studies show that users who have auto-fill enabled complete forms up to 12% faster than those who don’t use the feature.
What is the shortcut on Mac?
You can use the keyboard shortcut Command + Backslash to trigger Universal Autofill and instantly enter the username and password you need.
Is CleanMyMac X good for Mac?
While CleanMyMac X performs most of its functions admirably and provides an excellent means of clearing gigabytes of unused system detritus/gunk off your Mac, it needs to catch up and perform equally well where each of its modules is concerned.
Is CleanMyMac X authorized by Apple?
This means that CleanMyMac X and the remaining MacPaw software offered through the Mac App Store are Officially notarized by Apple to be free from malicious intent and cleared for the safety of their user base.