
Do you want to know how to create an album on Facebook? Let’s find out the easiest ways to create an album on Facebook by using the Facebook app on Android Mobile and Facebook website on Desktop.
What is the need for creating an album on Facebook?
“Create Album” is one of the excellent features offering by Facebook to its millions of users. By creating an album, you can easily share your memories and wonderful moments with your loved ones like mother, father, sister, brother, friends, close relatives and many more, who are far away from you and living in any part of the world. If your loved ones are living far away from you, then you and your loved ones may meet once a year. Sometimes it may take 2 or more years to meet all of your loved ones. In such a case, you need to create an album on Facebook to remember and share your past golden and memories with your loved ones. Then it gives great pleasure and a wonderful thrill to you and to your loved ones.
- Related: How to Make a Facebook Page: Quick Guide to Create FB Page
- 2 Tricks To Recover Deleted Facebook Messages
How to create an album on Facebook?
Anyone can create an album easily and quickly in a few minutes on Facebook by
- Facebook App on Android Mobile
- Facebook website on Desktop
Method 1: How to Create an Album on Facebook App on Android Mobile?
Step 1: Open Facebook App and Log in.
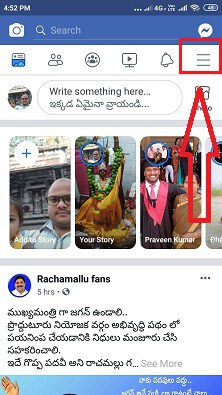
Step 2: Now Facebook opens and you can see various posts shared by your friends and you.
Step 3: Then click the menu symbol on the top right corner.
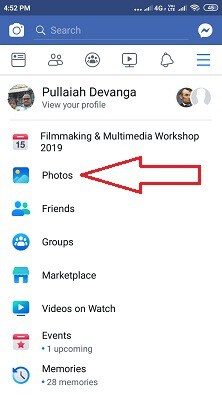
Step 4: Now click on the option “Photos”.
Step 5: Now scroll the options on top of the page towards the left side. Then you can see the option “ALBUMS” on the extreme right side on top of the page.
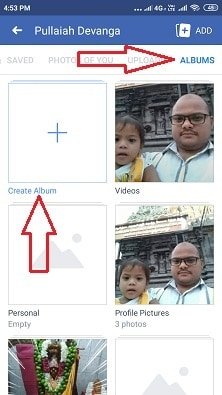
Step 6: Now click on the option “ALBUMS” and then click on the option “Create Album”.
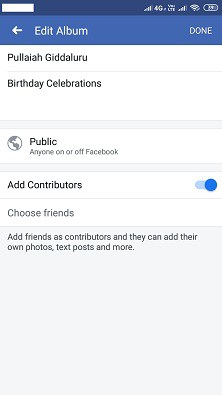
Step 7: Now give a name to your Album and also describe your album with few words related to the uploading photos on your Album.
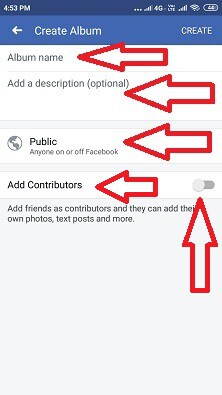
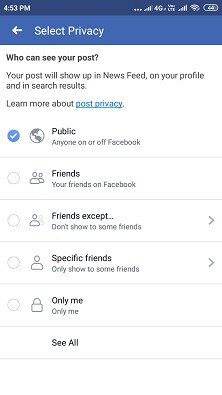
Step 8: Then click on the option public and select the options Public or Friends or other options so that whom do you want to see your album and then go back to the previous page.
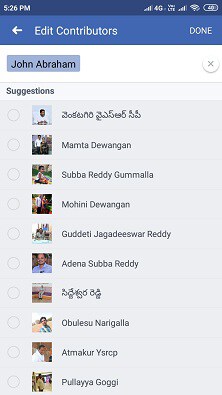
Step 9: Now click on the option “Add Contributors” and then click on choose friends.
Step 10: Now select friends who can upload photos to your created album later. Hence the option name is given as “Contributors”. Then click on the option “Done” on the top right corner.
Step 11: Now “Contributors List” appears on the page. Then click on the “Done” option.
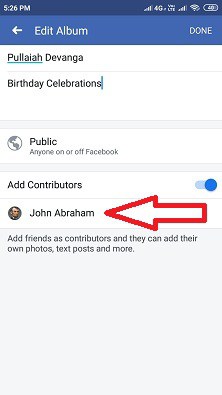
Step 12: Now an album is created with your specified name. Then click on your album with a specified name like “Pullaiah Giddaluru”.
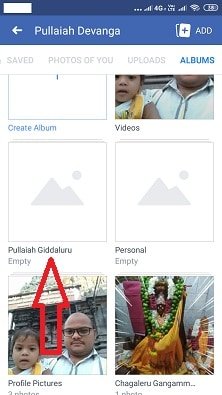
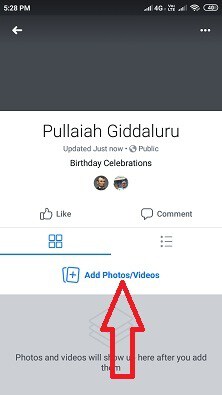
Step 13: Now click on the option “Add Photos/Videos”. Then photos appear on mobile. Now give a single click on photos on mobile you want to upload and finally click on the “Post” option.
Now the album is created with uploaded photos successfully and also shared to your timeline successfully. Now your friends able to see your album.
After creating the album on Facebook App on Android Mobile, then at any time later you can add photos or delete photos as you needed.
Method 2: How to Create an Album on the Facebook website on Desktop
Video Tutorial
We provided this article in the form of video tutorial for our reader’s convenience. If you are interested to read, you can skip the video and start reading.
Step 1: Open the Facebook website and Log in.
Step 2: Now Facebook opens showing various posts shared by your friends and you.
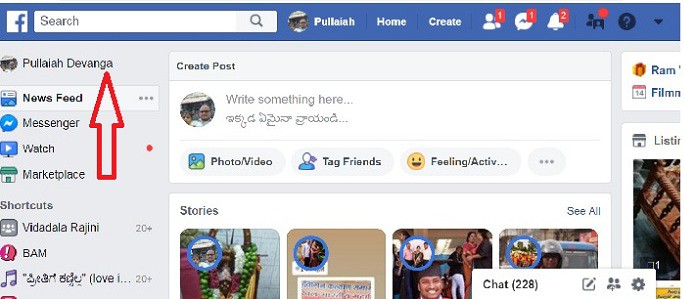
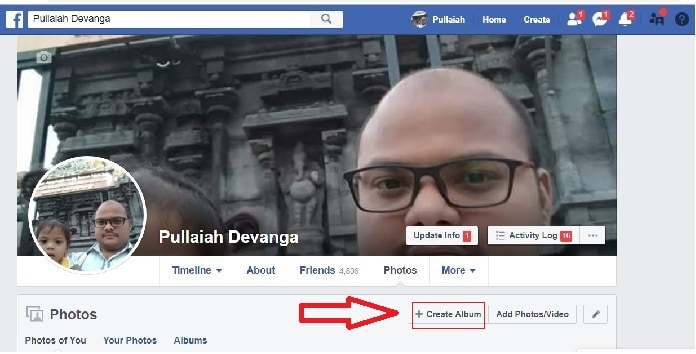
Step 3: Now click on your name appearing on the top left corner as you do to see your profile.
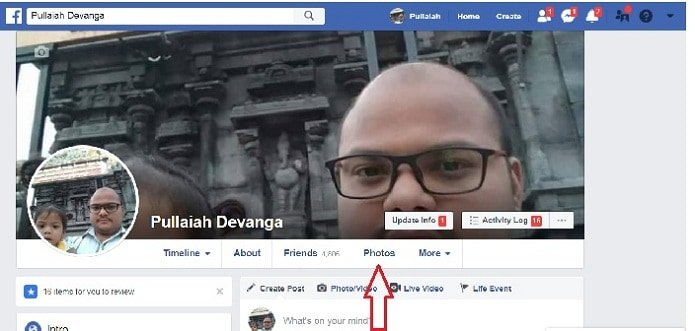
Step 4: Now click on the option “Photos”.
Step 5: Now click on the option “Create Album”. Then select the photos on the desktop.
Step 6: After selecting and uploading photos, do the following
- Assign a name to the album.
- Describe the album with few words so that anyone can understand about the album.
- Type the name of the location where the photos were taken.
- Click on the option public and select the options Public or Friends or other options so that whom do you want to see your album.
- Now click on the box to get tick mark on the left side of the option “Add Contributors” and then type the names of your friend and select them.
- Now click on the option “Post” to share your album to your friends on Facebook.
After creating the album on Facebook on desktop, then at any time later you can add photos or delete photos as you needed.
What are the features of “Create Album” on Facebook?
The important features of “Create Album” are
- Upload bulk number of photos
- Add Contributors
- Add Location
- Upload Videos
- Description of Album
- Add/Delete Photos
1. Upload bulk number of photos
“Create Album” feature on Facebook allows you to upload a bulk number of photos to share your wonderful moments and memories with your loved ones.
2. Add Contributors
Again “Add Contributors” is another excellent feature provided by Facebook in “Create Album”. After creating an album, if you use the “Add Contributors” option to your album, then all contributors nothing but all your loved ones can add photos to your album. Suppose you created your album with 100 photos and you added 10 contributors to your album. Now if all 10 contributors uploaded 10 photos each to your album, then if you see your album, amazingly the number of photos increased to 200. It’s an astonishing feature and its like a gift to every Facebook user offered by Facebook. The created album appears not only on your profile but also on added contributor’s profile.
3. Add Location
If you want to share the location of uploaded photos on the created album, then it can be done by clicking the “Location” option and you have to type the name of the place.
4. Upload Videos
Now Facebook offers to upload not only photos but also videos on the created album.
5. Description of the Album
Now you can add a description of the album by using the “Description” option so that anyone can understand your feelings and affection with the created album.
6. Add/Delete Photos
After creating the album on Facebook, then at any time later you can add photos or delete photos as you needed.
- Read: How To Upload Photos To Facebook: 2 Ways To Post Photo Using PC and Mobile.
- 2 Ways To Do Facebook Group Chat On Desktop and Mobile
By the end of this tutorial, you came to know how to create an album on Facebook and the features of the album. Do a favor by sharing it and follow whatvwant on Facebook, Twitter, and YouTube for more tips.