
Are your Gmail formatting options not showing? Are you tired of using the default text styles? This article will tell you how to get the Gmail formatting toolbar and how to use the required Gmail formatting options like Font style, type, color, etc.,
What is Text Style?
A text style is a resource that specifies text attributes, including the font, size, line spacing, font style, text alignment, and text and background colors. Text styles make it easy to apply a consistent look to all text throughout a file. if you change a text style, all objects that use the style are updated at once. A text style can be applied to objects created with the Text tool.
How to Use Gmail Formatting Options?
Video Tutorial
We Provided this Article in the form of a Video Tutorial for our reader’s convenience. if you are interested in reading, skip the video for now and watch it after the completion of reading this article.
1. How to Use Gmail Formatting Options on a Computer?

In This section, I will show you the process to use Gmail Formatting Options on a Computer.
STEP-1: Visit the Official Site of Gmail
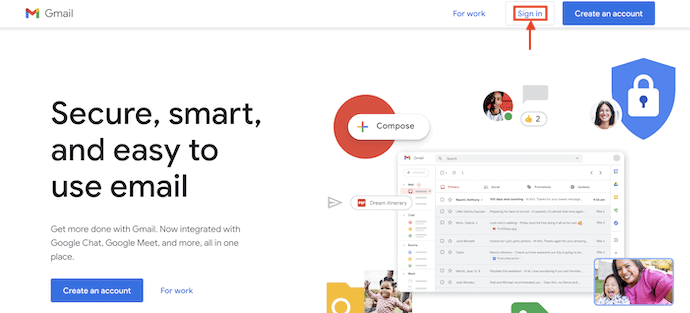
Open any Browser on your Computer and Visit the Official site of Gmail. Click on the “Sign In” option available on the top right of the interface.
STEP-2: Login to Your Gmail Account
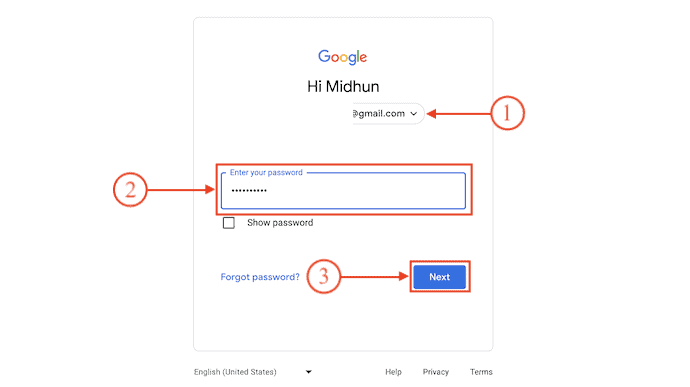
Enter the Email Address and Password in their respective columns and click on “Next” to log in to your Gmail Account.
STEP-3: Open Text Formatting Options in Gmail
After logging into your account, click on “Compose”. Then the compose window will pop up. If you didn’t find the Text Formatting options in the Compose window. Click on the “A” icon and then it displays the “Text Formatting” bar. In the Text Formatting bar, it displays various options like Font, Size, Bold, Italic, Colour, etc.,
STEP-4: Font List
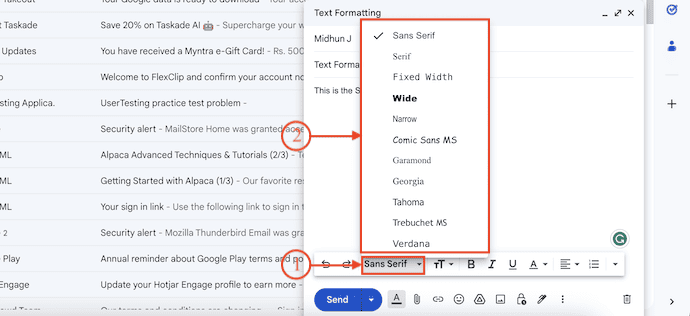
Select the text and click on the drop-down option of the Font option. Then it displays lots of fonts. Choose any font from that list to change the font of the selected text.
STEP-5: Text Size
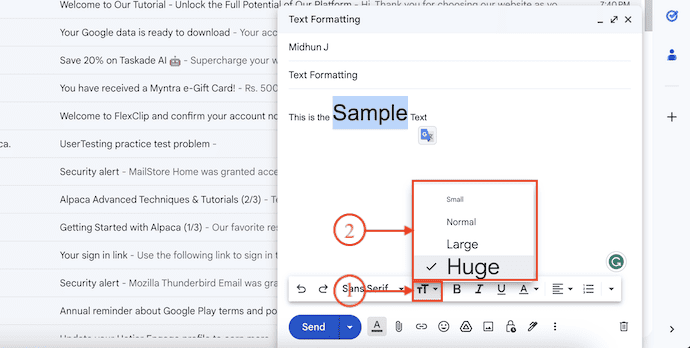
In the beside of Font option, you will find the Size option with the “T” icon. Click on it and it displays various sizes like Small, Normal, Large, and Huge. Choose the option according to your requirements.
STEP-6: Text Weight Options
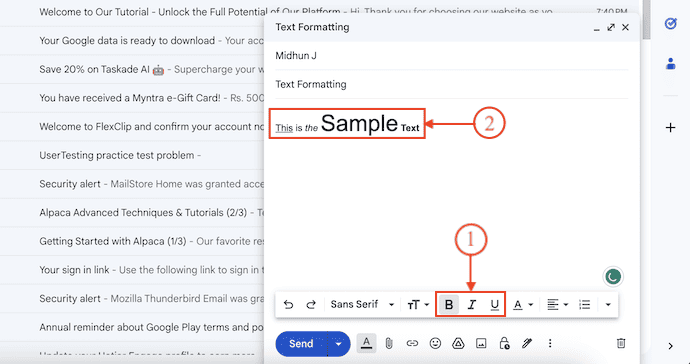
It provides the options like Bold, Italic, and Underline with “B”, “I”, and “U” icons accordingly. You can use them to change the look of your Text in the body of the email.
→ The “Bold” symbol is used to highlight certain words from the bulk of words. It is heavier and darker than the regular type.
→ The “Italic” symbol is used to draw the attention of the reader to a particular part of the text. Mainly the italic is used to emphasize the titles, foreign names, etc.
→ The “Underline” is a section of text in a document where the words have a line running under them. it is used to represent the important point in the text.
STEP-7: Color Palette

You can also change the color of a particular word or sentence using the Colour option. All you need to do is just select the text and click on the “A” icon. Then a color palette will open and from there you can choose the color for your selected text.
STEP-8: Text Alignment
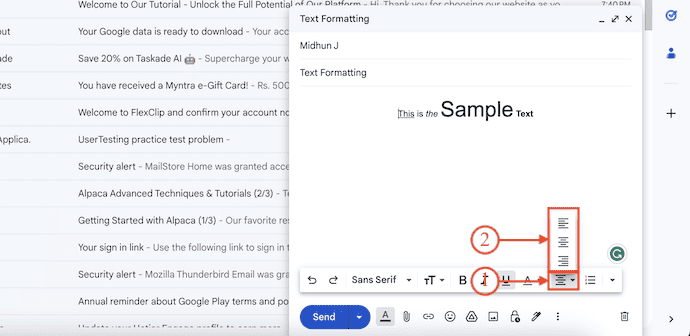
On the right side of the color option, it has the Alignment option. It is indicated with the “Three Lines” icon. Click on it and it displays three alignments, such as Align Right, Align Centre, and Align Left. Choose the alignment type based on your requirements.
STEP-9: Text Decorators

You can add the indentation, list form, Quotes, and much more by using the options indicated in the below screenshot. If you didn’t find those options, Click on the “Drop-down” icon to open the options list.
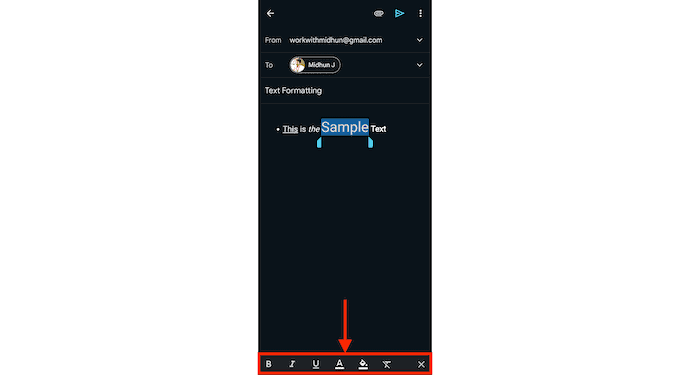
2. How to use Gmail formatting options On Android
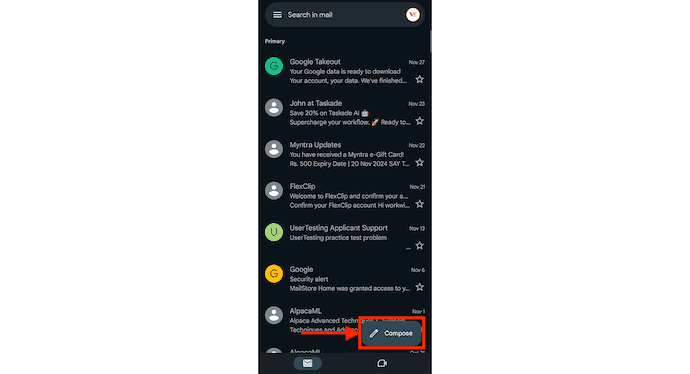
- STEP-1: Launch the Gmail Application on your Mobile Device and Tap on the “Compose” option to open the new Compose page.
- STEP-2: Enter all the details like the Recipient address, Subject, and Body of the Email. Long press on the text to select it. Then an options list will open. Choose the “Format” option from that list.
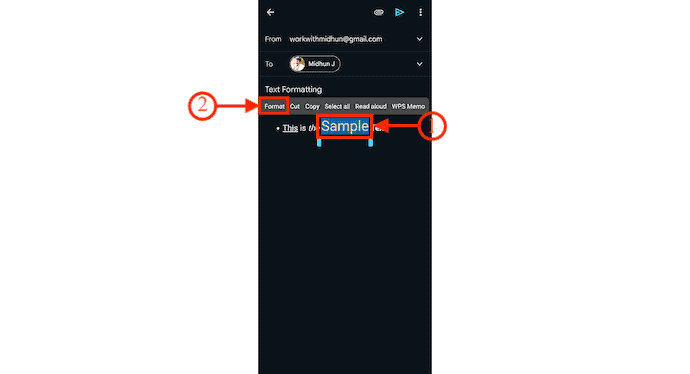
- STEP-3: Then the Text Formatting bar will appear at the bottom of the interface and display options like Bold, Italic, Underline, Text Color, Background Color, etc.,
- Bold: click on the “B” symbol at the bottom of the screen. Then the selected word becomes heavier and darker than regular text. It draws the attention of the reader.
- Italic: Click on the “I“ symbol to make the titles and the writer’s names or locations or some other special words different from the regular text.
- Underline: This is a section of text in a document where the words have a line running under them. it is used to represent some specific words or important sentences in the text. It is indicated with “U“.
- Text color: It is also used to emphasize specific words in the text. Click on the “Text color” symbol and select your desired color, then the color of the text changes.
- Background color: To change the background of the text select the “background-color” option and select the color which you want.
- STEP-4: Select the Text and tap on the options to modify the text as per your requirements.
- RELATED – How to create a group in Gmail
- What is Archive in Gmail? How to access archive emails in Gmail
Conclusion
After reading this article, you can easily add styles to text in Gmail. you can easily change the font and size of the text. You can also highlight the important words with the help of formats like Bold, Italic, Text color, and Background color.
Arrange the entire text to the left or right or center. With all these formatting options you can make your text more beautiful, grab the attention of the reader, and easy to find the title and important names or some other in the text.
I hope this tutorial helped you to know about “How to use Gmail Formatting Options”. If you want to say anything, let us know through the comment sections. If you like this article, please share it and follow WhatVwant on Facebook, Twitter, and YouTube for more Technical tips.
How to use Gmail Formatting options – FAQ
How to change the font style in Gmail using Windows?
Selecting the font option in the compose mail window and select the desired font style.
Can I highlight the word in the text?
Yes. you can highlight the word in the text by using several formats like Bold, Italic, Text and background color, and underlining.
How can I add bullets to the important points?
you have the Bullets list option in the Formatting options. Simply by selecting that option, you can add bullets.
What is Gmail Font style?
Gmail uses Sans Serif as its default font.
Is there a Gmail format?
Gmail has a new integrated view to organize Mail, Chat, Spaces, and Meet in one place.
Thank you so much for these instructions. However, when I highlight the text I wish to change, there is no format option. Only copy, cut, paste, select all etc – no “format”. Any idea how to fix this?? Thank you!!??
PS: I am using a Fire HD 10/11th generation