
Want to Change Gmail phone number? Want to know the uses of the phone number in Gmail? This tutorial will give you enough information on what you need.
Go through this article to learn how to Remove and Change Phone Numbers in Gmail or from the Google Account easily on desktop and Android.
Nowadays Gmail has become one of the most important tools in our day-to-day life for business purposes, education, etc. The Gmail interface makes use of labels. These labels replace conventional folders and provide a more flexible method of organizing emails. There are filters for automatically organizing, deleting, or forwarding emails to other addresses. And importance markers for automatically marking messages as ‘important’.
Every person has a minimum of one Gmail account for their usage. However, when you are looking to create a Gmail account, it asks to enter the phone number. Do you ever think what is the use of a Phone Number in Gmail? If you are looking for the answer, you are on the right page. Here we have given the details regarding the usage of a phone number and how to change the mobile number for your Gmail account.
What is the Use of Phone Number In Gmail?
When the phone number is activated, it prevents your Gmail account from hacking. That is if hackers steal your Gmail password to hack your account, then they will not succeed. Because the verification code comes to your mobile via SMS.
Also, in an effort to protect users from abuse, Gmail sometimes asks users to prove they’re not a robot before they’re able to create or sign in to accounts. Using this additional confirmation by phone helps to keep spammers away from abusing your systems.
However, there is a limit on the phone number of Gmail accounts. You have to use a different number if you get a popup notification saying “This phone number has already created the maximum number of accounts.” In order to protect the users from abuse, this limit has been implemented. Also, you can recover your deleted Gmail account by updating the phone number when you have created it.
Gmail needs your phone number for the following reasons:
- In case you lost your password, you can restore it with the help of your phone number.
- To be used for 2-factor authentication purposes.
As mobile number plays an important role, one must update your phone number. If you have changed the number that you are using, then below are the steps to change the Gmail phone number.
Why do You need to change the Mobile Number in your Google Account?
In this technical world, it is not possible to maintain a single mobile number for a lifelong. Sometimes the number may be changed intentionally for security purposes. Or sometimes it may be lost. There is another situation, where people use two numbers simultaneously in a single mobile phone and they give priority to the old number.
How To Change or Remove Gmail Phone Number
Changing or Updating or Removing your phone number in your Gmail account, sometimes, will become essential. In such a case, you can do it easily using desktop and mobile devices. For details go through the following once.
Video Tutorial
We Provided this Article in the form of a Video Tutorial for Our reader’s convenience. If you are interested in reading, skip the video for now and watch it after the completion of reading this article.
How to Change Gmail Phone Number on Desktop
- STEP-1: Open any Browser on your desktop and Visit the Official site of Gmail. Click on “Sign In” and log in to your Gmail account by providing your Email address and Password.
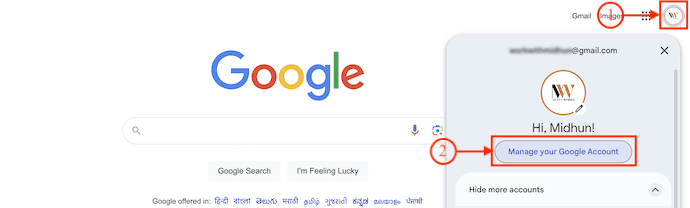
- STEP-2: After logging in, Click on the profile icon available in the top right corner of the window. An options list will open. Click on the “Manage your Google Account” option.
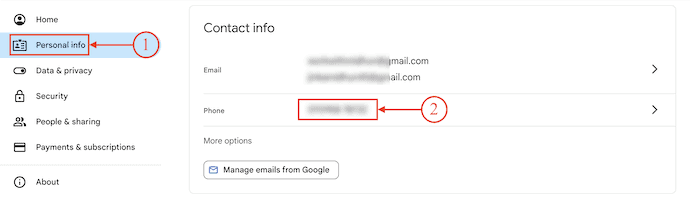
- STEP-3: It redirects you to the Google Account Page. Move to the “Personal Info” section from the left menu. Scroll a bit down to find the Contact Info section. In that section, Click on the “Phone” option.
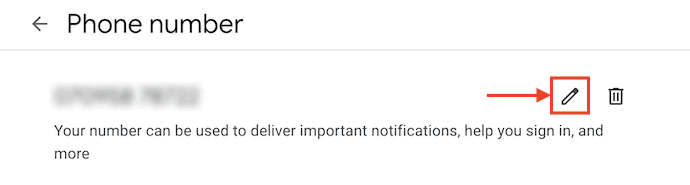
- STEP-4: Then it takes you to another page, from where you can edit and delete the Phone Number. Click on the “Pen” icon.
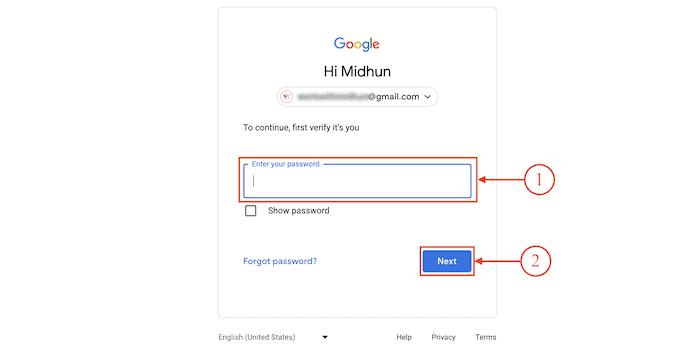
- STEP-5: It asks you to verify your Gmail account by providing the password.
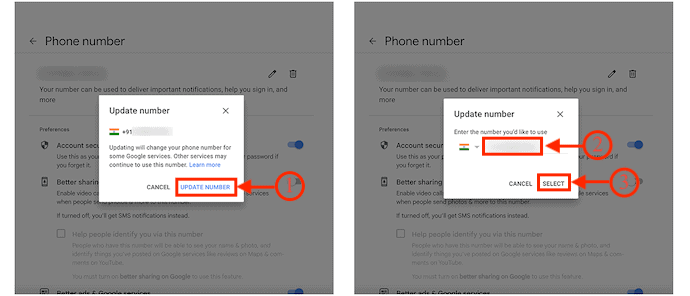
- STEP-6: You will find a small pop-up with the previously added phone number. Click on the “Update Number” option. Then it allows you to edit the phone number. Click on the number and modify the number. Later, click on “Select”. That’s it, this is how you can easily change Gmail phone number on the Desktop.
How to Change Phone Number In Gmail Or Google Account on Android?
In This Section, I will show you the step-by-step procedure to change Gmail Phone Number using a Mobile Device.
STEP-1: Launch the Gmail Application and Log In
Launch the Gmail Application and Log in to Your Gmail using the Email ID and password.
STEP-2: Go to Settings
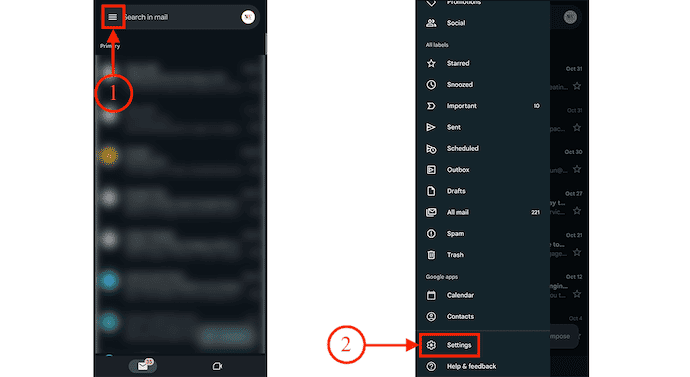
After logging into your Gmail successfully, Click on the “Three lines” icon available on the left side. Then a side bar will open. Scroll the Sidebar to the bottom and there, you will find the “Settings” option. Click on it.
STEP-3: Look for Phone Number
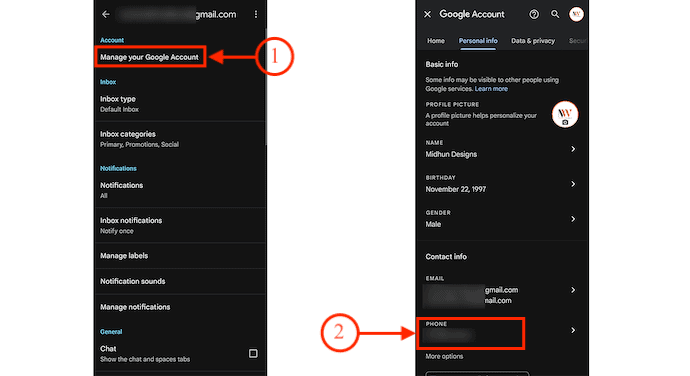
It takes you to the Settings page and there click on the “Manage Your Google Account” option. Then it redirects you to the Google Account page. Move to the “Personal Info” option and scroll down to find the “Contact Info” section. In that section, tap on the “Phone Number” option.
STEP-4: Verify to Edit Phone Number
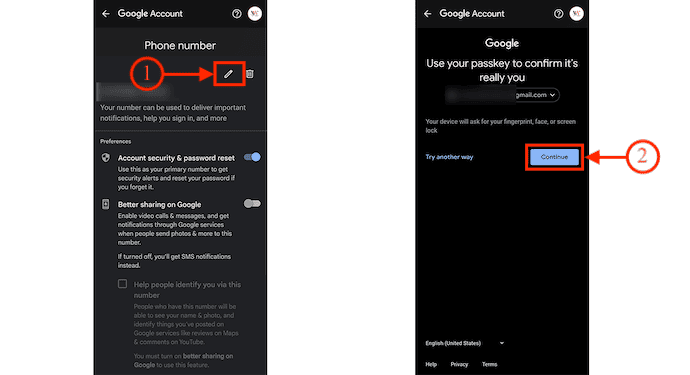
Then it shows a “Pen and Bin” icon which helps you to edit and delete the Phone number respectively. Tap on the “Pen” icon and then it asks you to verify your identity by entering the password. After verifying, it automatically takes you to the next step.
STEP-5: Edit and Save Phone Number
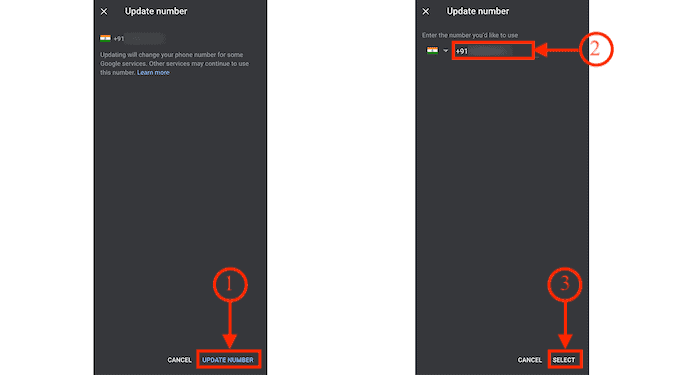
Here, tap on the “Update Number” option and then it allows you to modify the phone number. Tap on the phone number and type the number. Later, Tap on the “Select” option to save the Phone Number.
- RELATED – How to Get SMS Alerts for Gmail via Twitter
- How to Forward Multiple Emails at Once in Gmail
How to Remove Mobile Number completely from Google Account/Gmail on Android?
- STEP-1: Open the Gmail application on your mobile device and Log in using the Email and Password.
- STEP-2: Tap on the “Three lines” icon available on the left top of the interface. A sidebar will open. Scroll the sidebar to the bottom and there you will find the “Settings” option. Tap on it.
- STEP-3: It takes you to the Settings page and there click on the “Manage Your Google Account” option. Then it redirects you to the Google Account page. Move to the “Personal Info” option and scroll down to find the “Contact Info” section. In that section, tap on the “Phone Number” option.
- STEP-4: Then it shows a “Pen and Bin” icon which helps you to edit and delete the Phone numbers respectively. Tap on the “Bin” icon and then it asks you to verify by providing the password.
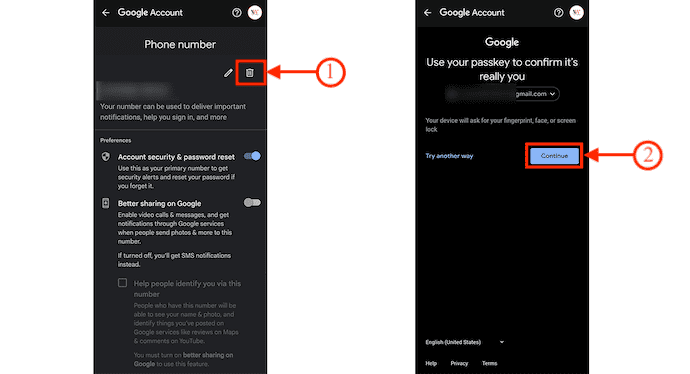
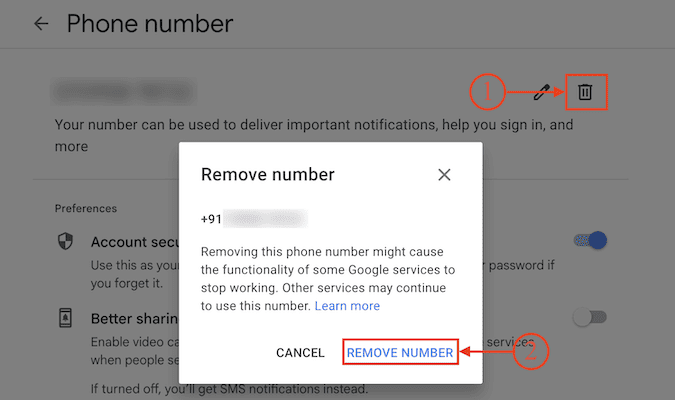
- STEP-5: Again tap on the “Bin” icon and a popup will appear. Choose the “Remove” option by tapping on it to remove the phone number.

Then your phone number will be removed from your Gmail/ Google Account completely.
- RELATED – How to Change Gmail Name or Name on Google Account
- How to Export or Import Gmail Contacts to Outlook?
How to Remove Mobile number completely from Google Account/Gmail on Desktop
In the previous section, we have seen the procedure to remove mobile numbers in Gmail on Android. Some people want to remove the mobile number in their Google account/ Gmail on a Desktop or laptop. For those people the procedure in this section is useful. Follow the below Steps to Remove the phone number completely from Google Account/ Gmail on Desktop.
- STEP-1: Open any Browser on your desktop and Visit the Official site of Gmail. Click on “Sign In” and log in to your Gmail account by providing your Email address and Password.
- STEP-2: After logging in, Click on the profile icon available in the top right corner of the window. An options list will open. Click on the “Manage your Google Account” option.
- STEP-3: It redirects you to the Google Account Page. Move to the “Personal Info” section from the left menu. Scroll a bit down to find the Contact Info section. In that section, Click on the “Phone” option.
- STEP-4: Then it takes you to another page, from where you can edit and delete the Phone Number. Click on the “Bin” icon.

- STEP-5: It asks you to verify your Gmail account by providing the password.
- STEP-6: Again, Click on the “Bin” icon. Then a pop-up will appear and ask for confirmation to delete the Phone number. Click on the “Remove Number” option.
- RELATED – Gmail Dark Mode: Makes It Easier To View Messages At Night Times or In Low Light Situations
- How to Change Gmail Background Image or Theme or Color
Conclusion
Adding a Phone Number to your Gmail Account is a good sign to secure your Account. You can add, modify, and remove the phone number of your Gmail account using Desktop and Mobile devices. You can follow the simple steps discussed in the above section to change and remove Gmail Phone Number.
I hope this tutorial helped you to know about “How to Change Gmail Phone Number”. If you want to say anything, let us know through the comment sections. If you like this article, please share it and follow WhatVwant on Facebook, Twitter, and YouTube for more Technical tips.
How to Change Gmail Phone Number – FAQs
Can Google recover permanently deleted emails?
For up to 30 days after deleting, users can recover their own messages from the Trash by following the steps in Recover deleted Gmail messages.
Why Google can’t verify my phone number?
The phone number was used on the spam listings. The phone number on other web properties is different. The phone number you suggested is different from what you provided during account creation.
What is the Google 6-digit code?
The Google authentication process prompts the scammer to prove that they own the number by entering a six-digit code sent to the victim’s phone.
How secure is Gmail?
Gmail blocks more than 99.9% of spam, phishing attempts, and malware from reaching you.
Is Google safe from hackers?
If the website is hacked, your email, password, and other sensitive information could be stolen. Facebook and Google have the security features and technology necessary to stop most hacking attempts from happening.