
Planning to Transfer iPhone Photos To PC and got frustrated in choosing the right method? Don’t worry! we are here to guide you through the best available methods to transfer iPhone Photos To PC. Go through this article and read till the end to grab the complete information to transfer iPhone Photos To PC.
Basically, people think that transferring data like photos, videos, and documents from iPhone is very difficult and it needs software to transfer. But it is completely a wrong assumption and even you will come to the same decision after reading this article. In this article, I have discussed the best possible ways/methods to transfer iPhone Photos To PC.
- READ MORE – How to reset iPhone to factory settings
- How To Recover Deleted WhatsApp Photos iPhone/Android
How To Transfer iPhone Photos To PC
Video Tutorial
We Provided this Article in the form of a Video Tutorial for our reader’s convenience. If you are interested in reading, skip the video for now and watch it after the completion of reading this article.
1. How to transfer iPhone phots to PC free using Windows Explorer
Windows Explorer is the first and foremost method to be used by anyone to transfer data from any device to pc. This is the built-in method in every windows PC and so this is our first method to transfer iPhone Photos to PC. This is a free method and very easy to transfer the data/files. Now, let’s see how to transfer iPhone Photos to pc using Windows Explorer.
- STEP-1: Connect iPhone to PC using the USB cable(It is also known as USB to Lightning cable).
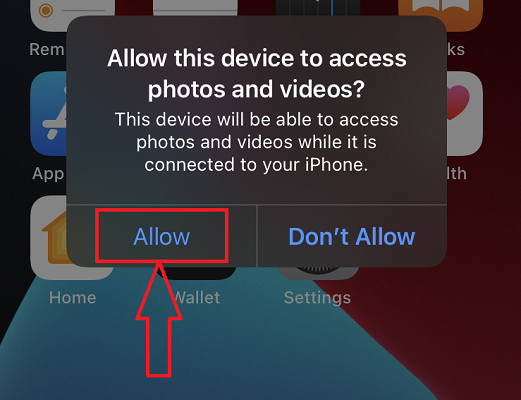
- STEP-2: After connecting the cable, you are asked to allow permissions in the iPhone. Click on “Allow” to grant the access. Then you will find the iPhone device on your computer.
- STEP-3: Open the iPhone device folder on the computer and locate the photos which you want to transfer.
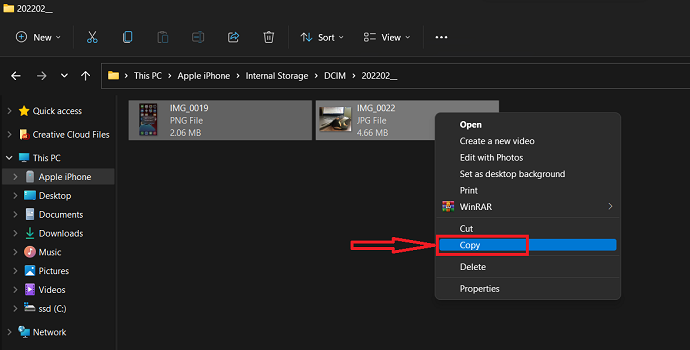
- STEP-4: Select the photos and right click on them. A list of options will be seen and choose the “Copy” option. Else, you can alos copy using the keyboard shortcut “CTRL+C”.
- STEP-5: Now head towards the location on your PC to where you are willing to transfer the copied Photos. Right click in the location to launch the options list. Click on the “Paste” option from that list. You can also paste the photos using the Keyboard Shortcut “CTRL+V”.

This is how you can transfer iPhone Photos to PC using Windows Explorer.
2. Transferring photos from iPhone to Windows PC free using Windows Photo Import
Windows Photo Import is also a built-in option available on every Windows PC. You can choose this option at the time of connecting devices from Choose the Action to perform window. Or else, you can use this option as discussed in the below steps.
- STEP-1: Connect Your iPhone to the PC as mentioned in the above method.
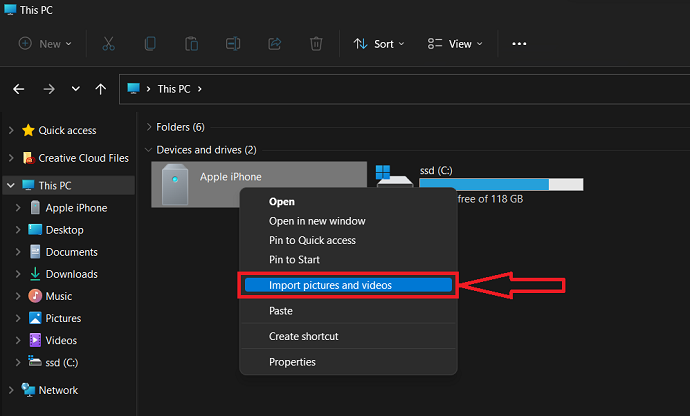
- STEP-2: Go To “This Pc” and Right click on the iPhone device from the drives list. choose the “Import Photos and Videos” option by clicking on it.
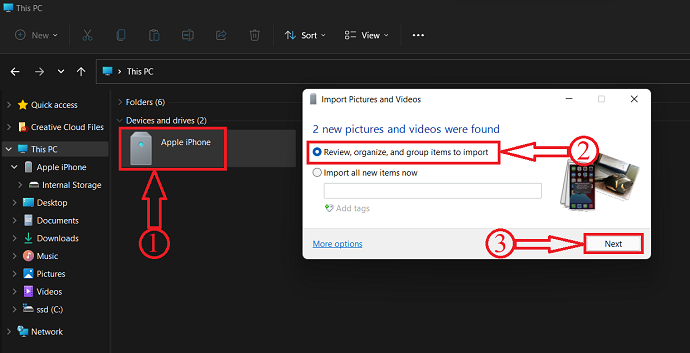
- STEP-3: Then it scans the whole iPhone and displays the results as displaying in the below screenshot. If you want to choose the specific photos or videos, choose the first option. If you want to transfer all the photos and videos, choose the second option. Later, click on “Next” to continue.
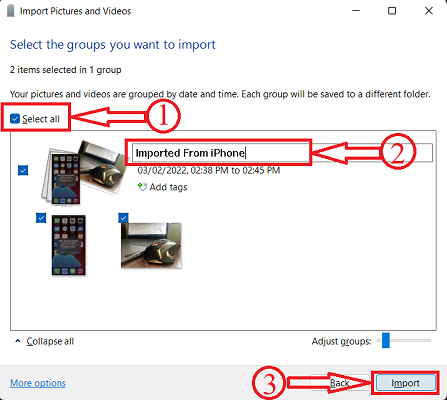
- STEP-4: In this step, you are allowed to choose the photos to import and also enter the name for the folder. After choosing the photos, click on “Import”.
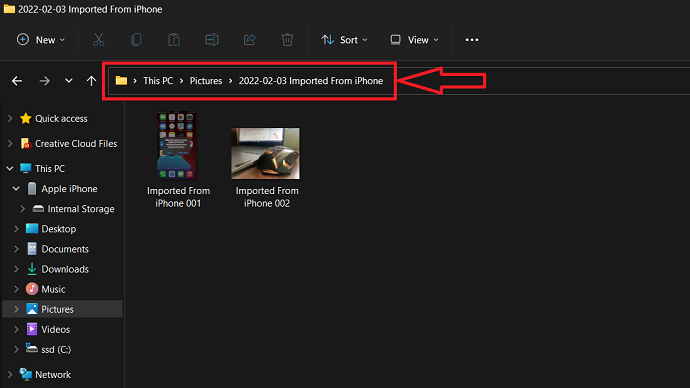
- STEP-5: That’s it, it starts importing and takes time depending on the photos count. Later, Move to the path “This Pc > Pictures” as displaying in the below screenshot and there you will find the imported photos in a folder titled as you entered in the Step-4.
- READ MORE – Best spying apps for iPhone
- How to delete duplicate photos on Mac, Windows, iPhone & Android
3. Using iMazing (Premium software)
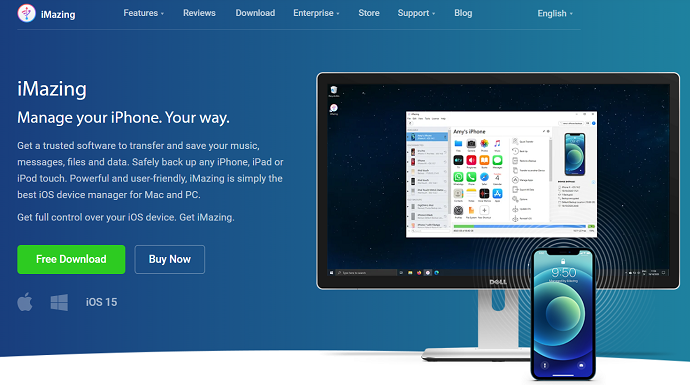
iMazing is the best and premium software for iOS users to manage their iPhones, iPad, and iPods. This is the most trusted software for transferring and controlling Apple devices. Using this software you can easily save, backup, and transfer the data between Apple products and computers. This is available in both free trial and paid versions. so that you can try before purchasing the software. Trust me, You can’t stop yourself from purchasing the premium version after trying the free version.
Because of its powerful and user-friendly interface, it is preferred and recommended by most Apple users to manage their devices. You can use this software on both Windows Pc and macOS. Using this iOS manager, you can control and perform every action on your without touching the device.
Highlights of iMazing
- Powerful and User-friendly Interface
- Smarter Backups
- Can Transfer data from old phone to new phone
- Exclusive App Management Solution
- Manage Your contacts
- Export Call history and Voice mail
- iOS Advanced Management
Pricing
iMazing is available in free trial and paid versions. The paid versions are available in two versions namely, Personal and Business. These two are further classified according to device licenses. The prices of all the licenses are listed below.
- Personal
- Device license (One time Payment)
- 1 Device – ₹ 2,700
- 2 Devices – ₹3,500
- 3 Devices – ₹ 4,000
- 5 Devices – ₹5,500
- 10 Devices – ₹ 10,000
- Unlimited Devices – ₹ 3,500/Yr
- Device license (One time Payment)
- Business
- Business – ₹ 4,000/seat Per Year
- Configurator (macOS only) – ₹ 28,000/seat Per Year
- CLI – ₹ 20,000/seat Per Year
- Custom Licensing
How To Transfer iPhone Photos To PC using iMazing

In This section, I will show you the step-by-step procedure to transfer iPhone Photos To PC using iMazing iOS manager software.
Total Time: 5 minutes
STEP-1: Download the iMazing iOS Manager
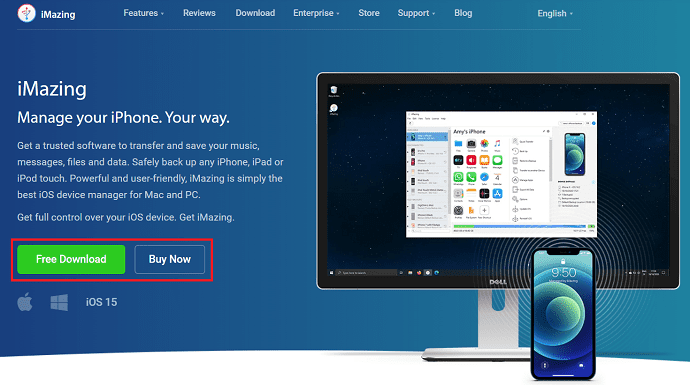
Visit the official site of iMazing and download the application according to your computer operating system. Install and launch the application.
STEP-2: Connect iOS device to PC
Connect your iPhone to the PC using the USB to lightning cable. Then it asks you to grant the permissions to access. Click on “Allow” to grant access.
STEP-3: iMazing Interface
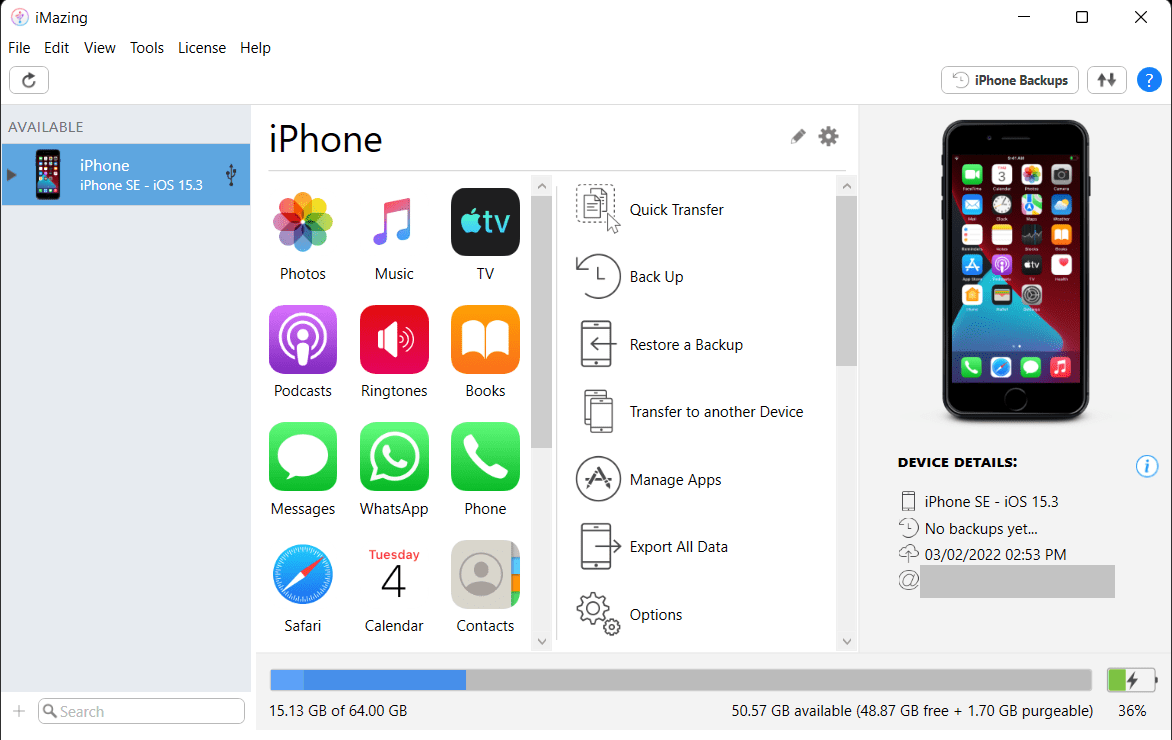
After allowing access from the iPhone, you will find the application interface as shown in the screenshot. Here, you will the complete information regarding the device that you have connected. From here you can access various sections of your iPhone and can perform different actions through the PC.
STEP-4: Finding the Photos Option
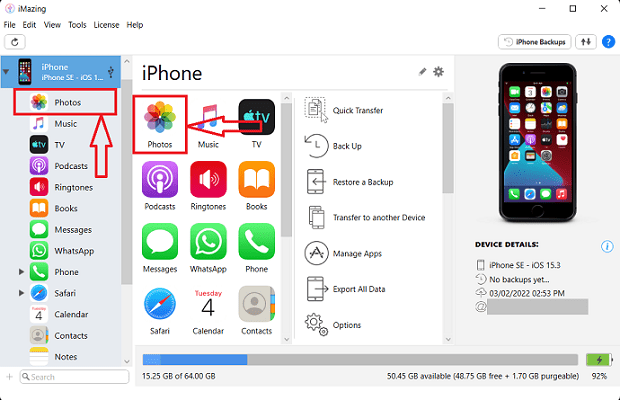
As we have allowed the permissions to access the device, we can easily transfer iPhone Photos to PC. Choose the Photos section from the interface. If you haven’t found the photos on the homepage, click on the device name located on the left side of the window. Then a list will open and from there click on the “Photos” option.
STEP-5: Choose the Photos to Transfer
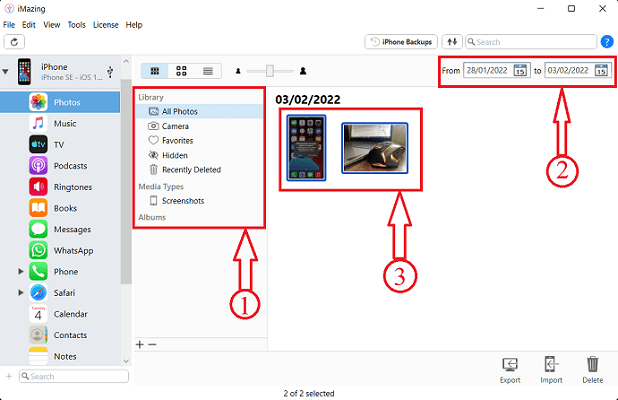
It will show you all the photos present on the iPhone. You can also choose the photos by choosing the specific folder. Or else, you can also select the photos from a specific timeline by modifying the calendar feature.
STEP-6: Transfer iPhone Photos To PC
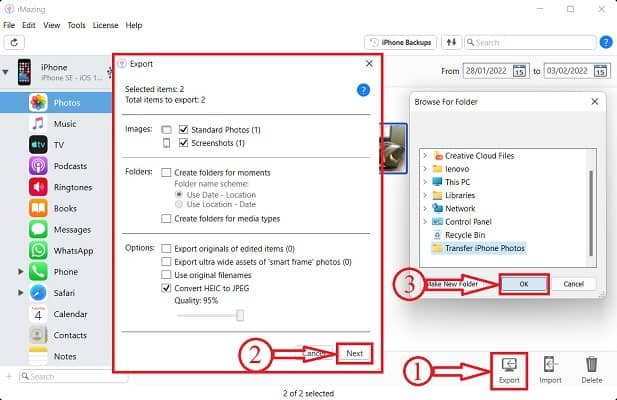
After choosing the Photos, click on the “Export” option available at the top right corner of the window. Then a window will pop up and asks you to choose the export criteria. Make modifications if necessary and later, click on “Next” to continue. Now, another window will pop up and allow you to choose the destination to export the photos. After choosing the destination, click on “OK”.
STEP-7: Completion of Transfer Process
It starts to transfer all the selected photos to the destination folder and shows you the notification as shown in the screenshot after the completion of the transfer process.
- READ MORE – How to Turn on Dark Mode on iPhone: 3 Methods
- IOTransfer 4 Review: A Better Way To Manage Your iPhone or iPad
4. How to move iPhone photos to PC using iCloud
iCloud is an official cloud storage platform of Apple. This can be accessed by logging in using the Apple ID. It syncs the data across all your Apple devices that are logged in using the same Apple ID. So, this is another best online method to transfer iPhone photos to pc. Follow the simple steps listed below to transfer iPhone photos to pc.
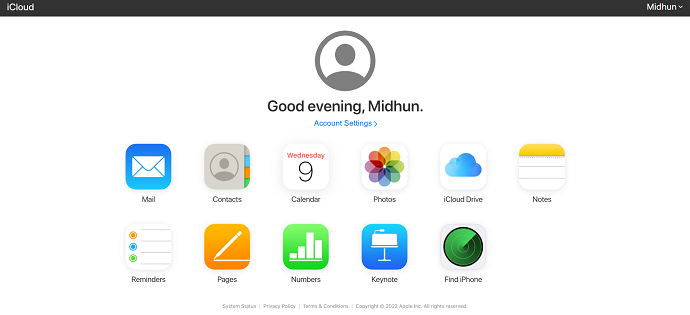
- STEP-1: Visit the official site of iCloud and login using your Apple ID.

- STEP-2: It redirects you to the homepage of the iCloud and there you will find the options like Mail, Contacts, Calendar, Photos, iCloud Drive, Notes, Reminders, Pages, Numbers, Keynote, and Find iPhone.
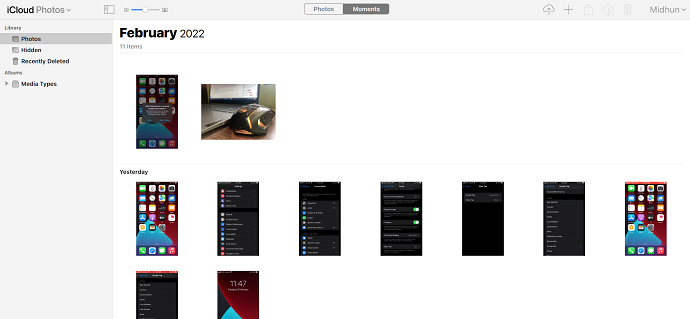
- STEP-3: As this article is to transfer iPhone Photos to PC, I’m choosing the “Photos” option from the available list. Then it shows all the synced Photos and Videos.
- STEP-4: Select the Photos you want to transfer from iPhone to pc and then you will find the download option on the right top corner. It provides two download options like Unmodified Originals and Most Compatible. Choose a option and click on “Download” and it starts downloading automatically.
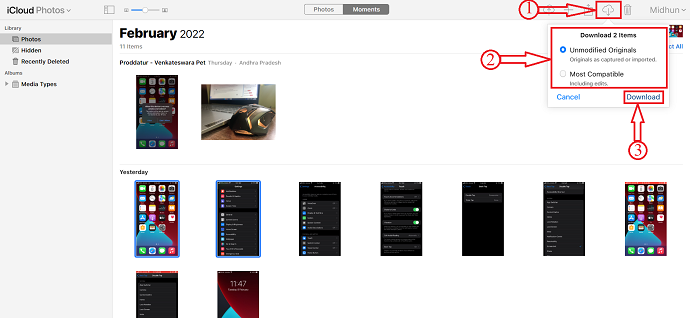
This is how you can easily transfer iPhone Photos to pc using the iCloud platform.
5. iTunes

- STEP-1: Download and Install the latest version of iTunes on your computer.
- STEP-2: Connect your iPhone to your computer using the lightning cable allow all the permissions to access your iPhone.
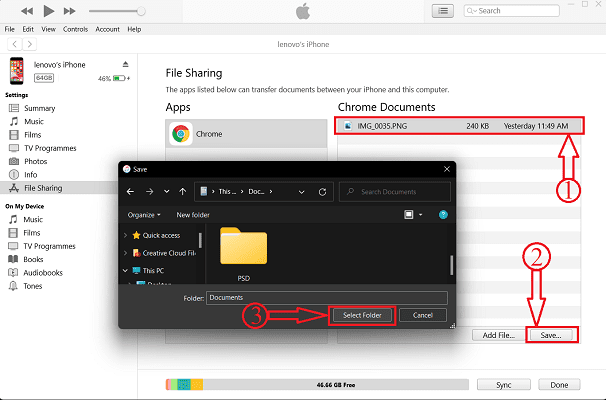
- STEP-3: Launch the iTunes and then you will find your device information on iTunes interface. Choose the “File Sharing” option from the options available at the left side of the window. Then it shows the apps installed on iPhone that allows you to transfer files.
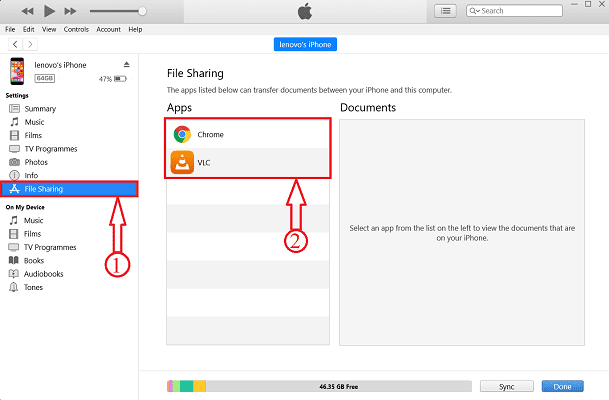
- STEP-4: Choose the app from which you want to share the files. Here, I’m choosing the Chrome option. To make the files visible on chrome, you need to save the files in the chrome folder. Follow these simple steps to save the files in any folder.
- Firstly, open the “Photos” application and choose the photo that you want to transfer and click on “Share” option.
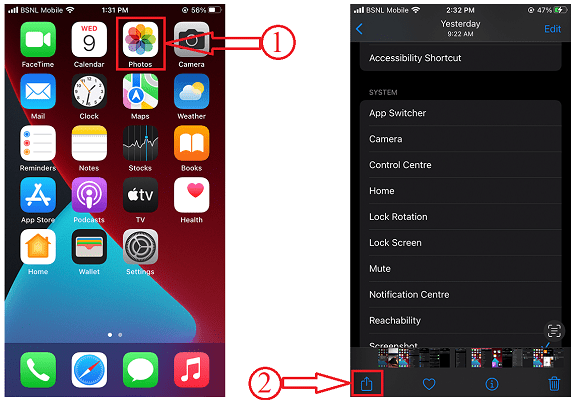
- Then a list of options will pop up. Choose the “save to Files” option by clicking on it. It shows the possible locations/destinations to save the Photo. Here, I’m choosing the “Chrome” folder.
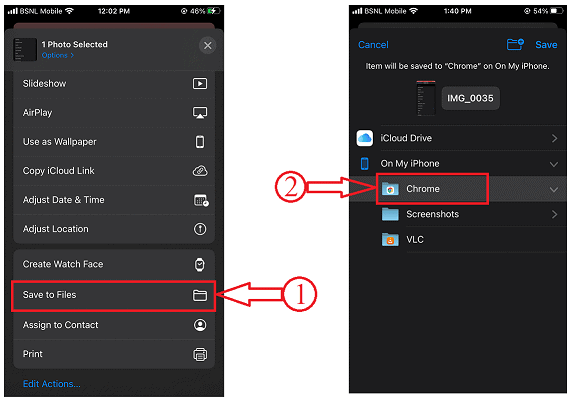
- That’s it, the photo saves in the chrome folder and will be visible in the chrome folder on iTunes.
- STEP-5: Select the Photos and Click on “Save”. A window will pop up. Choose the destination folder to save and click on “Select Folder”. Then the Photo will be automatically saved in the selected folder.
- READ MORE – How to Selectively Recover iPhone Data from iTunes Backup
- 13 Best Project Management Apps For iPhone, Android, & Desktop
6. Google Drive
You can also transfer iPhone Photos to Pc through Google Drive. But this is a time taking process as you have to upload every file to google drive from iPhone and later download them from Google Drive to PC. But in some cases, this method will also help you to transfer iPhone Photos to pc.
- STEP-1: Firstly, Download the Google Drive from the App Store and login using the Google credentials.
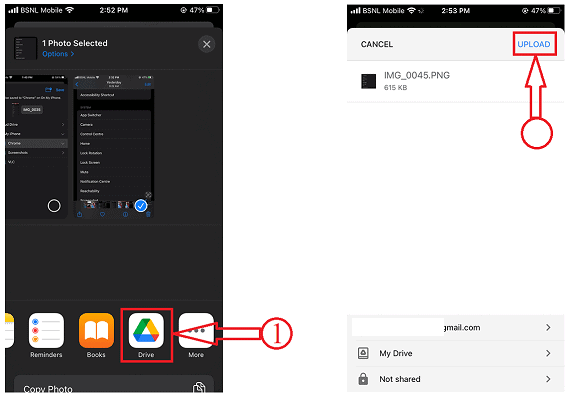
- STEP-2: Go to Photos and choose the Photos that you want to transfer. Tap on the share option available at the bottom menu.
- STEP-3: A list of options will popup. Choose the Google Drive as the targeted location. The it asks to choose the location and Click on “Upload” to start uploading the photo.
- STEP-4: Now open any Browser on your computer and login to Google Drive using the same login credentials that are used on iPhone.
- STEP-5: Locate the Photos and select them by clicking on them. Click on the three dots for options. Choose the “Download” option and that’s it, downloading starts automatically. This is how you can easily transfer iPhone Photos to Pc using the Google Drive.

Conclusion
The above-stated methods are some of the best and most simple methods to transfer iPhone Photos to Pc. We have included free, online, and premium methods in this article, so you can try the method that suits you best. In my opinion, using premium software like iMazing will help you not only to transfer iPhone Photos to pc but can access all the data of your iPhone from your pc itself. From the above-discussed methods, Choose one that you feel easy and comfortable to transfer iPhone Photos To Pc.
I hope this tutorial helped you to know about the Best Methods To Transfer iPhone Photos To PC. If you want to say anything, let us know through the comment sections. If you like this article, please share it and follow WhatVwant on Facebook, Twitter, and YouTube for more Technical tips.
- READ MORE – How to recover deleted files from Windows, Mac, iPhone, USB, etc.,
- How To Transfer Your Music/Pictures/Contacts/Message/Video From PC To iPhone Without iTunes?
How To Transfer iPhone Photos To Pc – FAQs
Why can’t I Transfer iPhone Photos to PC?
This issue can sometimes happen when you have selected to Optimize iPhone Storage for the photos. The optimized images sometimes do not show up in the file structure when transferring it to a Windows PC.
Can you Airdrop from iPhone to Pc?
Lots of users will wonder if it is possible to AirDrop files from iPhone to Windows 10 PC or laptop. The answer is not, Windows computers do not support the AirDrop function, unfortunately. You can not move files from iPhone to Windows 10 directly.
Can you Transfer Photos from iPhone to computer via Bluetooth?
Just open the Photos app of your iPhone and select photos you want to transfer, then click the “Send” option and select using “Bluetooth”. Wait for a while and the photos will be transferred to your computer and saved in the Pictures folder.
Why can’t I see my iPhone files on my computer?
Make sure that your iOS or iPadOS device is turned on, unlocked, and on the Home screen. Check that you have the latest software on your Mac or Windows PC.
Can I Install AirDrop on Windows?
Apple devices can use AirDrop to transfer the file to your computer. However, neither Windows nor Android support AirDrop.