
Want to recover deleted files from Windows, Mac, iPhone, USB, etc? Sometimes we need files which are deleted from the device. At that time there is a necessary to recover them. Then is it possible to recover deleted files from PC, Mac, iPhone, pen drive, Memory card, etc? Yes, it is possible. You can recover deleted files with free software.
In this article, I am going to show you all possible ways to recover deleted files from almost all devices. We did not include the Android recovery methods, we have a separate article for that. Read How to recover lost Android data.
Is It possible to Recover Data Online Free?
Have you ever searched for a free data recovery service online? Is there any easy-to-use and free such software online?
Some of you may want to find a free way to recover deleted files or lost data from USB, memory card, hard disk. Or you need to rescue some essential data from inaccessible storage devices without using the software. Then you may turn to the Internet and try to find a free data recovery method online.
If you are trying to discover a free online data recovery service without software to rescue your lost data, you may be disappointed, because you’ll find that there are some local data recovery services nearby, but you need to take your storage to the service center.
Actually, it is impractical to recover data without software online. If you are attempting to find a data recovery service to recover data free online without software, you would be disappointed.
How to Recover deleted files from Windows
First 4 Steps to restore deleted files
When you want to restore deleted files, you need to follow the below steps one after one.
1. Stop Using the computer
First thing first. If you know, you have a deleted file then stop using the computer immediately. Because anything may overwrite your deleted file’s memory.
2. Restore previous versions or file recovery
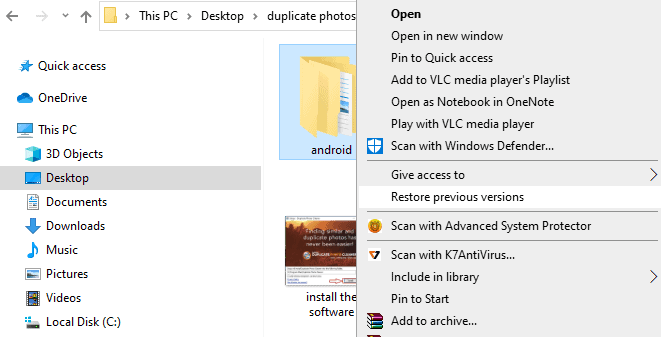
Sometimes it is possible to restore your deleted file just by restoring the previous version. “Restore previous versions” option available in Windows 7. Navigate to the folder from which you have deleted the file. Right-click on the folder. You can see the “Restore previous versions” option. Click on that. It may restore the deleted file in the same folder.
The “File recovery” option is available in Windows 8 and later. But it is useless if you had not taken back up earlier. You can take backup to the external disk by using this option. If you had a backup ready, then you can restore your file with this option. See more details from the Microsoft article.
3. Check Recycle Bin
When you delete the file, it will go to the recycle bin. So check the recycle bin first. You can see the recycle bin on the desktop. Open recycle bin. Check the recycle bin for your file. You can also use the search function for a particular file.
4. Use Data Recovery software
If the above methods did not solve your problem, then you should go for data recovery software. There are many free and paid software available. We recommend using EaseUs data recovery software.
1. Using Windows Inbuilt features
Lets’s first quickly talk about how can you recover those permanently deleted files in the Windows operating system.
The first and easy method is to restore files from the already created backup or use file history in windows. But it could not work for everyone because there are high chances that the user has not been set up backup earlier.
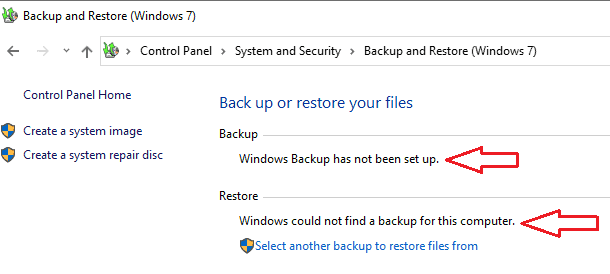
You can quickly find if there is a backup available on windows or not by navigating the control panel>backup and restore
The second place you need to look for the backup is file history. File history is the process of creating a backup in an external drive, and it is used to restore those files which may be lost or corrupted.
Open the control panel and navigate to file history. If the file history option is off, that means you could not retrieve lost files by using this method.
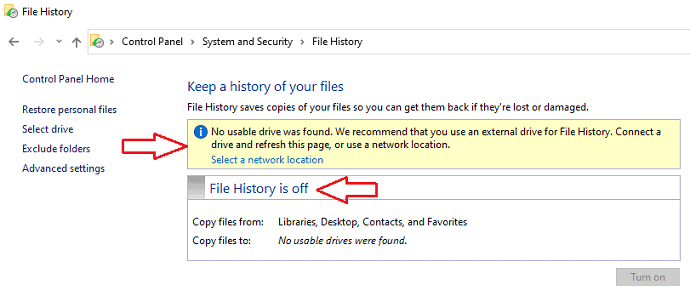
As you can see in both images, that my system doesn’t have a previous backup and I also never used the file history option to backup my files on an external drive.
So this recovery method has been failed in my case.
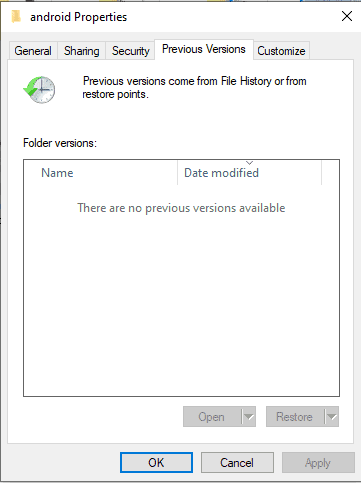
For the users who have a backup already in their system or any external drive, they can quickly restore those files and folders using the “Restore previous version” option. Right-click on the folder where your deleted file was existed and select the “restore previous version” option. If your system has a backup, the previous version of the files will appear in this box. This way, you can restore files from the backup.
2. Using Data Recovery software
If you can not recover the files using backup and file recovery, then you left only is to use recovery software to retrieve the lost files. But as I mentioned earlier, that success rate depends on how carefully the user executes the process.
Under the sections below, you will know essential things to keep in mind before starting the recovery process. Lastly, you will find some of the best popular recovery tools which can help you to recover deleted files from Windows and USB.
In this section, you can learn about different methods of renewing access to your files. Read these steps to recover shift deleted files and secure them.
Precaution to take care before using the Recovery tool
After you get to know that you lost your files, do not use the system/device and the drive where the file previously existed. Because when you lost your files permanently, they will not disappear from the folder, you just lose their entries. If for instance, any new data write into that folder, your lost file entries will be overwritten by new data. And then the recovery is next to impossible.
Also, the overwriting problem may occur again in the situation when you are trying to save/restore files (from the recovery tool) into the same folder. Always select another folder or external drive to save recovered data.
Recovering files on windows drive: To prevent data overwriting, Install a recovery tool on a separate USB drive/external drive.
Recovering files on USB/External hard-drive: Under this situation, do not make any change on that drive and do not and Install recovery software on the Pendrive. Instead, install it on the computer hard drive.
Note: If mistakenly, any change happens on the deleted file folder, the recovery process failed and the recovery software shows an error, and it cannot be altered in any way.
2.1 Using Recuva
Recuva is one of the best free recovery tools built by a company that has developed the popular cleaner software CCleaner. It offers users to recover files without any size limit, unlike other recovery tools the only limitation of this recovery tool is that it is only available on windows. Not only files it can also recover emails, camera images, and a lot more. It is a highly recommended recovery tool when you need it for personal use.
Recuva Features
- Robust Scanning: Recuva offered two scanning modes to recover files from the disk: Master file table and deep scanning. Master file table mode can quickly recover files from a specific location. However, the user has the option to use the deep scan method in the situation when quick scanning doesn’t work. In deep scanning mode, Recuva scans for the files in a whole hard disk which is beneficial when you don’t find files in a default scan mode.
- Virtual Hard disk support: The Recuva is capable to export recovered files directly to VHDs (Virtual hard-disk)
- Email recovery: In case you have deleted emails permanently from Outlook, Mozilla, or Windows Live mail, you can recover with the Recuva advanced wizard available in a free version.
- Multiple file system supportable: Recuva doesn’t care about the file system type of your hard-disk, It is capable of recovering lost data from NTFS, FAT, and exFAT formatted drives.
- Damaged disk recovery: There are chances that you may get your Pendrive or USB device corrupted after plug into corrupted systems. In that case, if you want to recover USB files, Recuva has the functionality to fetch lost files from damaged or reformatted disks.
- Effective searching process: Recuva has a robust searching algorithm. It can allow the user to search files for a quick recovery by file name, file location, and file type.
Recuva Pricing & Plans
Though the free version works well, if you want, you can try their premium plans. The Professional Plan started from $19.95. Under this plan, you get extra features along with file recovery are:
- Virtual hard drive support
- Automatic updates
- Premium support
Recuva Pros
- Windows 10 compatible
- Cheapest price as compared with other file recovery tools.
- Multiple scanning modes are available.
- In a free version, recovered files can be restored with their original names.
Recuva Cons
- Not available on Linux and Mac operating system
- Customer support is not a priority with a free version
- No preview before recovery.
- Recuva is slower as compared to EaseUs recovery software.
How to Recover Deleted Files free from Recycle Bin after empty using Recuva?
In my case, I am using 16 GB Sandisk Pendrive for recovery tool installation. For experimental purposes, I am using the file “Gopro 4k video size – 256 MB” saved inside a “New folder”.
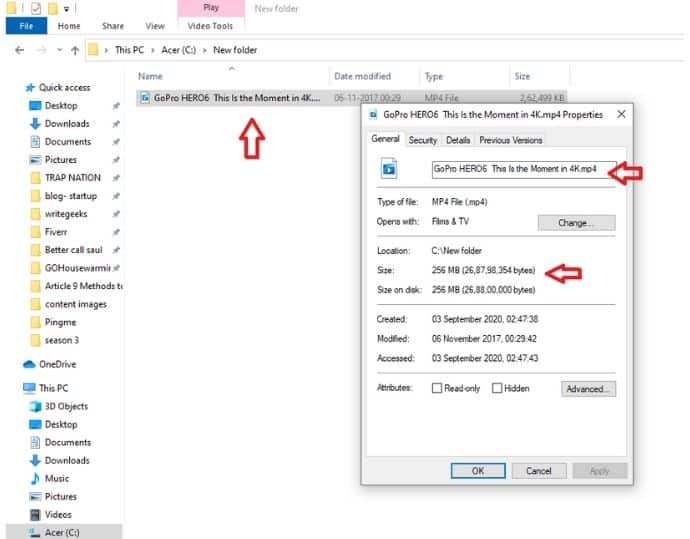
Let’ see how the Recuva recovery tool retrieves the video after the deletion.
This section will show you how to Recover Deleted Files from the recycle bin after using Recuva
Total Time: 5 minutes
Step 1: Download, Install & Run Recuva
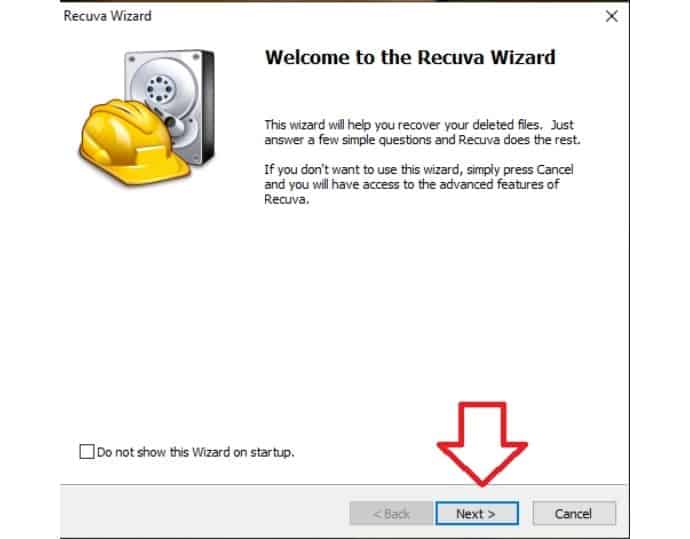
Open the Recuva website, download it, and install it on a USB drive to prevent future overwriting issues.
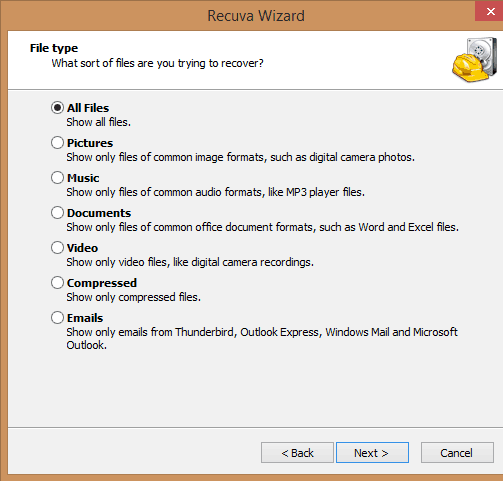
Step 2: Select the File type
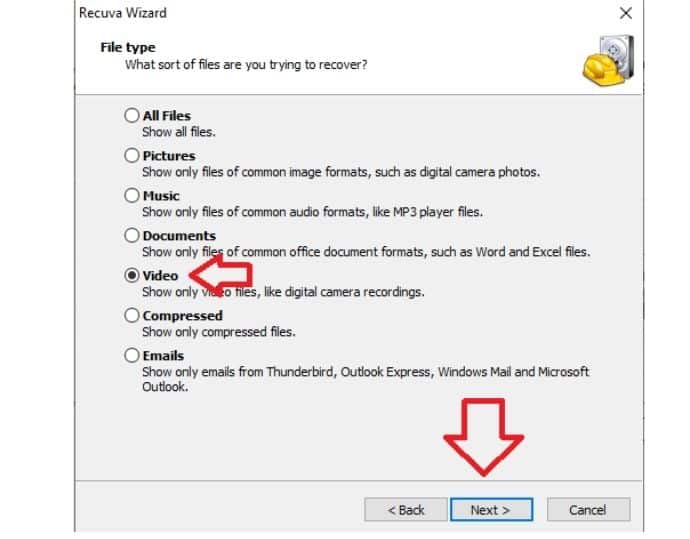
After you click “Next” on the wizard screen, you will see a window where Recuva asks you to specify the file type that you want to recover. For this example, I am selecting “video”. And then click on “Next”.
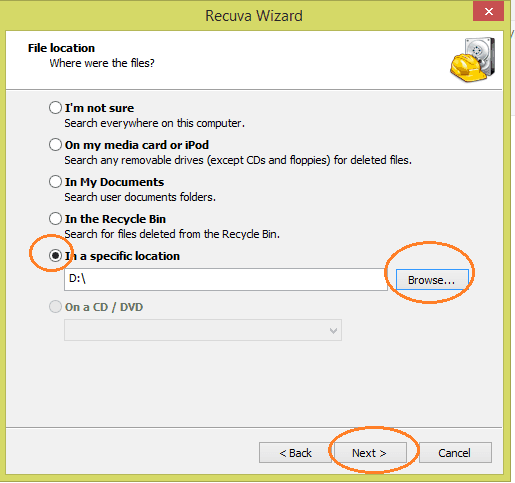
Step 3: Select File Location
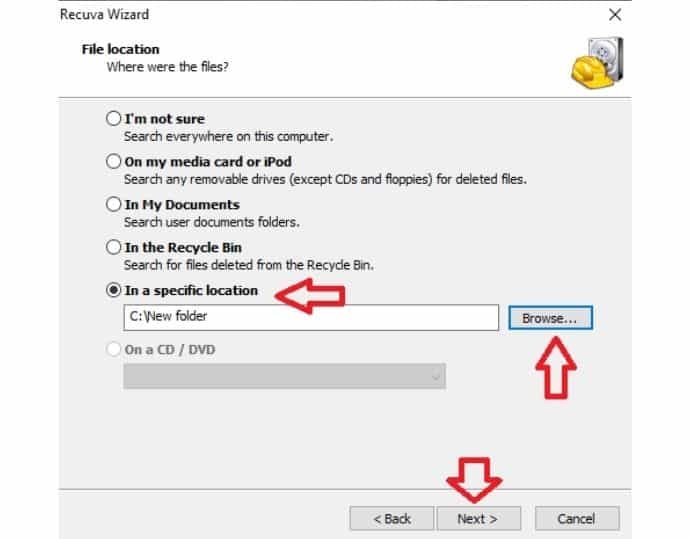
Next Recuva asks you to specify a location. You can choose the “I am not sure” option if you don’t remember the path of a deleted file. Well, I know where my video was located, I am specifying a path by the browse button. Click “Next”.
Step 4: Ready to start
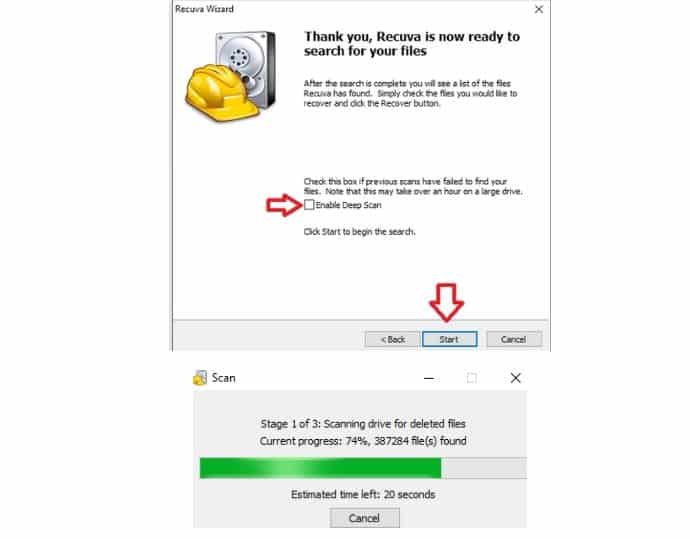
Before initiating the recovery process, Recuva asks you to specify the scanning mode. I recommend first trying with normal mode, and If it doesn’t work, then you try deep scan mode. In this case, I leave the deep scan box unchecked and click “start”. Wait until the recovery process finishes.
Step 5: File Recovery finished
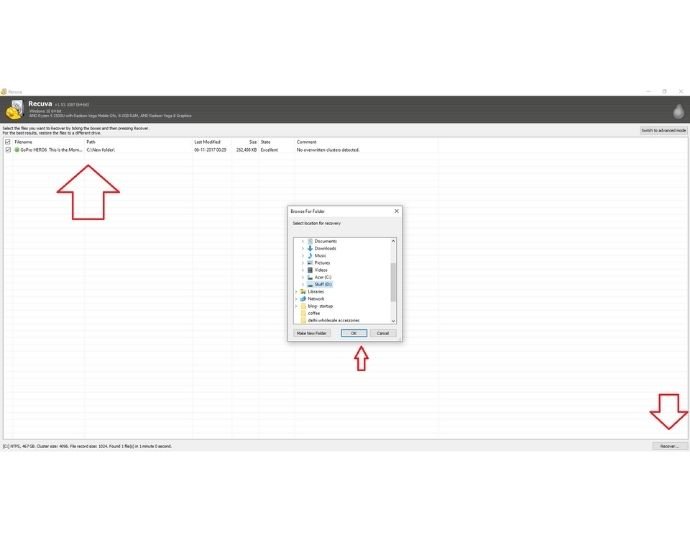
After the scanning is completed you can see that Recuva can successfully find our deleted video. Click recovery to restore the recovered file to a different folder rather than the previous destination of deleted data.
2.2 Using EaseUS

EaseUS is one of the widely used recovery software in the world. They are providing servicing since 2004. Its compatibility for multiple operating systems including Windows, Mac, Ios, and Android makes it a very versatile data recovery software. Although their free plan allows users to recover files up to 2 GB, a user always has the option to take a trial of their paid plans without spending money.
EaseUS Features
- Recycle bin recovery: EaseUS is capable of recovering data in different kinds of scenarios, and the most common is when a user accidentally deleted their data from the recycle bin.
- Partition data recovery: Corrupted partition or inaccessible partition is another situation where users face situations of data loss. EaseUS can recover data from lost partition situations too.
- Accidental formatting recovery: EaseUS is capable of recovering data in a condition when a user mistakenly formats their USB drive, memory card, hard-drive, and other storage devices.
- Dead devices recovery: With EaseUS, data retrieval is possible even when your devices get corrupted or inaccessible, including External hard-drive, flash drive, sd card, digital camera, etc.
- Unexpected disaster recovery: Again, EaseUS has the power to recover data and files that a user lost in unexpected situations including system crashes, accidental shutdown, antivirus malware deletion, boot failures, etc.
- Powerful Scanning: EaseUS has both a quick scan and deep scan mode in its interface. However, to save time, it allows the user to recover data during an ongoing scanning process, which means that a user doesn’t have to wait to restore data until the scanning process completes.
- 1000+ file types support: EaseUS is fully capable of recovering any file type existed in the computer system. The file format of documents, graphics, video, email, archive, etc. can be undoubtedly recovered.
Related: How to recover deleted partition
How To recover deleted Files from Recycle bin using EaseUS Data Recovery Wizard
- STEP-1: Visit EaseUS Official website and download the Data recovery software according to your operating system.
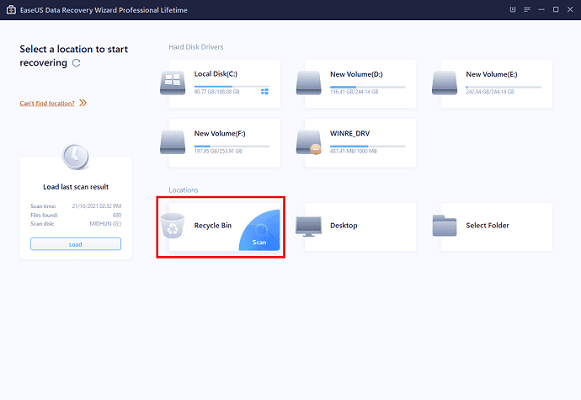
- STEP-2: Install and launch the application. Then the interface of the application will be seen with all the drives present in your computer.
- STEP-3: Move the cursor onto the “Recycle bin”. Then, scan option will be seen on that drive. Click on it and it starts scanning.
- STEP-4: After the completion of scan, the files are shown in the list form. Choose the files that you want to recover and then click on “Recover” option located at the right bottom of the window.
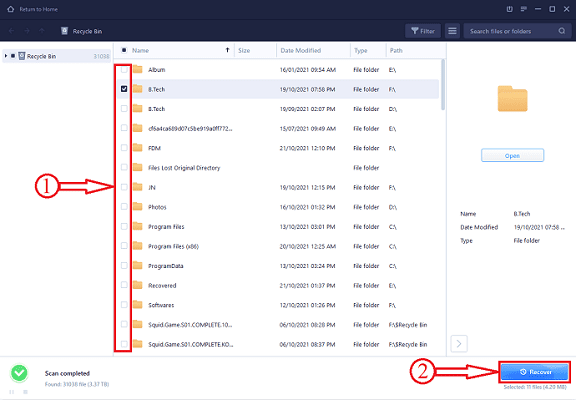
- STEP-5: It asks to choose the destination to save the recovered files. Choose the location and click on “Select Folder” option. That’s it, files will be recovered and saved to the choosen location soon depending on the size of data recovering.
EaseUS Pricing, Plans, and promo code
EaseUS has 3 plans which can be purchased either monthly or annually basis.
Under the free plan you will get:
- Option to recover 2GB data
- File preview before recovery
- Option to recover data from damaged or RAW partition
Under the Pro plan (started from $69) you will get:
- Option to recover unlimited data
- File preview before recovery
- High-quality assistance support by EaseUS professionals
- Partition Recovery
Under the Pro + Bottable plan (started from $99) you will get:
- Everything included in the pro plan. Plus,
- Option to boot the system with a downloadable WinPE when the system gets crashes or unable to start.
Offer: Our readers get a special 30% discount on all EaseUS products. Visit our EaseUS discount coupon page for the promo code.
EaseUS Pros
- A free trial is available on paid plans
- Deep scan mode is available
- Fully supported on windows, mac, ios, and Android devices.
- The user has an option to preview recovered files before saving them to the device.
- The EaseUS support team is impressive. They assist users by live chat, email, and phone from Monday to Friday.
- EaseUS is faster than Recuva
EaseUS Cons
- The free plan can only recover data up to 2 GB
- Expensive paid plans
- In a free version, recovered files cannot be restored with their original names.
2.3 Using Wondershare Recoverit(Earlier Wondershare data recovery)
Wondershare Recoverit is one of the top companies which develops many utility software for computers and mobile. Wondershare data recovery is one of the best software in the data recovery industry. It is a very less priced software compared to other premium data recovery software. You can recover almost all types of files with this software. It will support more than 550 file formats. You need not pay yearly for this software. Because you can buy a lifetime license. You can read my detailed review of Wondershare data recovery.
Wondershare Recoverit Features:
Here I am giving you a features overview. If you want complete details, just visit Wondershare Recoverit Official site.
- Easiest software to use.
- It can recover more than 550 file formats. You can recover, Videos, Music, documents, photos, emails, compressed files, executable files, and many more.
- Less priced.
- Supported Devices: You can recover deleted files from hard drives, external hard drive, Flash drives, Memory cards, Digital Camera, Camcorders, and more.
- It can recover files even from the formatted computer.
- You can search by using a file type.
- A deep scan is available.
- It can recover deleted files even after a long time if it is not overwritten.
- You can preview the file.
- You can recover the entire partition.
- Resume recovery: If you are recovering large files, you can pause recovery and you can resume at any time.
- Discounts available from multiple PC licenses.
- You can recover only 100 MB with the trial version.
How to Recover shift deleted files from hard drive with Wondershare Recoverit?
Download the Wondershare Recoverit software and install it. After installation, you will see the below screen.
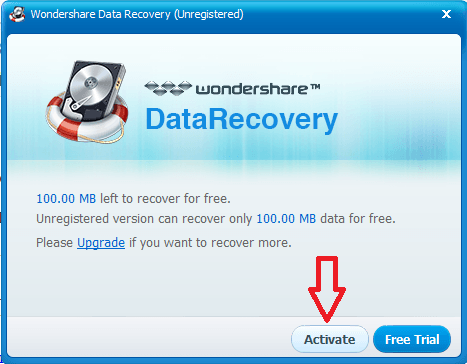
If you want to continue with the trial version Click on Free Trial. If you had bought a license, click on “Activate”. You will see the below screen.
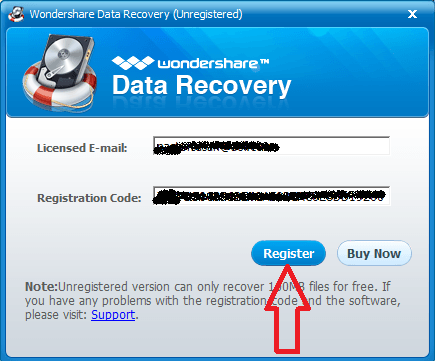
Enter your Registered Mail ID and License Key in the respective fields. And click “Register”. You will see a small window showing that Wondershare has been registered. Just click “OK”.
If you are using Windows software, you will have two modes to recover. If you have Mac, you will get four modes. Here I am using Windows, so I can have two modes. One is Wizard mode another one is Standard mode. You can choose anyone. First, let me show you how to use Wizard mode.
Wizard Mode
Wizard mode will help you to narrow your recovery process. It will ask you some questions about what type of files you need to recover and from where. So that it will search very quickly.
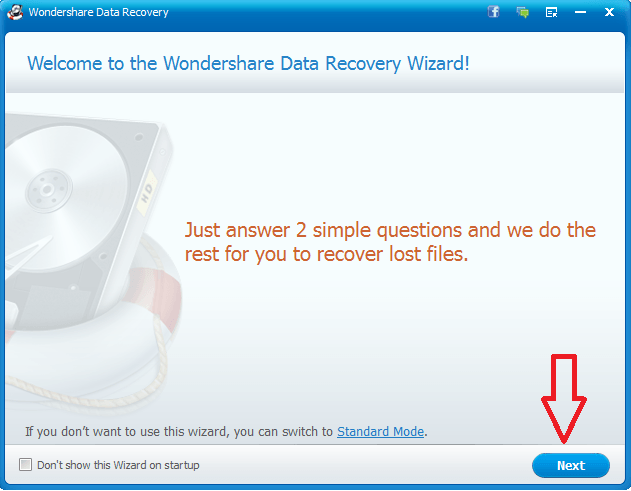
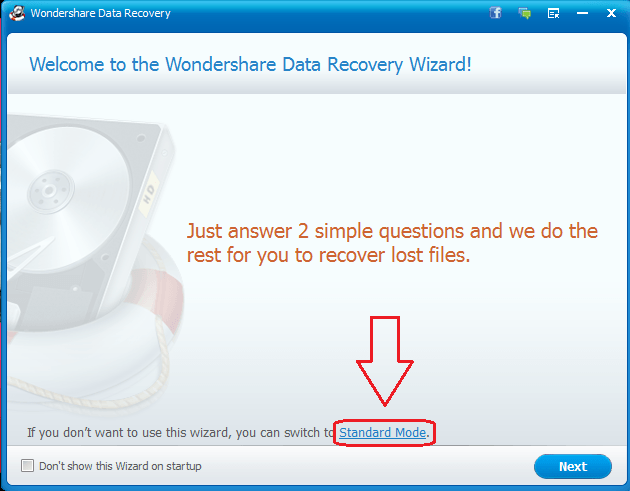
After registration, you will see the below screen just click on “Next” to use Wizard mode. If you want to use standard mode, you need to click on “Standard Mode”.
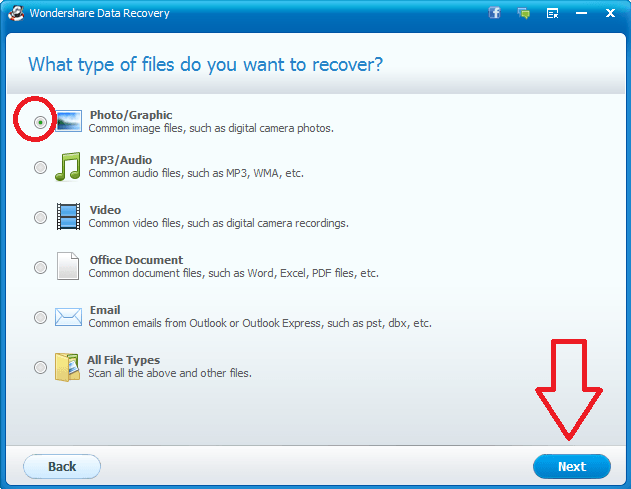
Select the file types that you want to recover. For example, I want to recover only photos, so I have selected the Photos/Graphics option. It will make your search faster. And click “Next”.
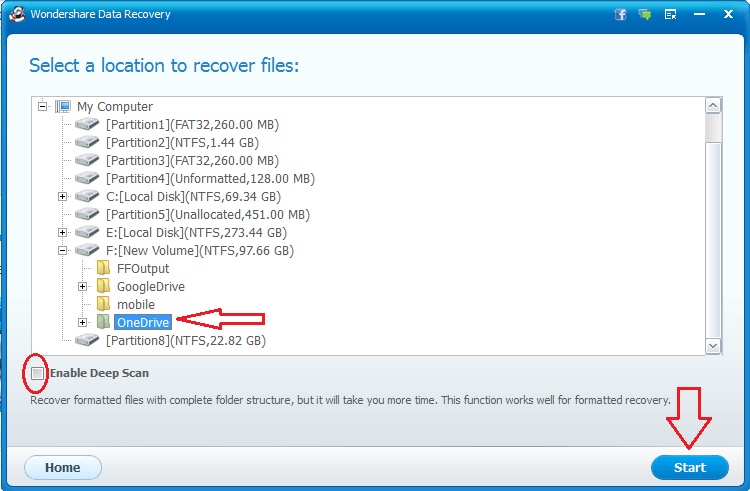
Now you will see below the screen where you need to select a particular place.
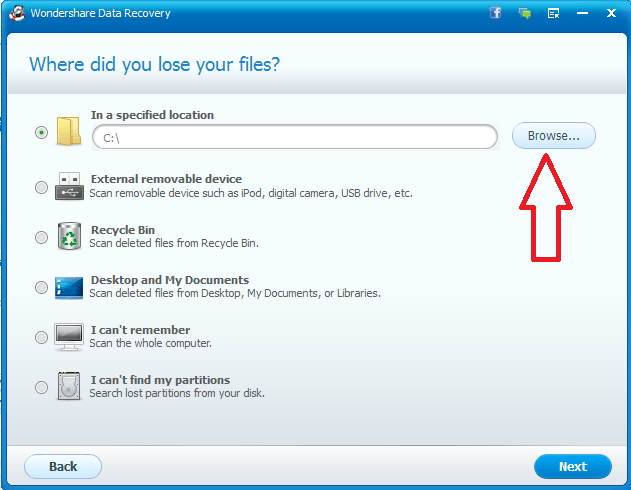
If you want to recover the file from the External drive, select the “External drive” option.
If you don’t remember where the file was, select the I Can’t Remember option. It will scan the entire computer.
If you know your computer drive where the file was. Just select “Browse”. Select the Drive. And browse Drive. Select the folder from your computer and click “Next”.
Now you will see the below screen with two options.
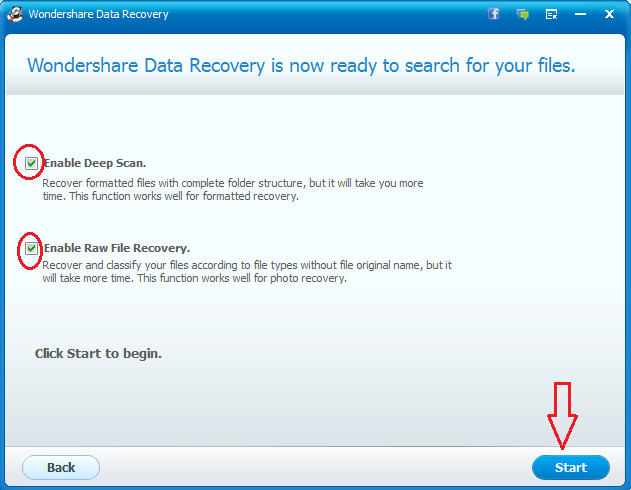
You can select any one option or you can also select two options. If you want to recover a file from a formatted drive, use the first option. Otherwise, you can use the second option. Then click “Start”. It will immediately scan your mentioned folder and show results.
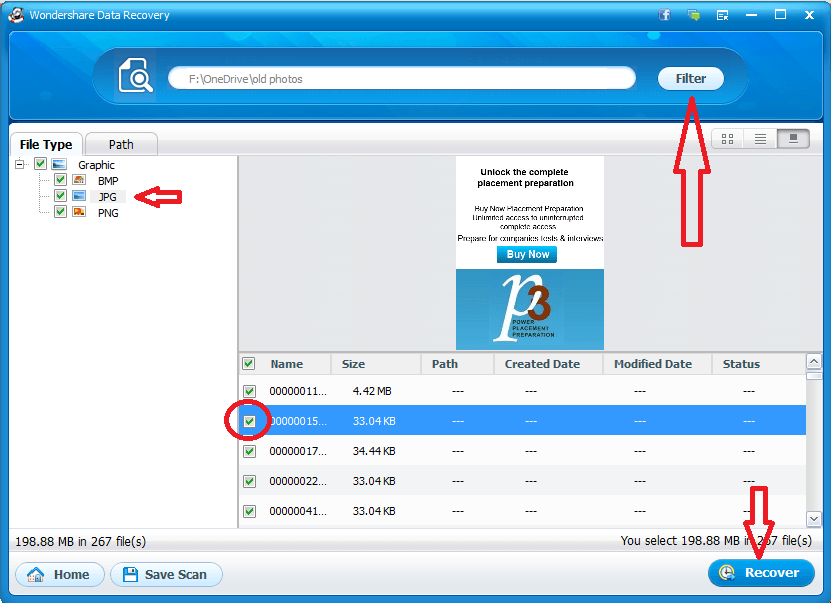
Just click on the File type on the left side. It will show files related to your required file type. You can also use the Filter option to display files based on size and creation date.
Click on any file you will see Preview. You may not see the preview for corrupted files. In that case, just uncheck that file. By default, all files will be selected. If you want, you can uncheck any file.
Click on “Recover”. You will see the below screen where you need to select your computer folder to save the recovered file.

Select the folder where you want to save the file. And click “Recover”. It will immediately recover your file.

This is how you can use Wondershare data recovery in Wizard mode.
- Related: How to Recover deleted files from Recycle bin after Empty
- How to Recover deleted files from Memory card with a free tool
Standard mode
By using standard mode, you can recover the entire partition. You can also recover files deleted from the hard drive. You can resume the recovery process.
Open the software from the desktop icon. Click on “Standard mode”.
Now you will see available options in standard mode.
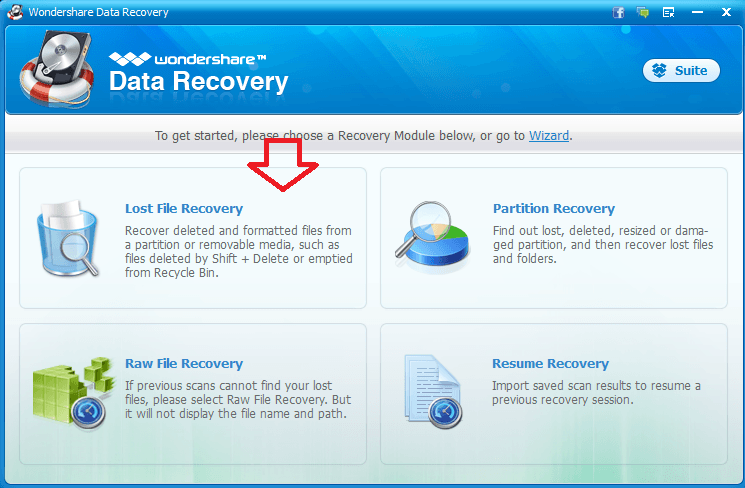
If you want to resume the previous recovery process, you can select the “Resume Recovery” option.
If you want to recover files from the entire partition, just select the “Partition Recovery” option.
If you want to recover files that are not recovered in previous scans, just select “Raw File Recovery”.
If you want to recover deleted files, select the “File Recovery” option.
Browse your computer folder. Select the folder to recover. Click Start. It is better to check the Deep Scan checkbox. It will start scanning. The rest of the procedure is the same as Wizard mode.
Offer: Our readers get special discounts on all Wondershare products. Visit our Wondershare discount coupon page for the latest offers.
2.4. Recover Missing Files on Windows 10 Using MiniTool Power Data recovery
How Is Data Missing or Lost from Windows 10?
Accidental deletion, maybe a major reason for data loss, happens because of human errors in modern computing scenarios. In fact, human error leads to more data loss than other reasons, like virus infection, system crash, hard drive logical damage, and so on. Obviously, it brings much inconvenience and trouble to users.
In fact, it is possible to recover missing data on Windows (as well as other versions of Windows OS PC). The occupation of missing or deleted files is marked as available space for the system to store items. Even though the files are deleted permanently, you have a chance to recover them as long as they are not overwritten.
Therefore, in this section, we intend to demonstrate how to recover missing data, including images, videos, music, and documents on Windows 10.
How to Recover Missing Files on Windows 10 on Your Own
Case-1: Restore from Recycle Bin
Usually, if you delete a file just by using Delete, it will be moved to Recycle Bin unless you empty the Recycle Bin. Thus, you can check the Recycle Bin to see if the file was there due to mistaken deletion. And then, restore it within just a few clicks.

Case-2: How to Restore lost files on Windows 10 Using MiniTool Power Data recovery
If the data was lost due to Shift + Delete deletion or other reasons without having a backup, you may need a data recovery application. MiniTool Power Data Recovery enables you to recover all kinds of data from various storage devices. In the following part, let’s see how to recover missing data on Windows 10 with this tool.
Before the recovery, please download and install MiniTool Power Data Recovery on your Windows 10 PC. Then, confirm the specified location (drive) where the data got lost.
Note: This application should not be installed on the drive where data got lost to avoid data being overwritten.
First Step: Open MiniTool Power Data Recovery and Select a Recovery Module
To recover missing or deleted files from Windows 10 local drive, you can select This PC module. If you need to recover files from the lost partition, please choose the Hard Disk Drive recovery module.
Here, we take This PC as an example.
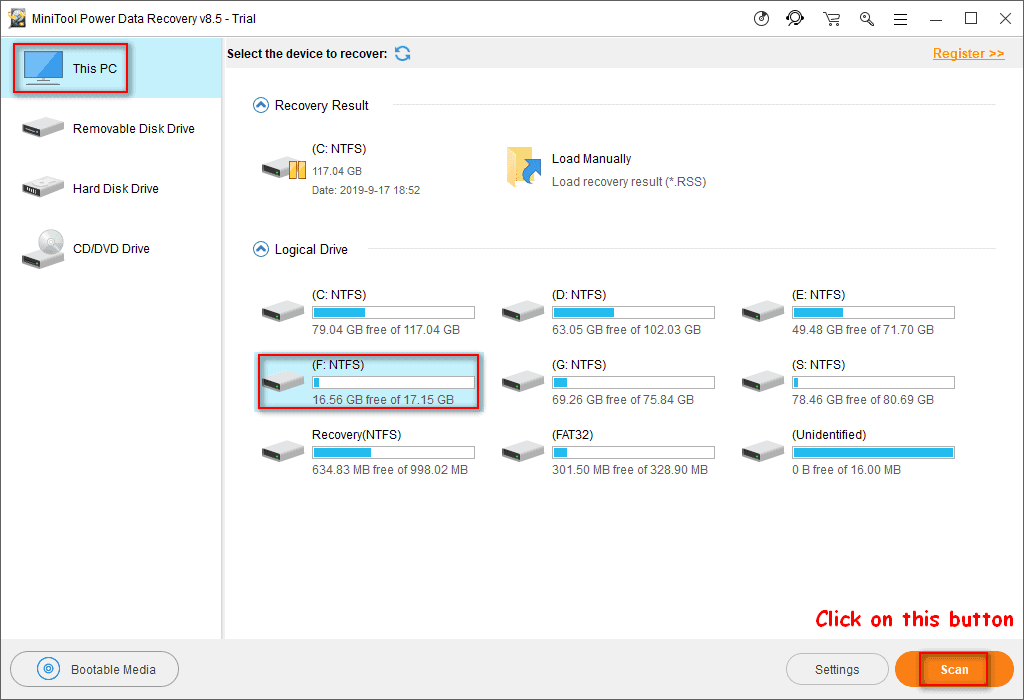
Second Step: Choose the Drive to Scan
Choose the drive and click the Scan button to scan it. Just be patient to wait for a scanning result.
Third Step: Choose the Needed Files to Recover
Browse the scanning results to find what you need. Using Find, Filter and Preview can help you find files quickly. After choosing all you want, click Save to specify another location (different from the original path) to store the recovered files.
After finishing those steps, you can check and use the recovered files in the specified path. This is the whole process of Windows 10 data recovery with MiniTool Power Data Recovery.
Offer: Our readers get a special 20% discount on all MiniTool products. Visit our MiniTool discount coupon page for the promo code.
2.5. How to Recover Lost Files on Windows PC using FonePaw Data recovery?
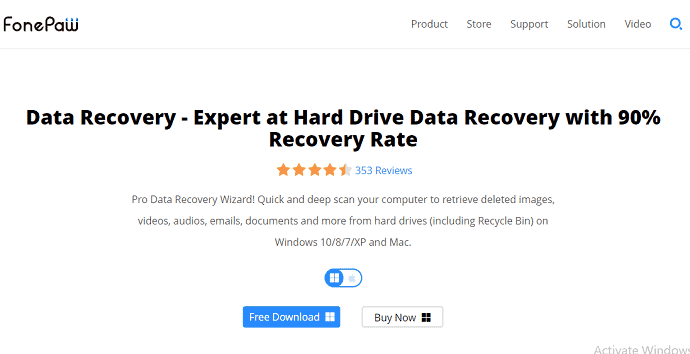
Step 1: Get a Windows Data Recovery Tool on Target PC
FonePaw Data Recovery is a professional tool that allows you to recover lost files on your computer with several simple clicks. Now, you can download and install the FonePaw Data Recovery app on your Windows to give it a shot.
Notice: As we mentioned above, we should avoid downloading apps on the hard drive where we lost data. So if the lost files are previously saved on Disk C, you should download and install the FonePaw Data Recovery tool on Disk D or any other drive except Disk C.
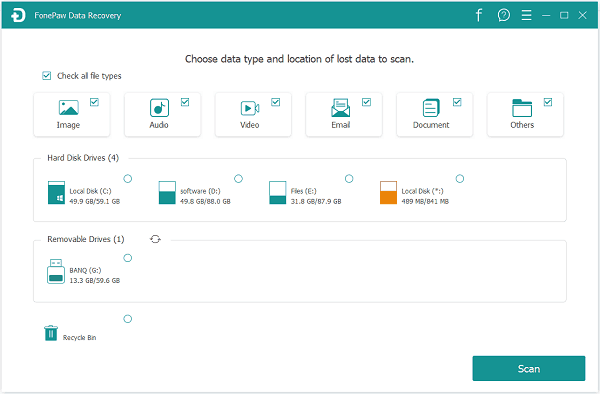
Step 2: Select Data Types to Scan
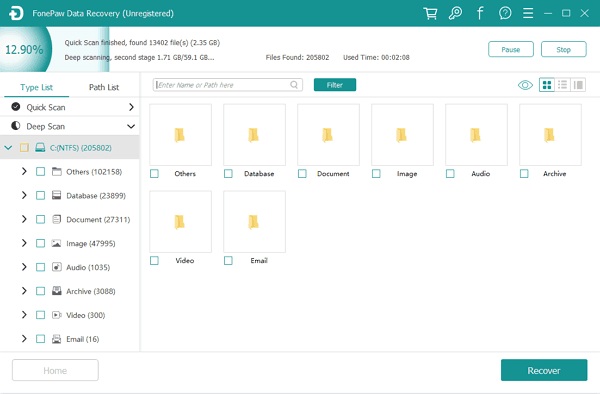
After you download and install the FonePaw Data Recovery software on your target PC, launch it and you will see the interface as below. The app supports you to recover data types including photos, audios, videos, documents, and so on. Choose the data type you want to recover and then also the hard disk where you saved your deleted files. Now, tap on the “Scan” button and the recovery tool will start to perform a quick scan on your selected hard drive.
Step 3: Scan Hard Drive and Look for Lost File
The quick scan process will finish in no time. After that, you can see the files saved on your computer displayed on the interface.
Tips: If you cannot find the files you want after the quick scan, you can try the deep scan mode, which will scan your selected hard drive in a deeper way. Click on the “Deep Scan” button on the top pane of the software and it will start scanning. But the scanning process may take a while. The more files on your selected drive, the longer time it will take.
Step 4: Recover Lost or Deleted Files on Windows PC
The file names in orange are the deleted ones. And you can sort them out by clicking on the eye logo (but this feature is only for Deep Scan mode).

Photos are supported to be previewed, but other data types such as videos, audio, or documents are not allowed to be reviewed yet. You can restore them on your computer to check. Choose the files you want and click on the “Recover” button and get them back on your Windows PC.
How to recover deleted files from USB
1. How to Recover Shift Deleted Files free from Pendrive or Memory card using Recuva?
Video tutorial: Recover lost files from USB with Recuva
The same above process you need to perform in a situation when you want to recover files from Pendrive with Recuva. The only change you need to do is to specify a file path to the Pendrive location in step 3. OR follow the below procedure.
- Download Recuva software from here. you will get the rcsetup.exe file. Install it.
- Connect your pen drive.
- Open Recuva. You will see Recuva wizard click “next”.
- Now you will see the below window where you can select the file type. Just check “All Files” and click next.
Now you will see the below window where you need to select the file location.
- Check “In a specification Location”.
- Click on Browse and select your pen drive name.
- Click Next.
In the next window check “Enable Deep Scan” and click Start. Now you will see scan progress and estimated time left. Scanning time depends on your pen drive size.
After the scan completes, you will see below the window with complete details. Under the file name, you can see the green button and a red button. The green button means you can recover the file. The red button means you cannot recover the file. Expand the window to see complete details.
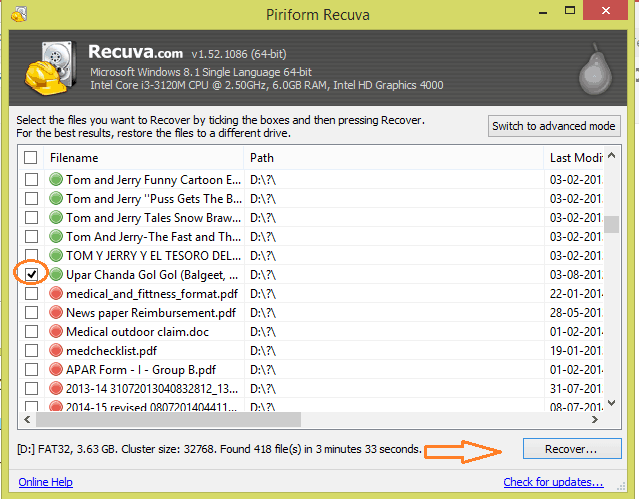
- Check the rectangular box near the green button file. which you want to restore.
- Click on “Recover” at the right bottom.
- You will see another small window to select a folder. You can select your pen drive or any other folder in your system.
- Click “Ok”. It will restore your file immediately.
2.How to recover deleted files from Pendrive or Memory card using EaseUS free data recovery tool?
Step 1: Download, Install and Run EaseUS
Open the EaseUs website and download the free version. After installation ends, click the EaseUS icon from the desktop to run the software.
Step 2: Select a location & Scan
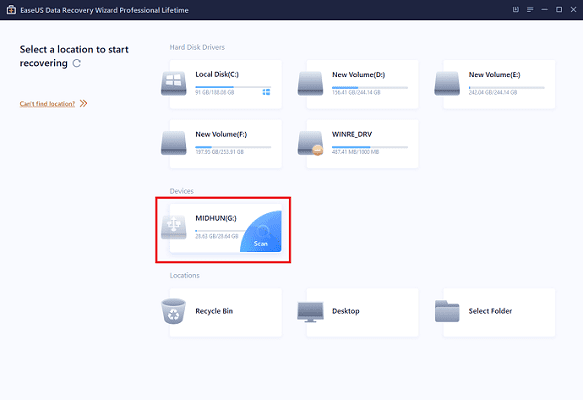
As soon as you run the software, first, it will ask you to specify a location from where you want to recover the data. Here, I’m selecting the G drive which is a USB device connected to my computer. Move the mouse onto the drive, then the scan option will appear. Click on it to start the scanning process.
Step 3: Restore Data

After the completion of the scan, the data will be grouped into three categories like Deleted Files, Existing Files, and Other Lost Files.
Choose the file from the deleted files folder that you want to recover and click on the “Recover” option located at the right bottom of the window. It will ask you to select a directory to save recovered files. To avoid overwriting always remember to restore recovered files to other local disks rather than their previous location.
Note: The same process should be followed in order to recover deleted files from the windows local disk.
How to Recover Deleted Files On Mac
Is it really possible to recover deleted files on Mac?
Yes. It is now possible to recover the deleted files on your Mac. And it clearly depends upon the deleted time (how long ago) and technical knowledge.
Technical Knowledge: If you have profound technical knowledge, then you can restore the deleted files on your Mac in several ways. Some methods explained here really require technical knowledge. However, if you don’t have any technical knowledge, then don’t bother at all. Because simple methods that won’t require any technical knowledge are also explained here.
Method limitations: All the methods come with certain limits. One must be aware of those to save time.
Patience: These recovery methods take time from 1 minute to several hours depending on the size and number of the files.
Hint: Always free software gives you limited features. When you don’t mind spending a little amount to recover your valuable data, you need to use the premium data recovery tools. We suggest Wondershare Recoverit or MiniTool Mac Data recovery.
1.Using undo option
This is an easy method that doesn’t require any technical knowledge and just takes 20 seconds to perform the present task. However, it comes with its own set of limitations. It won’t work after the application exits. Moreover, it won’t work for recovering multiple files. But you can recover the last deleted file that too if a particular application is not closed.
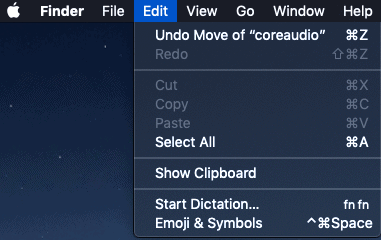
Now, look here at how an image can be restored after deleting it. For this, I have deleted an image with the name “CoreAudio” from the desktop. Now follow the below steps to restore it.
- Check out the “Edit” option from the top left menu.
- Click on Edit and choose to undo the “filename” option
- Restore it.
2.Restoring files from “Trash”
Whenever you delete files on your Mac, then those files will still appear in the trash bin until you empty it. Suppose you want to restore the deleted files at any time, then you can do it from the trash bin. Now follow the below steps to do this.
- Check out the trash icon from desktop.
- Select files to highlight them and use “Put Back” option.

- Then the selected files will be restored to the original destination.
If trash is emptied, then you can’t use this method. It works only when the deleted items are still present in the trash bin. The main advantage of this method is you can restore multiple files to the original destination in no time.
3.Using terminal
This process is not recommended for everyone. If you have profound knowledge on using commands over the terminal, then you can use it. By using this method, you can restore only a single file at once. Now follow the below steps to do this.
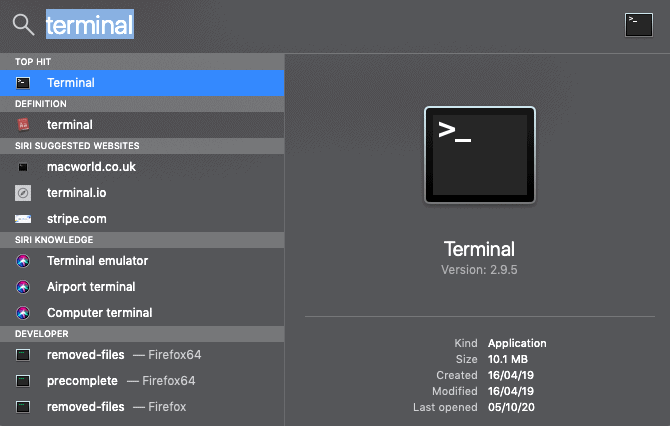
- You can use your own way to open the terminal. However, the easiest way to get to the terminal is by navigating through the spotlight.
- Enter “cd .Trash” which takes you to the Trash folder.
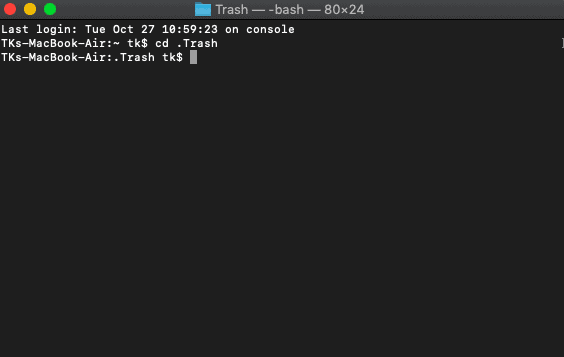
- Enter “ls -al ~/.Trash” to display the content of the Trash folder on-screen with file names.
- Enter mv filename ../ .
- Then replace the filename with the deleted file name and restore it.
It works the same as the previous trash method. The only difference is that the terminal allows you to easily discover the deleted images with the interface. And this method also can’t restore the files if they are deleted from the trash.
- Also Read: 2 ways to recover deleted Facebook messages
- 3 ways to recover deleted history from Google chrome
4.Using Backup options
Apple’s inbuilt time machine, Google Drive, Dropbox, etc falls under this section. Here, you can restore each and everything that you have deleted, if you have backup them prior. Now follow the below steps to do this.
- Browse to the original folder and use time machine(for newer versions)
- Choose the deleted files that you want to recover. Timeline displays on the right sidebar which will be helpful to choose more recent versions of the selected files.
- Later, click on restore. Then all the selected files will be restored to the destination.
Even if you are using some cloud services, prior backup is a must to recover the deleted files. The main advantage of this method is that you can access cloud backup (if you have it) from anywhere and restore it to any device with the same file name and to the same folder in no time.
5. Using Disk Drill (Software Tool)
Disk Drill is a great way to restore the deleted files even after you empty the trash. And you can also restore the permanently deleted files. Further, you can restore multiple deleted files.
STEP-1: Download and Install Disk Drill for Mac
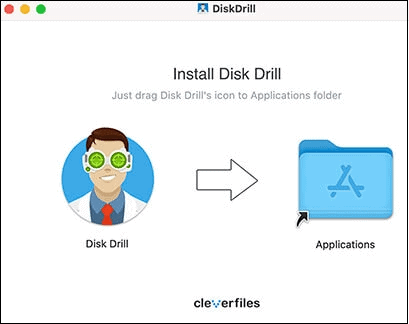
The Primary step is to Download the free Disk Drill application from its official website. This application requires macOS 10.8.5 or later. After downloading, double-click on the “diskdrill.dmg” image. Later drag it onto applications folders when prompted.
STEP-2: Launch Disk Drill file Recovery software on Mac and Upgrade to Pro
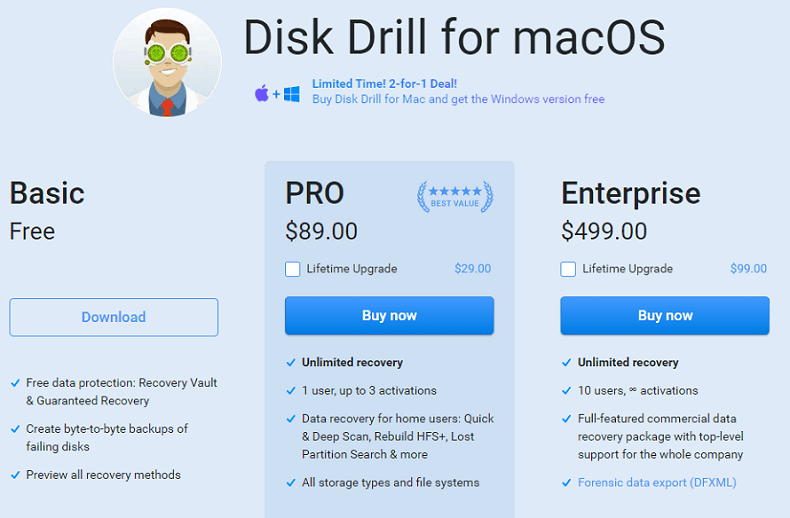
Launch the Application after the completion of the installation process. Next, it will ask you to upgrade. Then you can either go for an upgrade or choose the basic edition. With the basic or free edition, you can recover the data of 500 MB only. Suppose your data recovery size is greater than 500MB then you must go for an upgrade. The cost of its PRO plan is $89 and its enterprise plan is $499. If you buy Disk Drill for Mac, then you will get the Windows version for free.
STEP-3: Choose the disk from the list
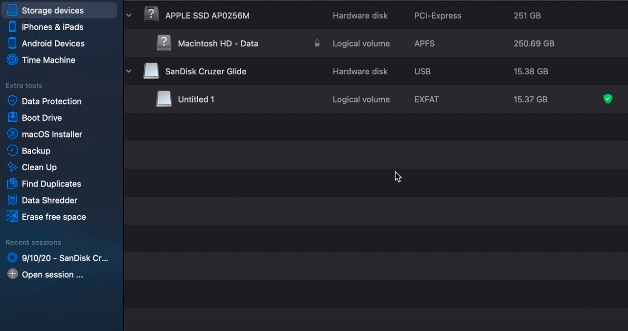
Choose the file from where you have deleted the file
STEP-4: Select the scanning method
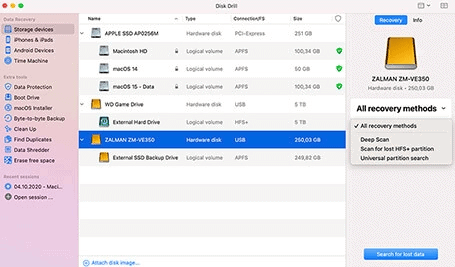
Now to recover the lost data in a simple way, just click on the “Recover” option, located beside the volume that you want to scan. Then it automatically goes through all the available methods one by one to find the deleted files.
Alternatively, you can also choose the following individual scans by clicking on the drop-down of the recover button.
- Deep Scan(Most Powerful but takes a long time for scanning)
- Quick Scan(Use this to recover the deleted files on HFS/HFS+, NTFS and FAT file systems)
- Undelete Protected data(Use this if you have installed Disk Drill prior to deleting the files and enabled guaranteed recovery or recovery vault)
Step-5: Wait until the software completes the scanning process. Then Select The Deleted Files And Recover Deleted Files on Mac
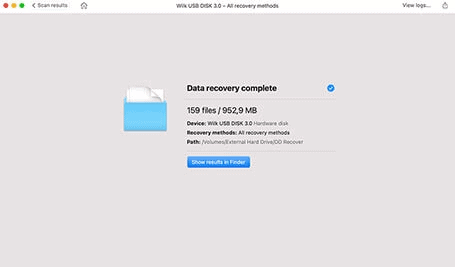
Depending on the scan method that you have selected, the scanning process may take 1 minute to several hours. You can see all the deleted files after the completion of the scan. Next, select the desired files and location where you want to restore them. Later, click on the Recover option. That’s it, the files start recovering. Once it completes, you can open the destination folder to verify them.
That’s It! You have now know how to recover the lost data on your Mac using Disk Drill.
6.Using MiniTool Mac Data Recovery
After deleting useful files by mistake, you must be eager to recover deleted files on Mac hard drive in a safe but effective way. You came to this article because you have lost your data.
No wonder so many people need to find a safe but effective way to recover deleted files on Mac hard drive. Today, we’d like to help them out.
If you, unfortunately, deleted a vital personal document or valuable business document permanently, you’re highly recommended to employ MiniTool Mac Data Recovery for Mac drive recovery (MiniTool Power Data Recovery should be adopted if you are running Windows, instead of Mac).
How to Recover Deleted Files on Mac Hard Drive Using MiniTool Mac Data Recovery ?
The files will be sent to Trash on your Mac computer, and they’ll be kept there until the total size of files in Trash has reached its limit or you have chosen to empty the Trash. If the deleted files you need are still stored in Trash, you can finish Mac OS X files recovery easily with a few clicks.
However, you also shouldn’t worry if Mac Trash has been emptied; you’re also able to recover deleted files on Mac easily with the help of MiniTool Mac Data Recovery. Here are things to do:
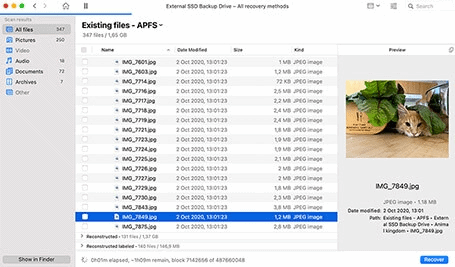
- Get a free edition (which only allows you to scan for free) or paid edition (which allows you to recover data easily) of MiniTool Mac Data Recovery. Then, start the software and choose “Undelete Recovery”.

- Select the partition which was used to store deleted files originally and click on the “Scan” button to detect them.
- Browse the found files carefully and pick out the ones you need. Then, click on the “Save” button to set a storage path.
This is the whole process of how to recover deleted files on Mac hard drive. After reading this, you will not ask questions like “how can I recover deleted files” and “how can I recover deleted pictures from my computer”, right?
However, we inadvertently discovered that an extremely large number of users have never cleared Trash since their Mac had been bought. So we figured out that it’s very important for Mac users to know they’ll not get any disk space back until the files put into Trash are removed.
As a result, if you need to move files permanently from Mac hard drive, you must make sure that you have emptied the Trash.
Offer: Our readers get a special 20% discount on all MiniTool products. Just visit our MiniTool discount coupon page for the promo code.
Recover Deleted Files From iPhone With or Without Backup
Want to Recover deleted files from iPhone? Losing data is a reality of every iPhone user’s life. We all suffer from this problem at one point or another, hence the availability of many data recovery programs in the market. While some of these data recovery programs are effective, only one can be called upon when you want guaranteed success. This data recovery tool is iMyFone D-Back.
What is iMyFone D-back?
iMyFone D-Back is not just a data recovery tool but it is so much more. Sure, it can recover up to 22 different types of data from all iOS devices regardless of the reason behind the data loss. These types of data include text messages, iMessages, videos, photos, call history, and more. But it can also be used to export data to HTML format, save data to the computer for safekeeping among other useful functions. It is available both for Windows and Mac users.
It is useful not just as a data recovery tool for a lot of other reasons. They include the following.
- It can be useful when you want to extract data from an iTunes or iCloud backup and don’t want to restore the whole device. The data on either backup will be displayed on the program so you can choose what you want to extract.
- It is especially useful when you have lost data on your iOS device and you don’t have a backup.
- The program offers you a quick and easy to use solution, ideal for you if you don’t want to waste time and want to get your data back in the shortest time possible.
iMyFone D-Back Price & Discount
A personal license costs you $39.95 dollars. The Family license which works up to 5 iOS devices costs you $69.95.
Offer: Our readers get an additional 15% discount on all Movavi products yearly license. Visit our Movavi discount coupon page for the latest coupon code.
How to Recover deleted files from iPhone Using iMyFone D-Back?
To demonstrate how easy it is to use, the following is a simple tutorial to show how you can recover text messages.
Step 1: Open the program and from the main window, click “Recover from iOS Device.” Click “Start” to begin.

Step 2: From the next window, select the files that you want to recover and then click “Next”.

Step 3: When prompted, connect the iPhone to the computer using USB cables and click “Scan” when the program identifies the device.

Step 4: Once the scanning process is completed, all the messages will be displayed on the next window. Select the ones you want to recover and click “Recover” to save them to your computer.

- You May Also Like: How to Record iPhone Screen
- How to password protect notes on iPhone
Tip – How to backup your windows data on an external data drive?
It is best to take the backup of your PC data to an external drive.
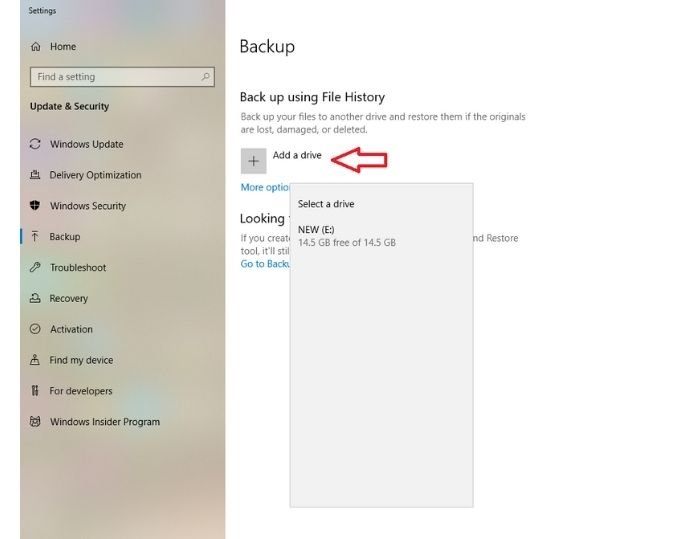
Step 1: Plugin your external hard drive into the PC
Step 2: Open the start menu and search backup settings. Click on it.
Step 3: Click on the Add a drive button and select your hard drive. From now on every time you connect this hard drive to pc, windows start backing up the data.
How to recover permanently deleted files from Google drive?
To retrieve permanently deleted files from google drive, you need to meet three criteria:
- First, the file must have been deleted from google drive trash up to 25 days ago.
- Second, you must be the owner of the file owner. Third, the file must have been uploaded on created through google drive.
- After meeting the criteria, the user has to place a request for file recovery from google drive helpline support:

Step 1: Log in to your google drive account and click on the “settings” option.
Step 2: Navigate to settings>help>find or recover a file.
Step 3: Select chat option to contact google drive customer support, team
Step 4: Request a file recovery by typing the message and send through the chatbox. The customer support agent will get back to you after 2-3 minutes.
Step 5: During the chat, the agent will ask you the file name you want to recover. Text him the file name and wait for his reply. If everything goes fine and you meet the required criteria, he will restore your files, and then you can download the deleted files from your google drive dashboard.
Conclusion
This is how you can recover your essential files from PC, Mac, iPhone, and other external devices. If you haven’t enabled the backup feature on your pc yet, kindly enable it to get protected from unwanted file deletion situations.
Go for Recuva when your data sizes exceed 2GB, and you want only for personal use.
Go for EaseUs when you want to recover your files with the help of professionals. Also when you’re trying to recover files on Mac, iPhone, and Android-based devices. EaseUS is more robust than Recuva.
If you like it, do me favor by sharing it with your friends. Please follow WhatVwant on Facebook and Twitter. Subscribe to the WhatVwant channel on YouTube for regular updates.
Imyfone offer will completely filter your device and restore deleted or lost information from your iOS devices. In case your information is not overwritten by a new one, this product promises to restore the completely lost information in its unique structure and not to degenerate or damage the information. It can also fix the iOS system recovery mode. There are techniques in each program so that it is also capable of backing up all the data. So if your data still needs to be backed up, no harm problem.
Hi, I tried Recuva and Stellar Photo Recovery Software for recovering couple of corrupted mp4 files on my Canon camera SD card. Both work great and recover my video files. Thanks!